The two ways to connect a wallet
Bring any wallet. In the standard setup, you link a public chain wallet address to each asset on your account. When a transaction needs funds from you, Borderless shows you the destination — a settlement address from the provider — and you send from your own wallet. Any wallet works: an exchange account, a custodian, a self-hosted wallet, MPC infrastructure. It doesn’t matter what you use. Integrate your wallet platform. If you run your wallet infrastructure on Utila or Dfns, you can connect it to Borderless directly. Instead of copying a settlement address out of Borderless and pasting it into your wallet platform, Borderless tees the transaction up in your wallet infrastructure for you: you create the transaction in Borderless, then see it waiting in your wallet platform for signing and approval. Borderless connects with credentials that can only initiate — it never has the ability to sign transactions or send funds. The integration removes the copy-paste step (and the human error that comes with it), and lets you reference your platform’s vault and wallet IDs instead of raw chain addresses.Link a wallet address to an account
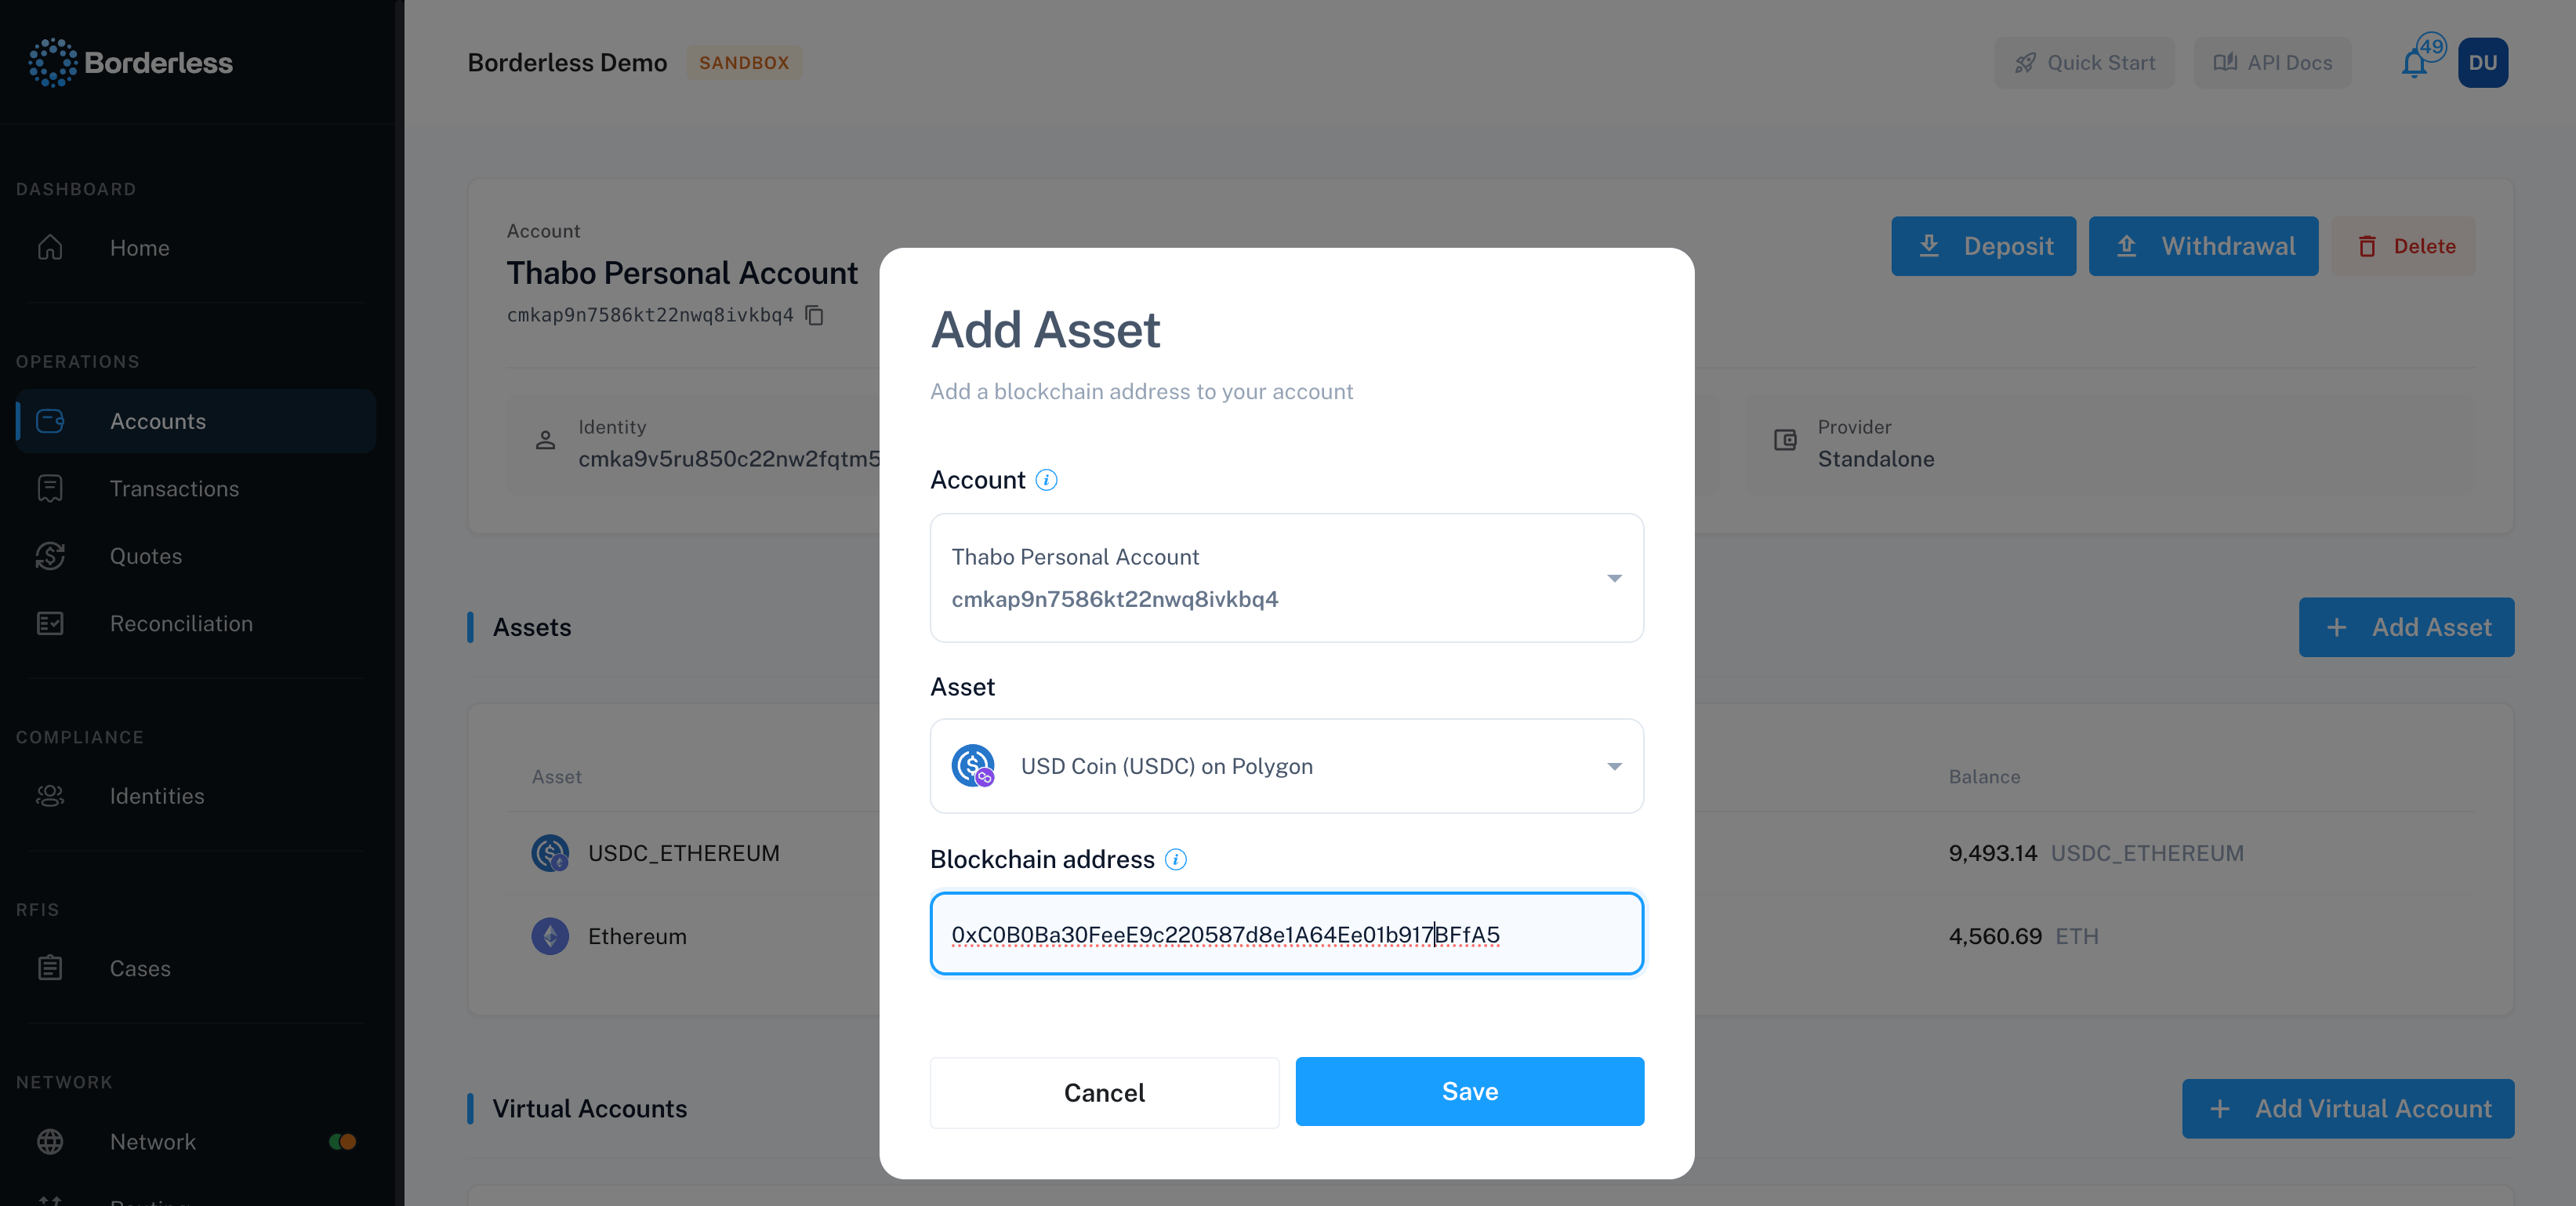
How you link depends on your organization’s wallet setup:- Standard (any wallet): on the account page, click Add Asset, pick the asset, and fill in Blockchain address — the public chain address for that asset. Each asset on the account gets its own linked address.
- Utila: the linkage happens at account creation. In the Create Account modal, enter your Utila Vault ID; Wallet ID (optional) links an existing Utila wallet, or leave it blank and Borderless creates a new Utila wallet in that vault and connects it automatically. Adding assets afterward needs no address at all — they resolve through the vault.
- Dfns: on the account page, click Add Asset, pick the asset, and enter the DFNS wallet ID for it.
Connect Utila or Dfns
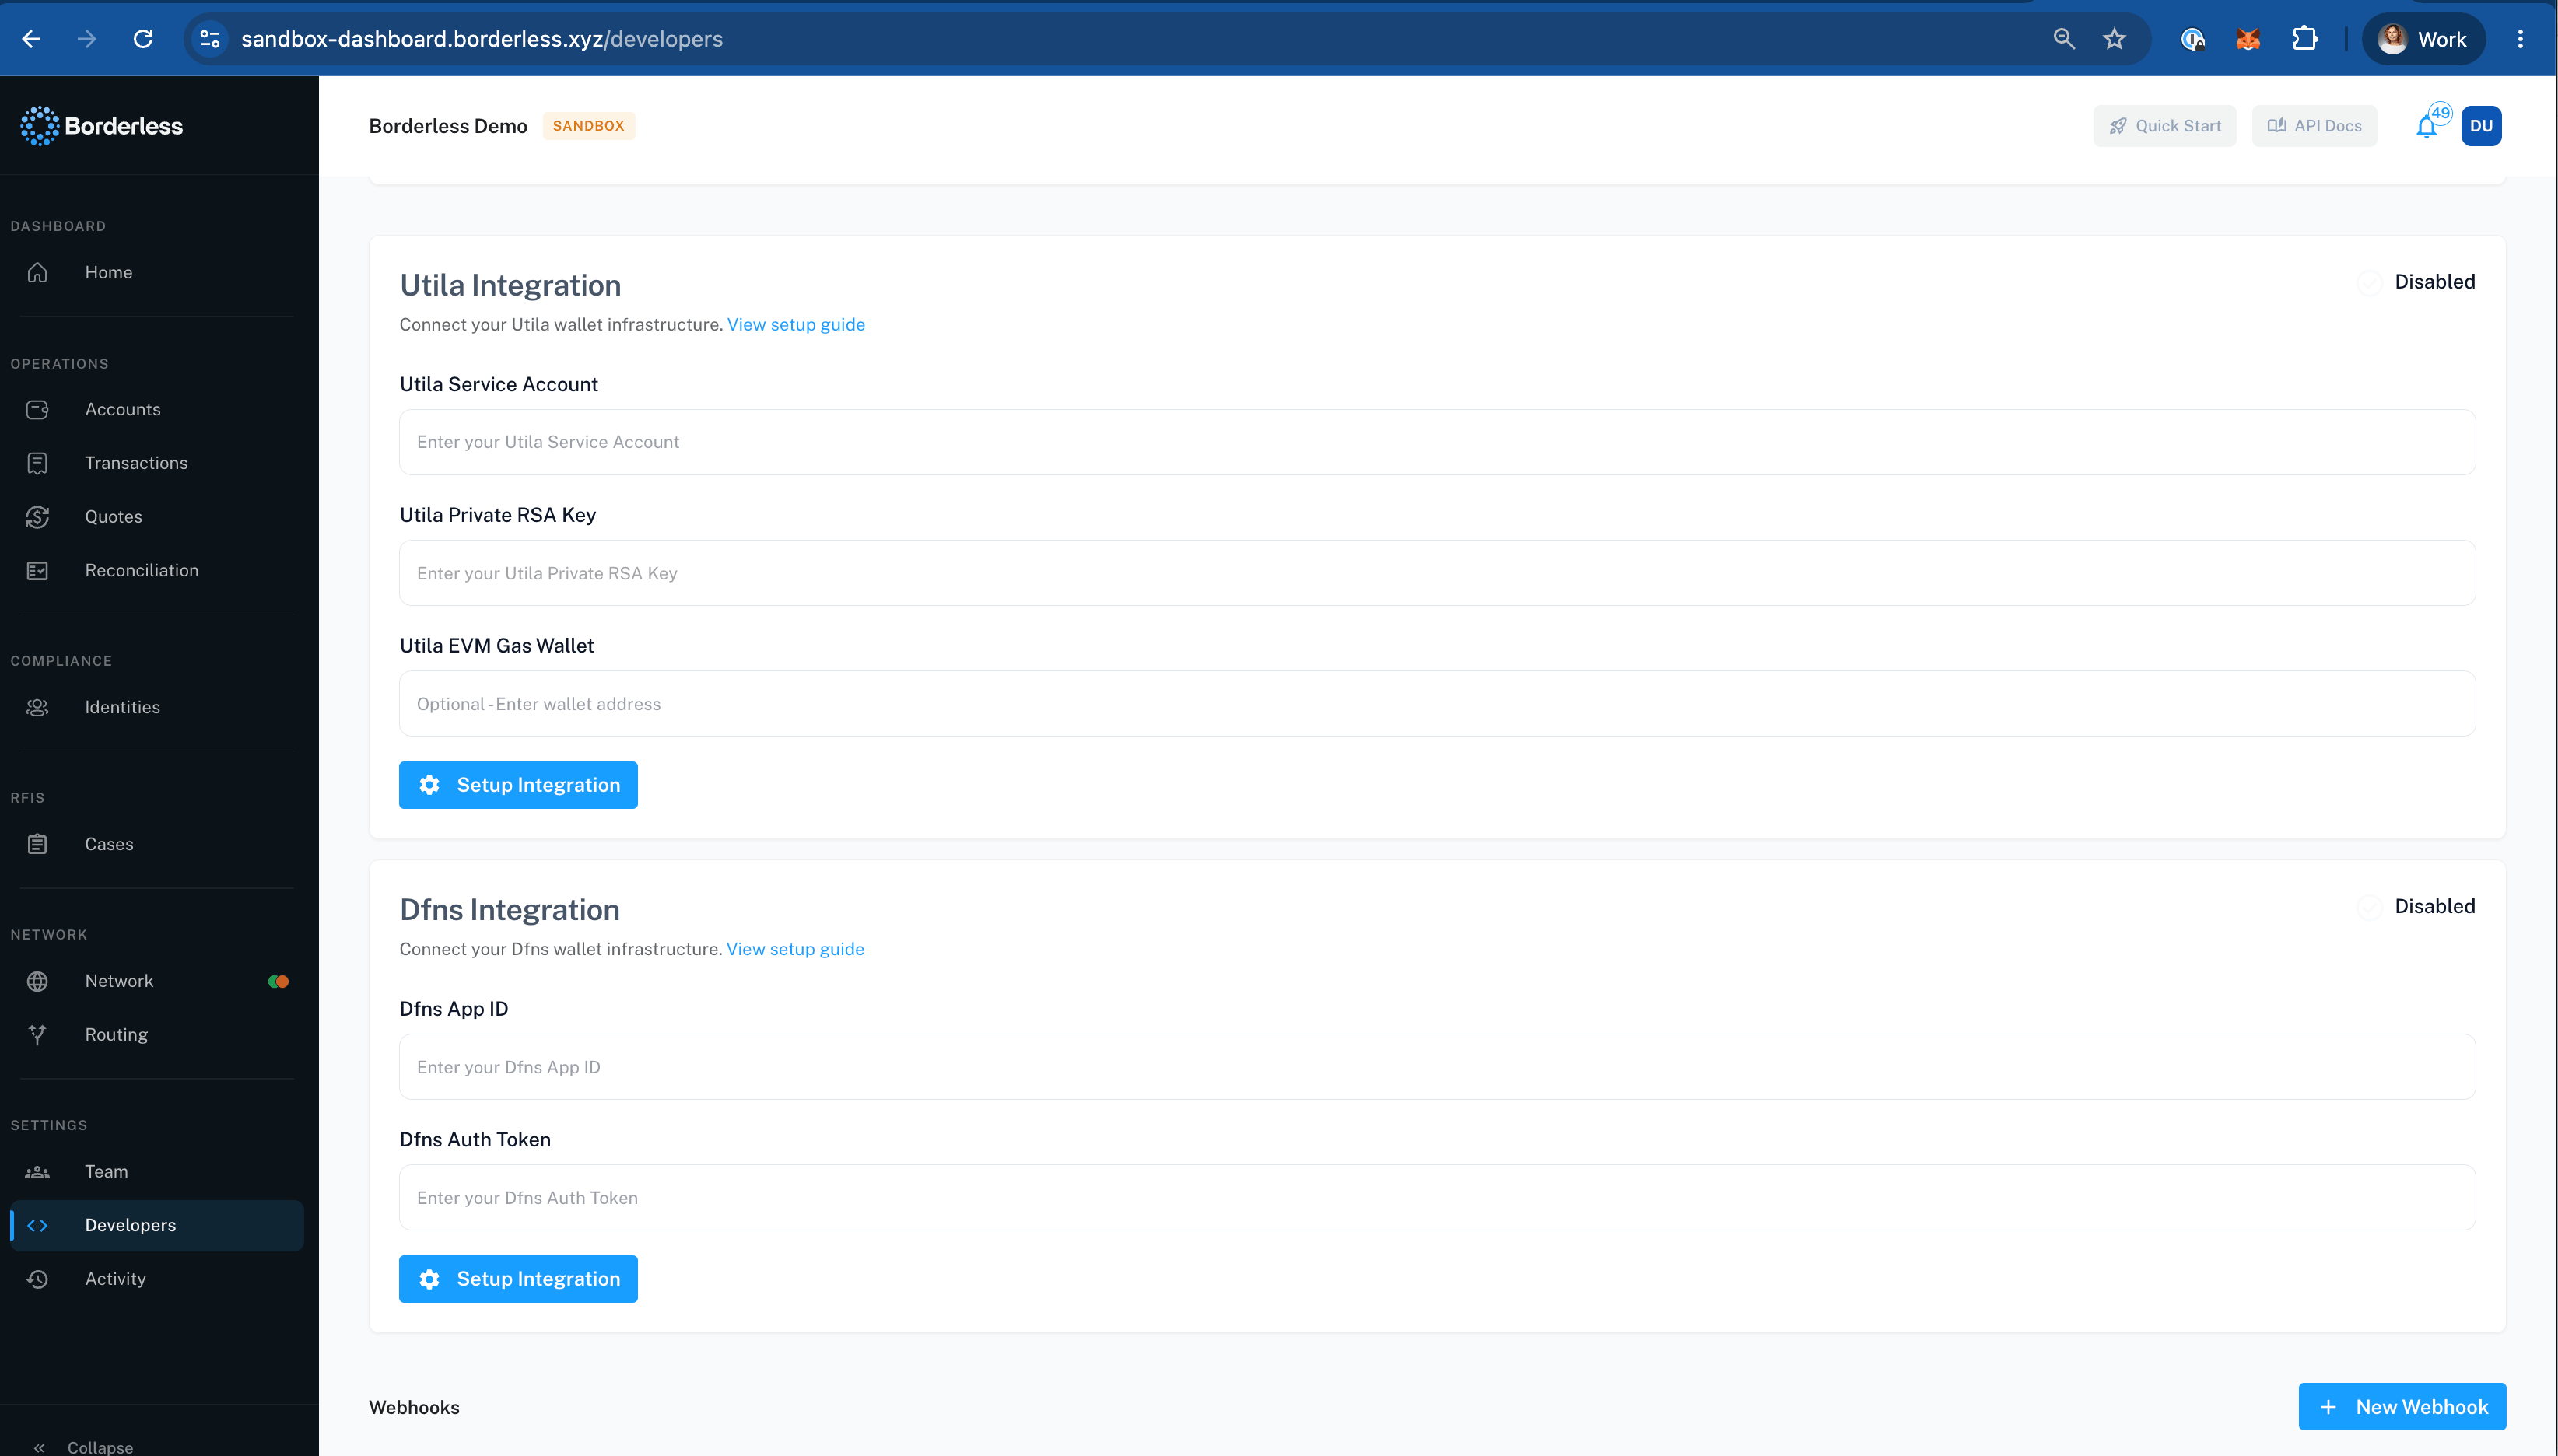
The integration lives on the Developer Settings page and requires the Enable Integrations permission (Owners have it by default). A status indicator on the card shows Enabled or Disabled.- Utila Integration — fill in Utila Service Account, Utila Private RSA Key, and optionally Utila EVM Gas Wallet, then click Setup Integration (or Update Configuration if it’s already connected). A View setup guide link on the card walks through generating these in Utila.
- Dfns Integration — fill in Dfns App ID and Dfns Auth Token, then Setup Integration / Update Configuration. Its View setup guide link covers the Dfns side.
Send funds for a transaction
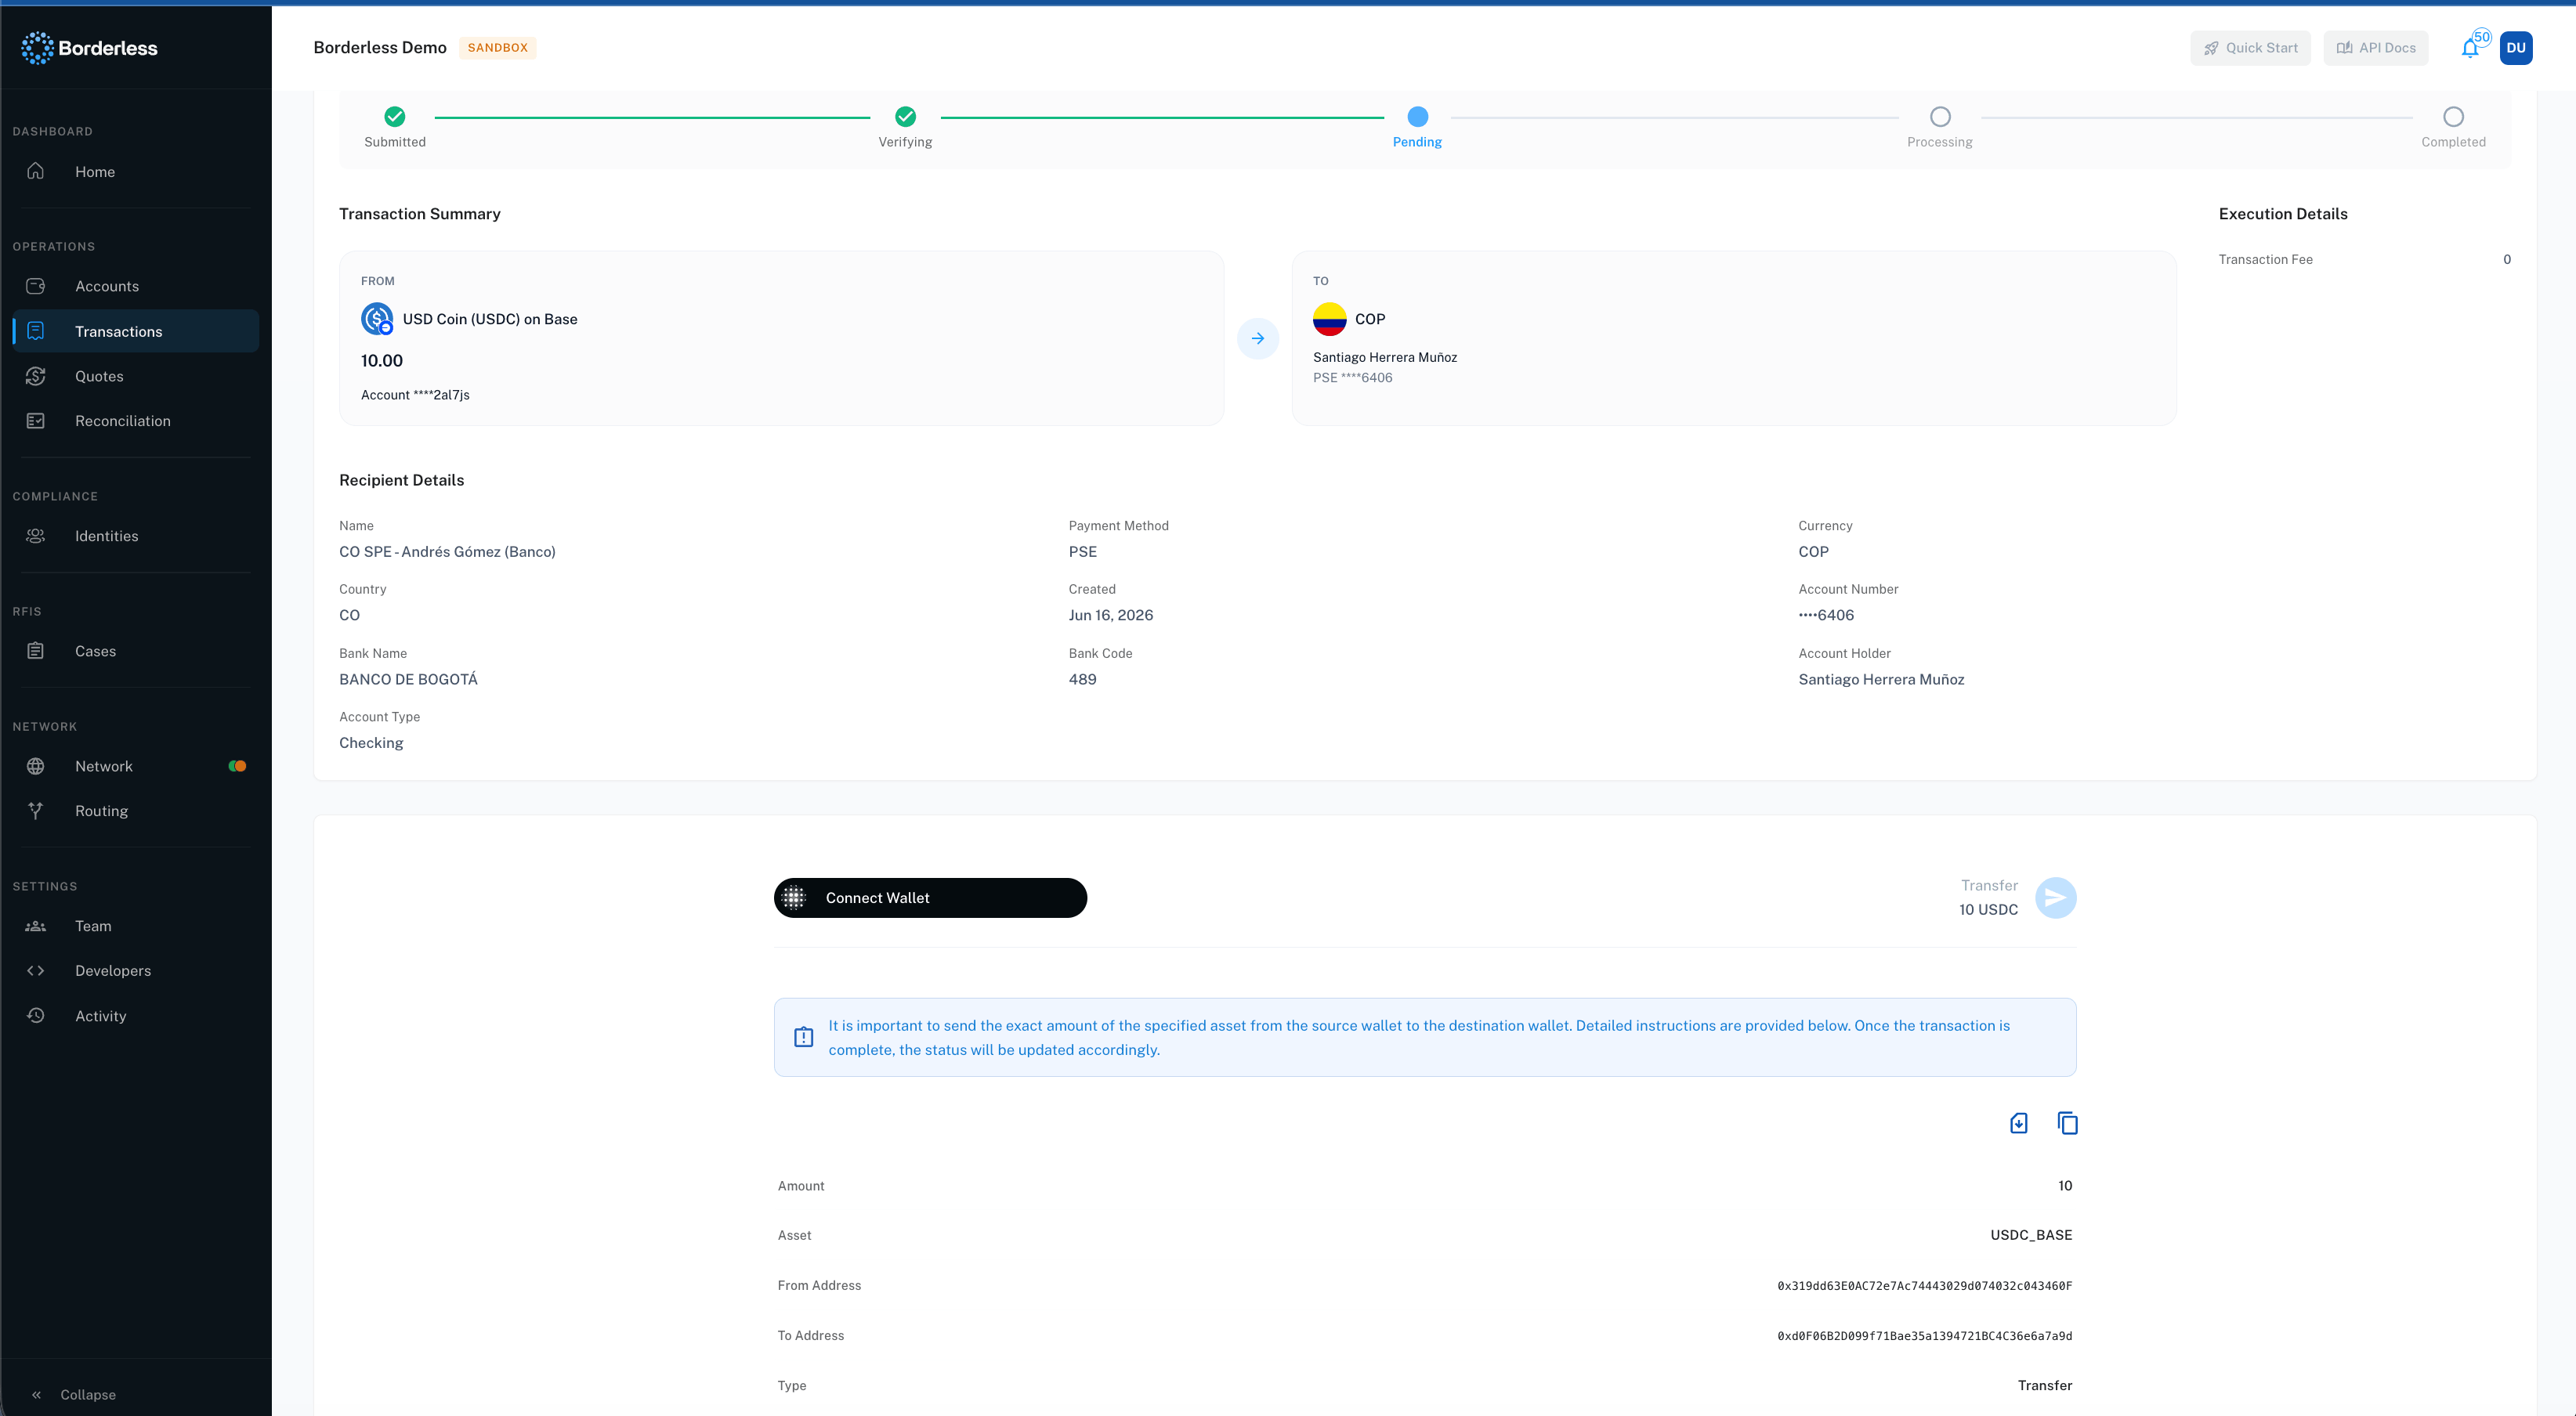
When a transaction is waiting on funds from you, its detail page shows an instructions card while the transaction is Pending.- Onchain (withdrawals): the card lists Amount, Asset, From Address, and To Address — the settlement address from the provider. Click any row to copy its value, use the copy icon to copy all instructions at once, or download them as a PDF. Send the exact amount to the To Address from your linked wallet. If your organization is on the standard setup, a Connect Wallet option may also appear on supported networks — connect the linked wallet and send directly from the platform instead of copying the address.
- Fiat (deposits): the card lists bank details — account holder, IBAN or account number, bank name and address, and a Deposit Message code. Include the deposit message in your payment’s memo; without it, the payment can’t be matched to your transaction.