

Before you start
- You need an invitation from someone at your organization who already has platform access. There’s no public sign-up — an Owner or a user with the right permission invites you.
- Some actions in this guide — inviting users, enabling organization-wide MFA, managing permission groups — require the Owner role or a Custom role with the matching permission. Where a step is restricted, this guide says so.
- Your workspace is connected to one environment, either sandbox or production. There’s no in-app switch to move between them — each environment has its own URL. Check the colored chip near your org name in the header: green means production, amber means sandbox or another non-production environment.
Log in
Borderless uses a hosted login screen, so the sign-in page itself may look different from the rest of the platform. Go to your platform URL and sign in with the credentials your organization gave you. After you log in, you land on Home.Read the Home page
Home is a summary of your account: a welcome header with your name, a row of key metrics, a transaction activity chart, a network health panel, an exchange rates chart, a Needs Attention panel, and a list of recent transactions.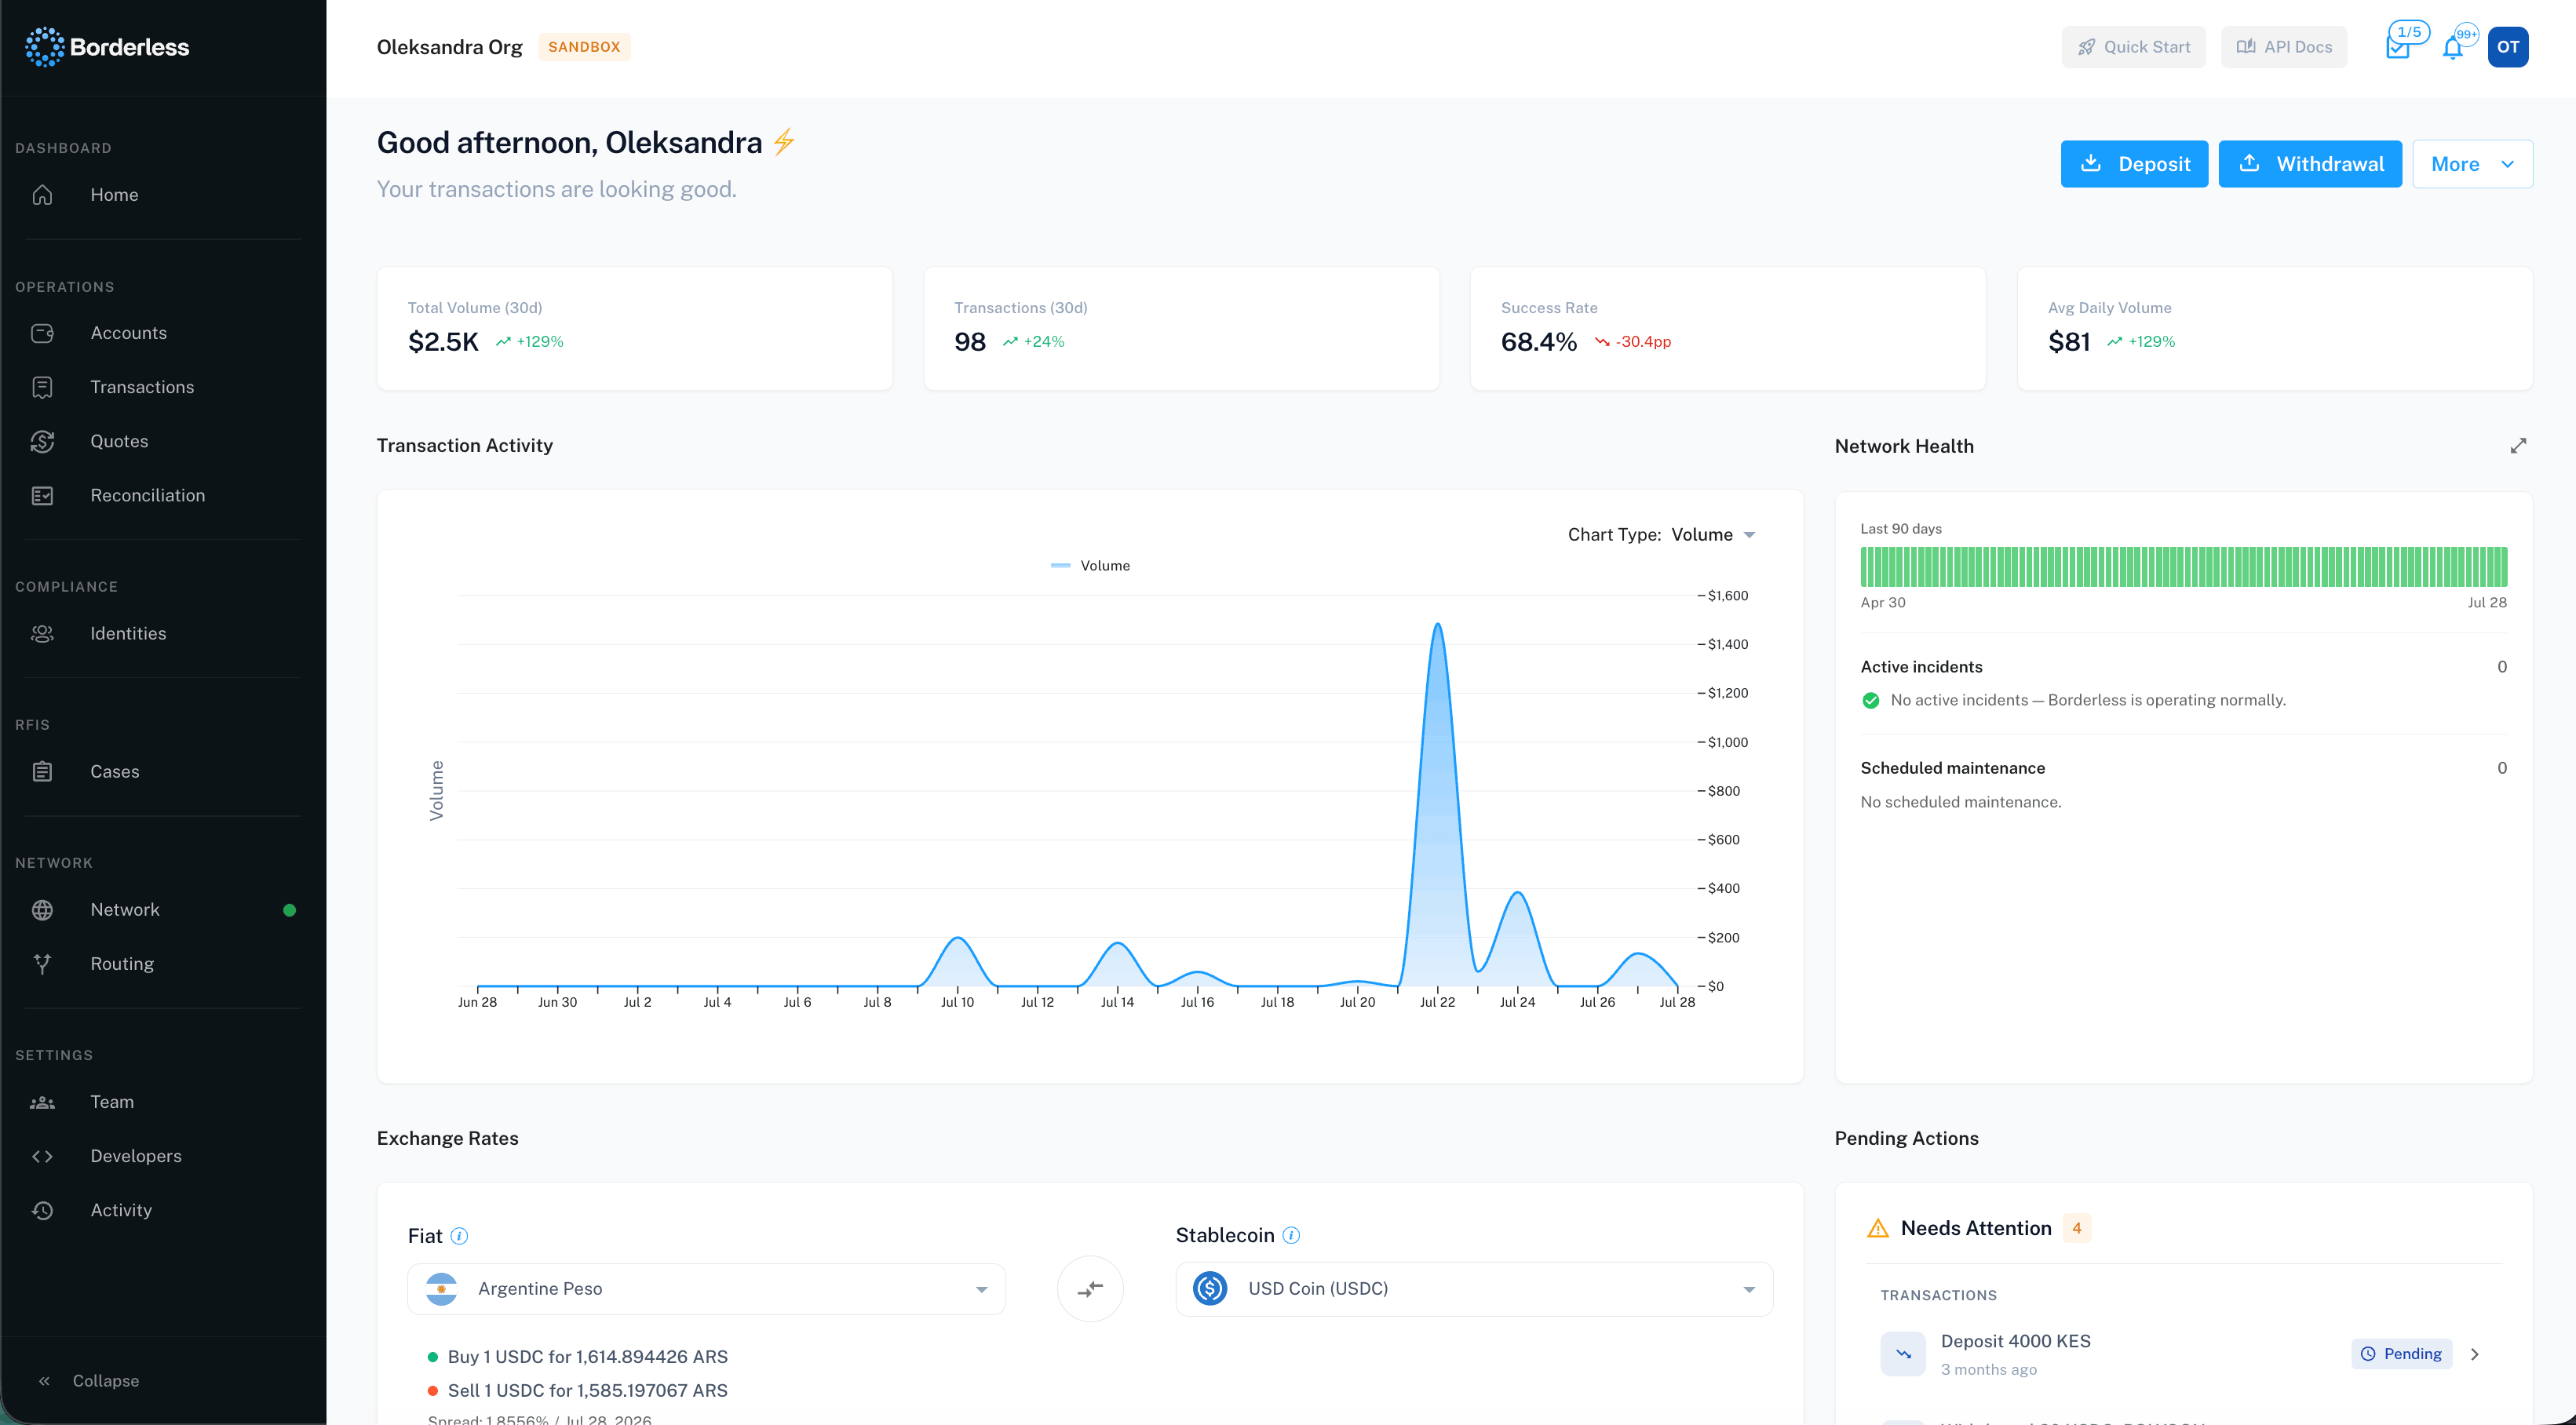
Notifications
Click the bell icon in the header to slide in the notifications panel from the right. It holds your notification history: mark them all as read, delete them, or click one to jump to whatever it’s notifying you about.Find Team and Developer settings
There’s no separate Settings page — clicking Settings takes you straight to Team. That’s where org-wide settings, users, and permission groups live. Developer-facing settings — API keys, webhooks — live on their own Developer Settings page.Set up multi-factor authentication
On the Team page, under Organization Settings, you’ll find a Multi-Factor Authentication card. It shows whether MFA is on for your organization and, if you have permission, an Enable MFA button.- Click Enable MFA.
- A confirmation modal titled Enable Organization MFA appears, warning that this updates MFA for every user in the organization.
- Confirm to enable it.
Invite a user
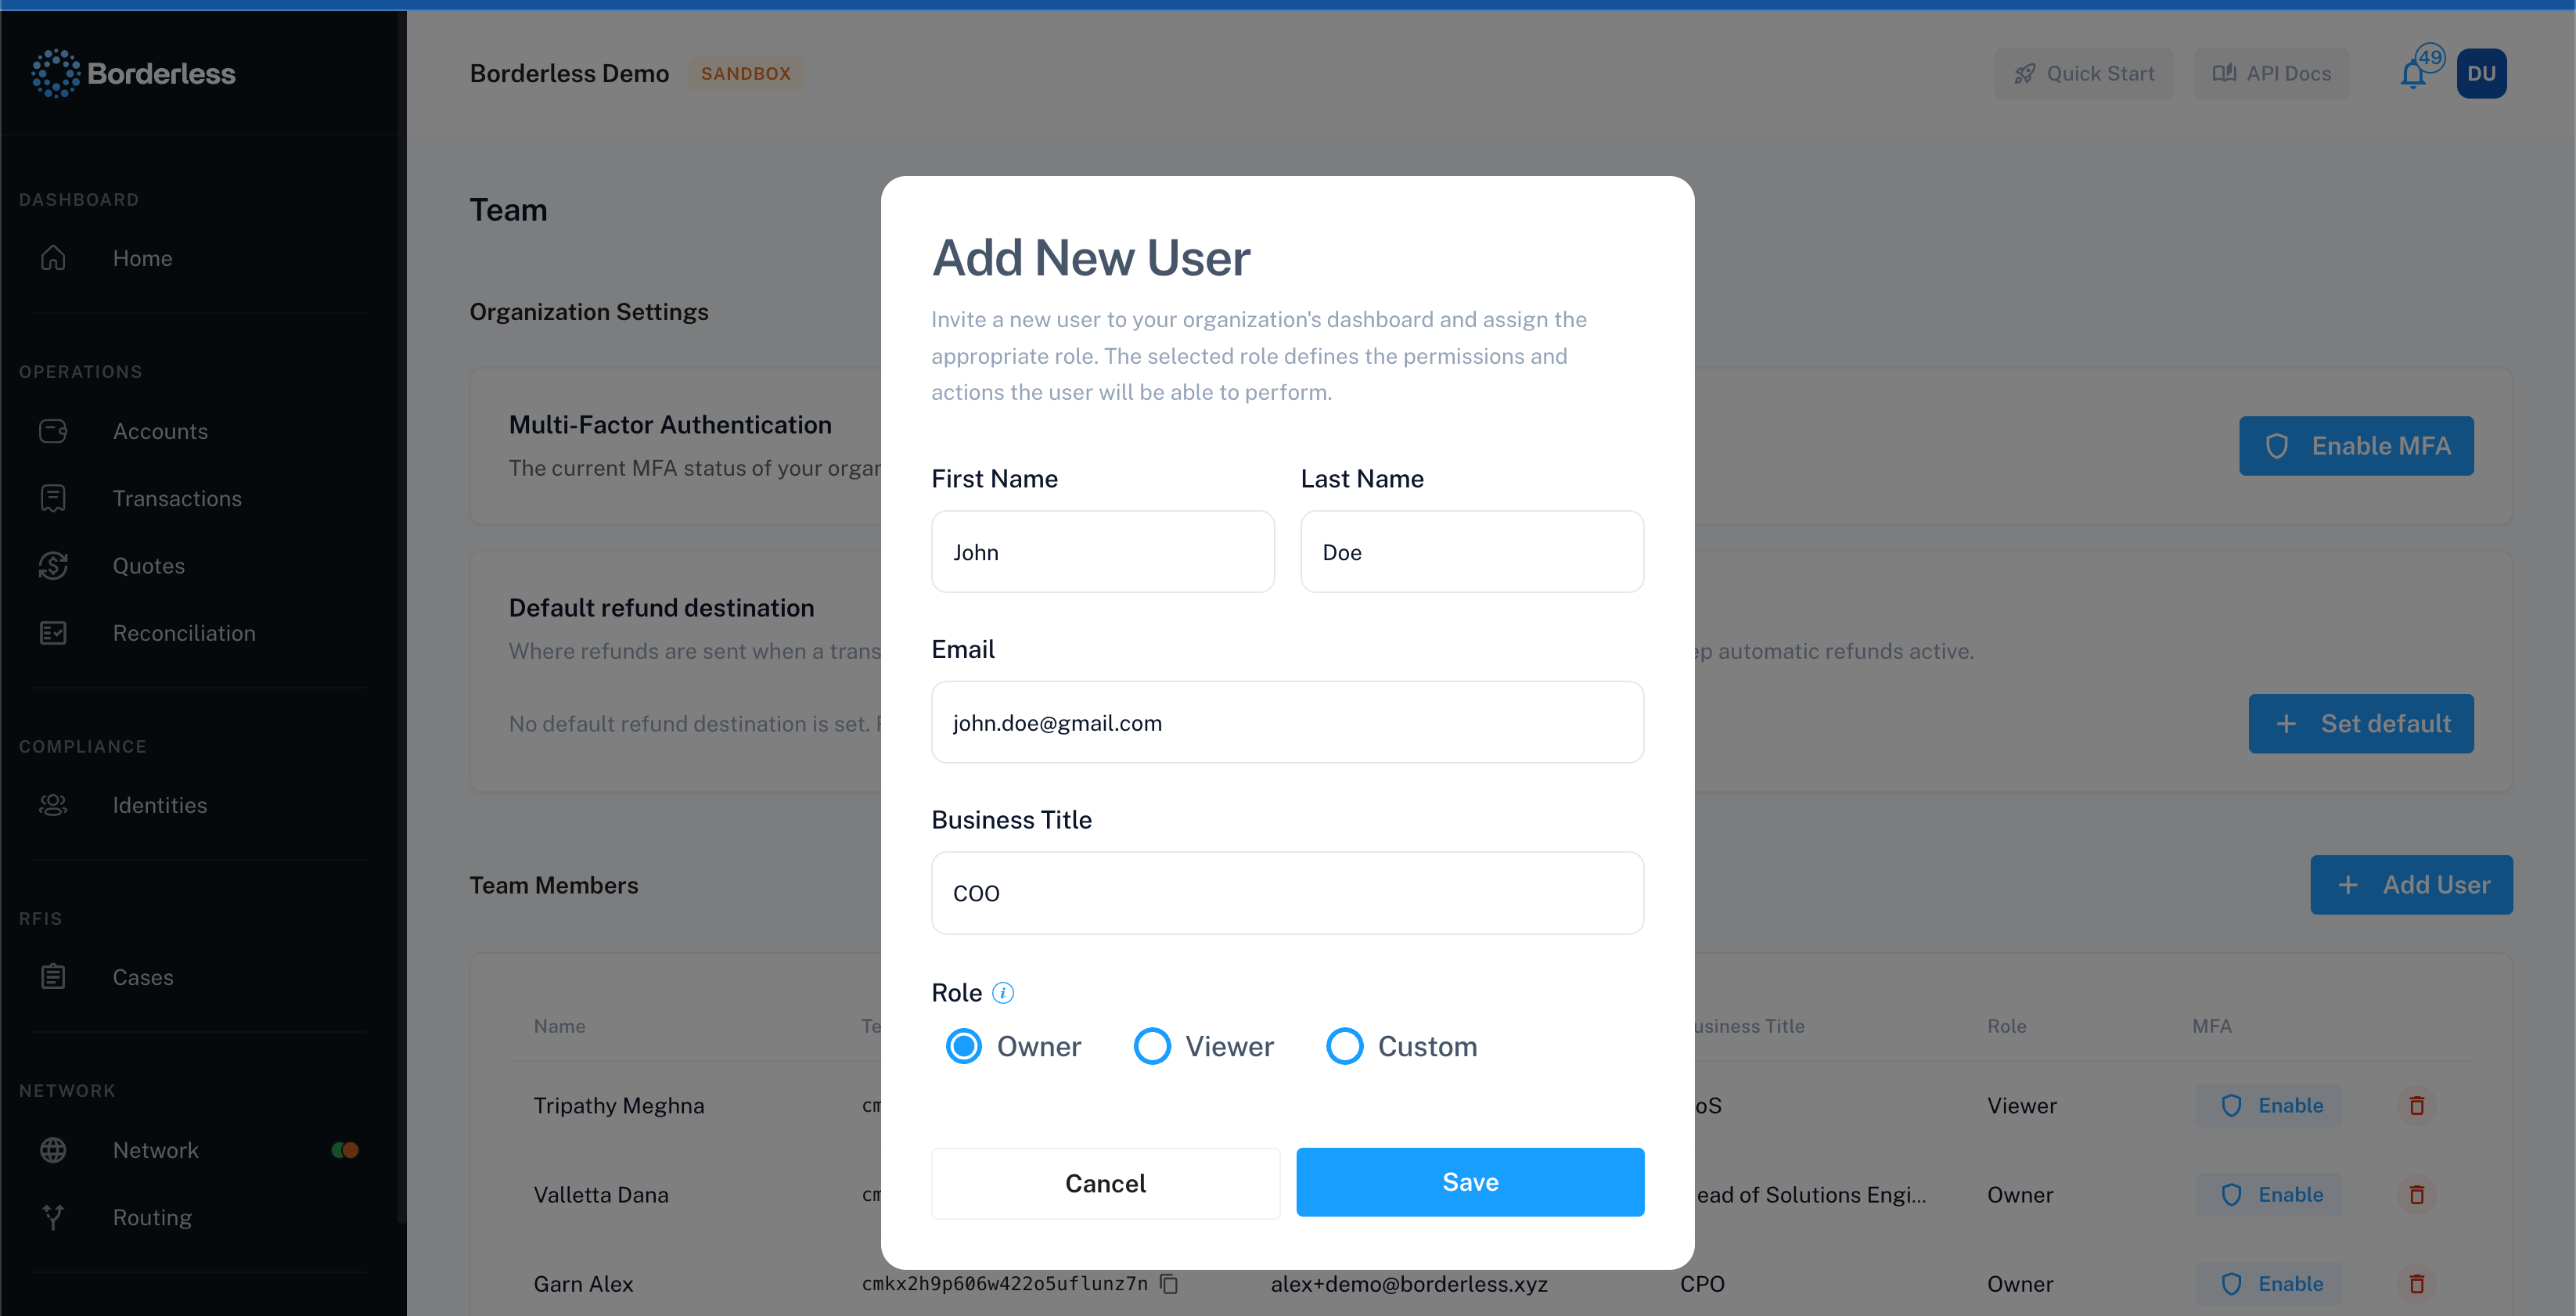
- On the Team page, under Team Members, click Add User (or use Invite user from the Home page’s More menu).
- Fill in First Name, Last Name, Email, and Business Title — all required.
- Choose a Role: Owner (full control), Viewer (view only), or Custom (permissions you assign through a permission group).
- Click Save.
Create a permission group
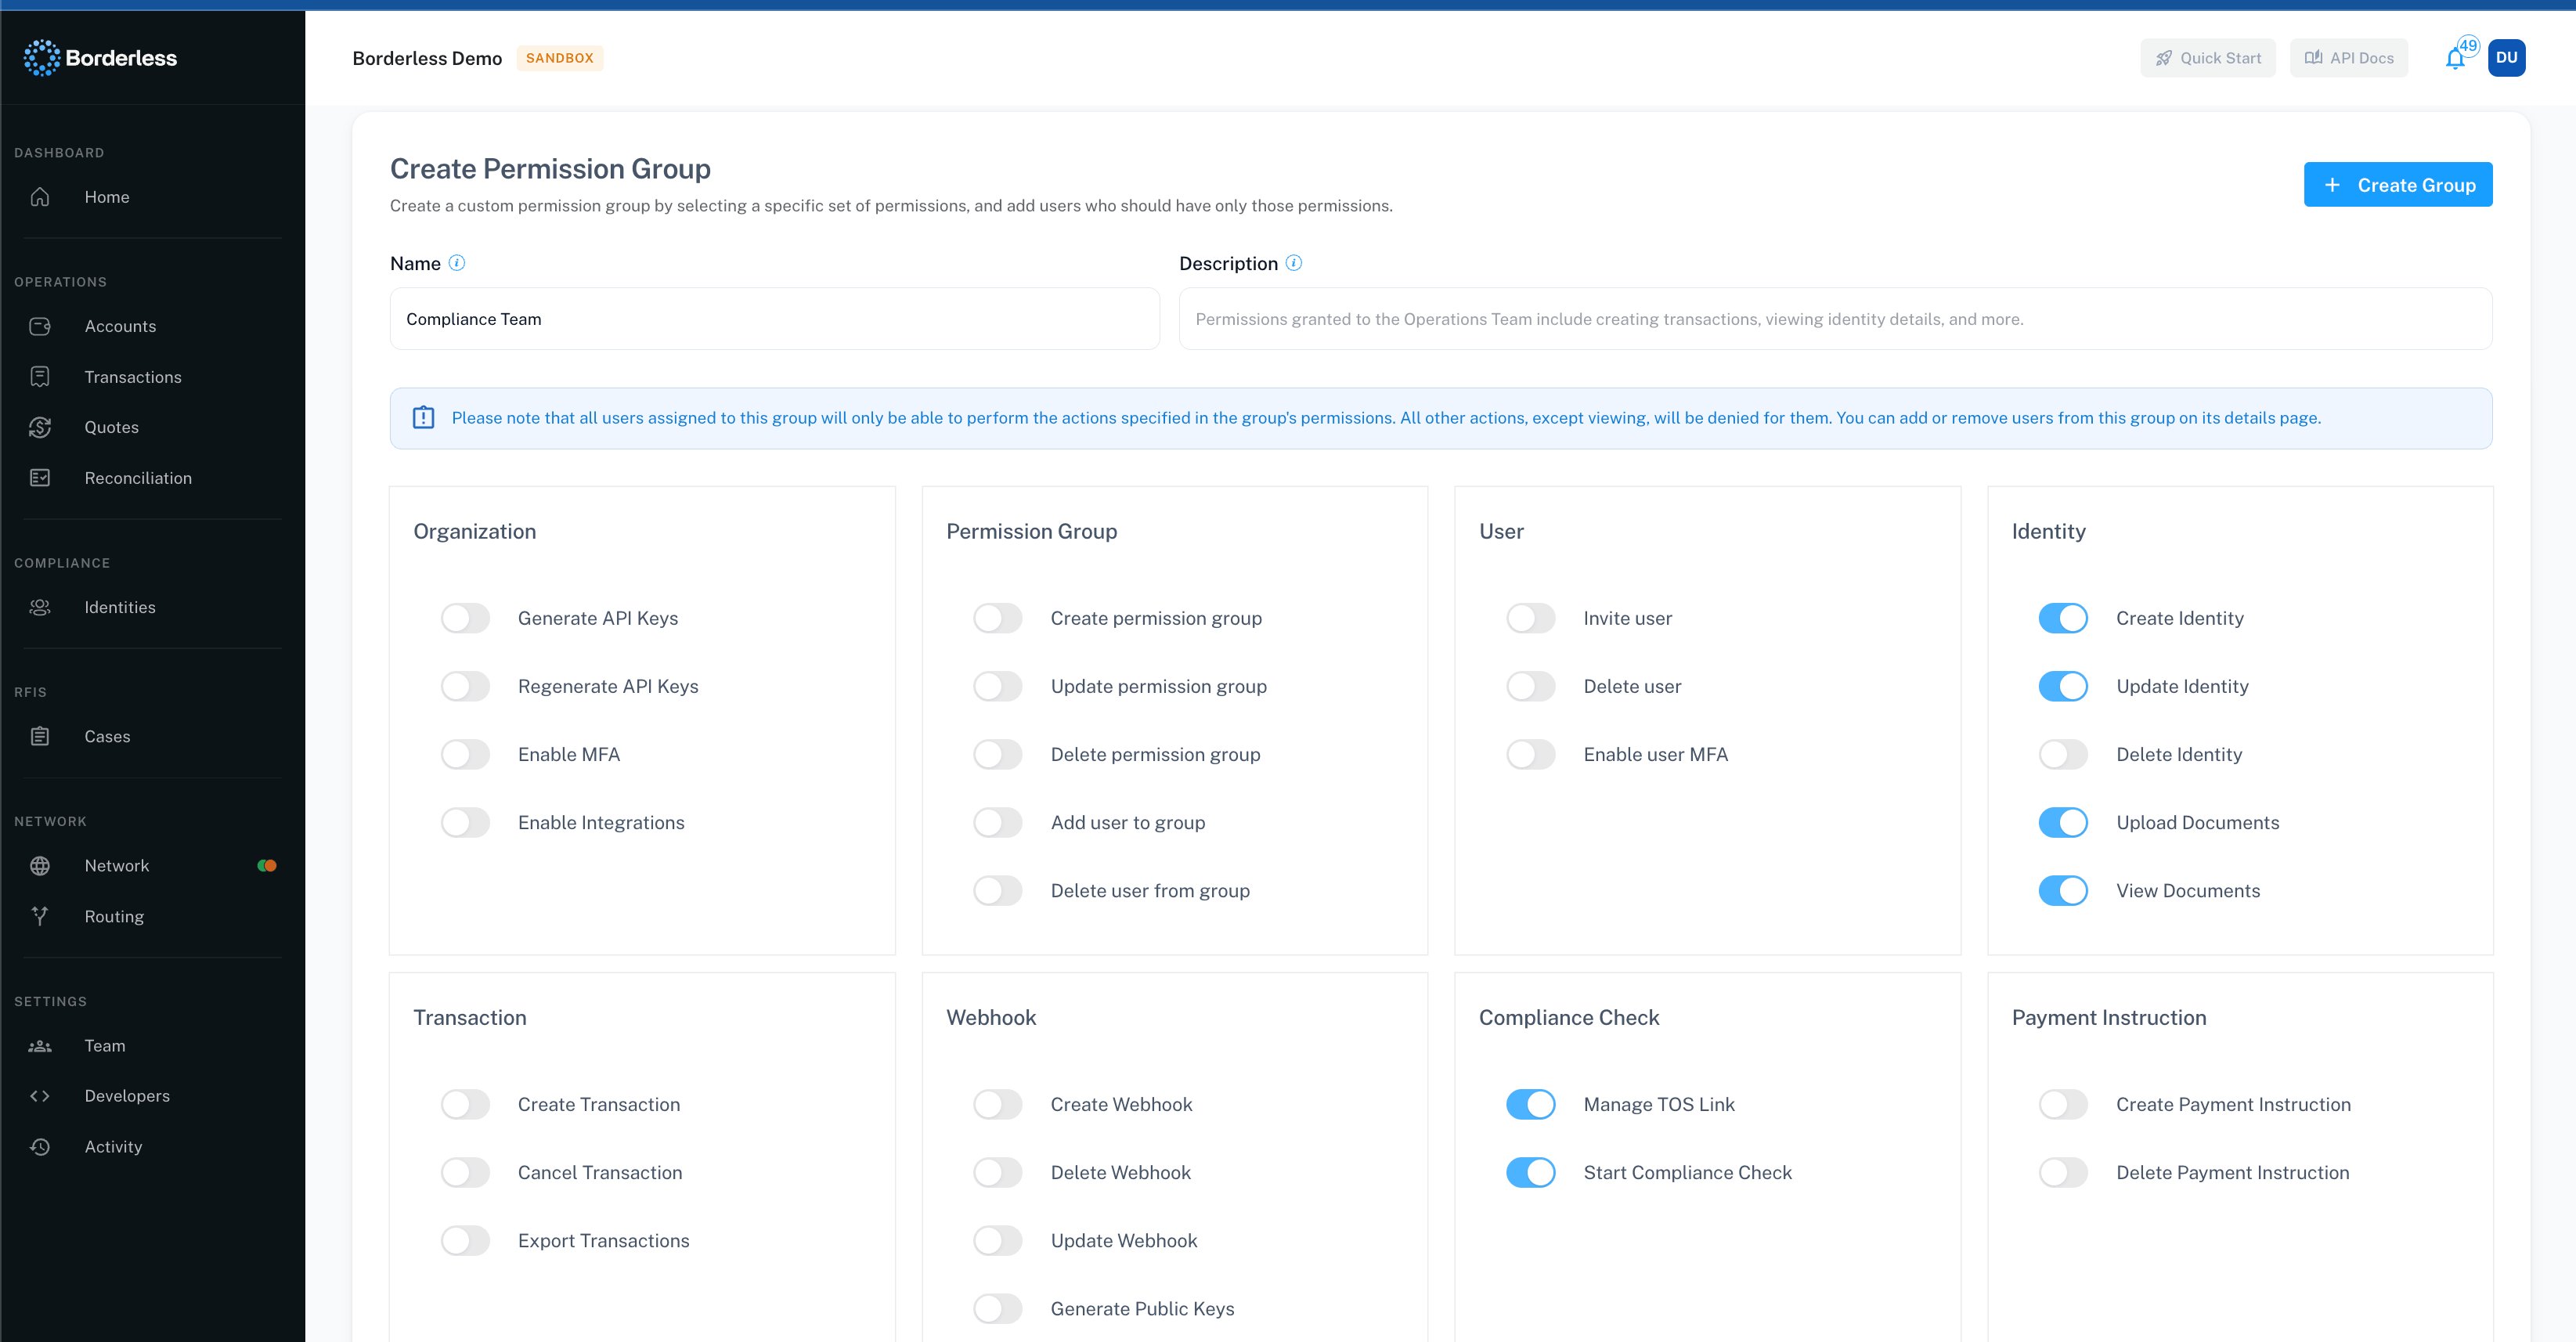
Use permission groups to give Custom-role users a defined set of actions — everything else stays denied to them, aside from viewing.- From Team or the Permission Groups page, click Create Group.
- Enter a Name (3–100 characters) and, optionally, a Description.
- Flip on the permissions to grant, organized by section.
- Click Create Group.
Find developer settings
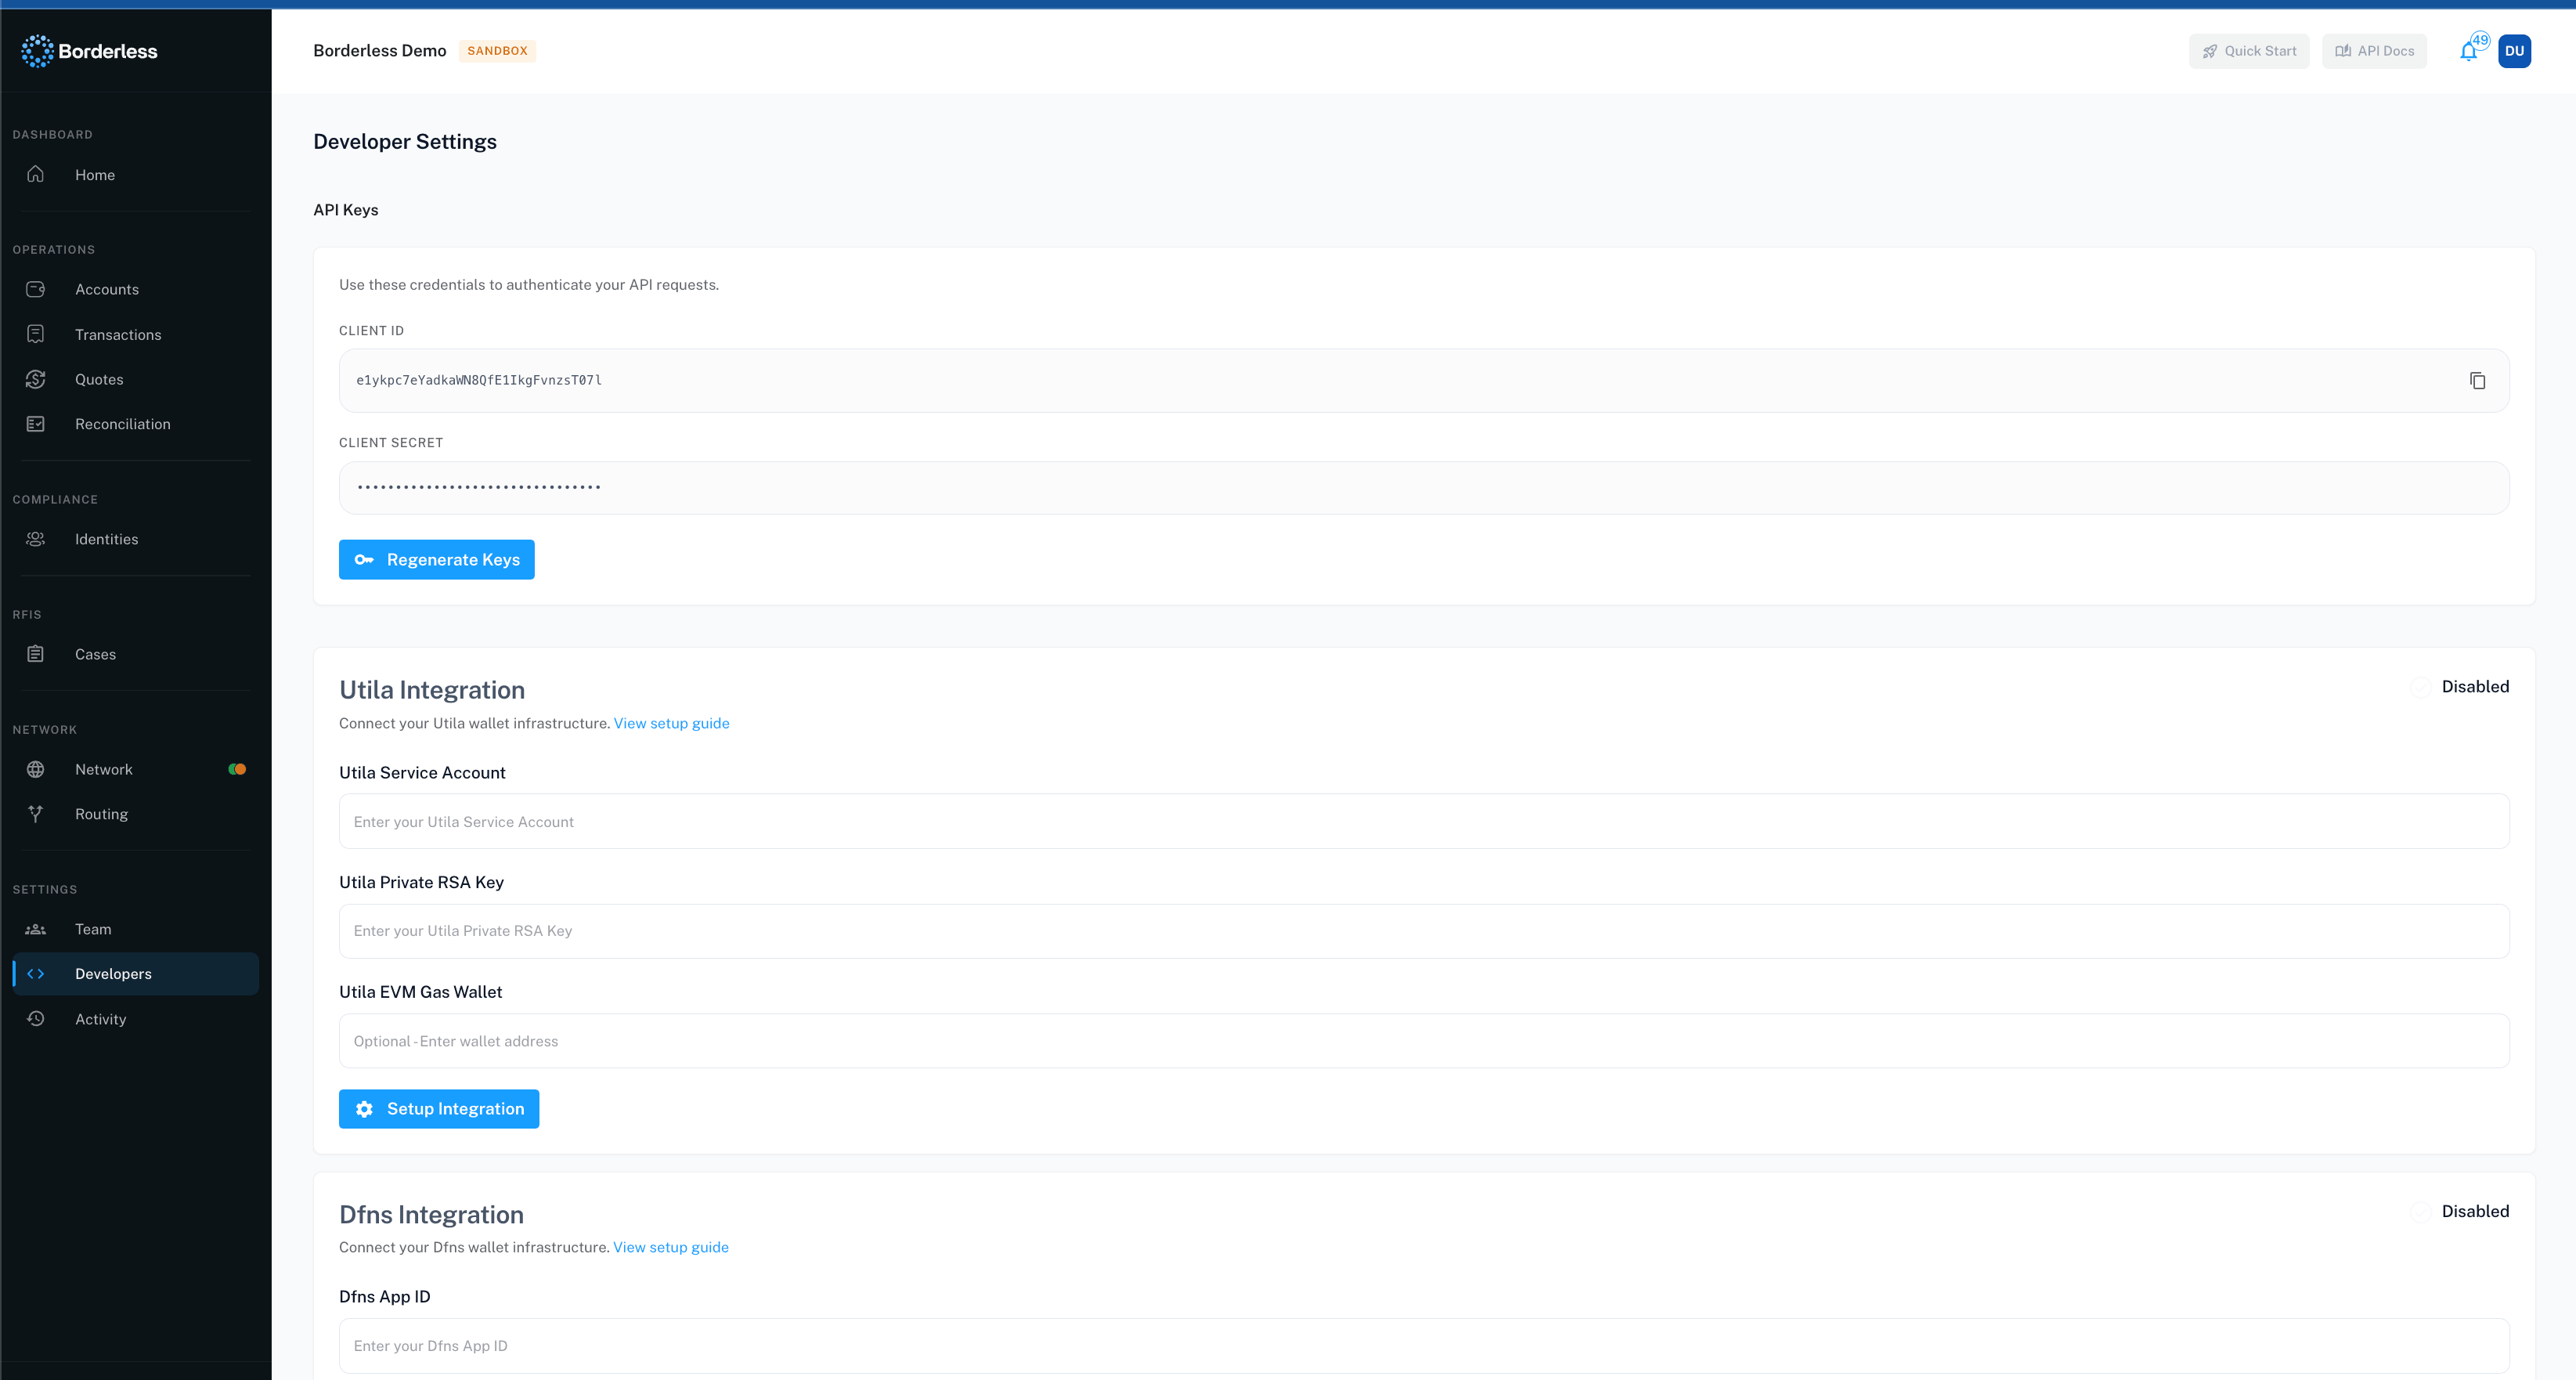
Go to Developer Settings for API keys and webhooks.- API Keys shows your Client ID and Client Secret, masked until you reveal them, with a copy button for each. Click Generate Keys the first time, or Regenerate Keys later. Regenerating asks you to confirm first — doing so logs out every device currently using that client ID.
- Webhooks lists your configured webhook URLs. Click New Webhook to add one.
- Webhook Authentication holds the public key used to verify webhook signatures, with its own Generate Keys / Regenerate Keys button.
Connect your providers
Borderless is the orchestration platform for a network of payment providers, and enabling your providers is the first step toward moving money. Go to Network to browse the provider marketplace — you can search and filter by capability, country, currency, and rail to explore which providers offer the services you need. If you’re already onboarded with a provider, link your account: click Add API keys on the provider’s card and drop in your credentials. Provider Marketplace covers the full flow, including providers whose connection Borderless manages for you. If you’d like to explore new providers, or want an introduction to a specific one, reach out to the Borderless team. We work with these providers across many clients and are happy to share that experience, help you choose, and introduce you to the expedited onboarding processes providers offer Borderless customers. You complete onboarding directly with the provider; once they approve you, add your credentials and the provider is live in your network.Your first transaction
Before you can move money, three things need to be in place — in this order:- An enabled provider. Borderless orchestrates approvals with your providers, so the provider comes first — see “Connect your providers” above and Provider Marketplace.
- An approved identity. Create the identity and take it through compliance — see Identities & Compliance. The identity must be approved with the provider you’ll transact through, or covered by a reliance agreement with that provider.
- A linked wallet. Link a wallet so Borderless knows the source of funds for your transactions — see Wallets.