

Money in, money out
Borderless is stablecoin-centric, and the platform uses two words for moving money:- A Deposit brings money in: fiat is onramped into stablecoins. Depending on where you work, you may know this as an onramp, a pay-in, or a collection.
- A Withdrawal sends money out: stablecoins are offramped into local fiat. Also known as an offramp or a payout.
Accounts link your wallets — they don’t replace them
Transactions start from accounts, so it’s worth being clear about what an account is. Creating an account doesn’t create a wallet, and you never hold funds in Borderless. You’ve already chosen, configured, and secured your wallet infrastructure — an account links it to Borderless, connecting the compliance information that lives in the platform (the identity) with the wallets you already run, whether that’s Utila, Dfns, Fireblocks, Privy, Turnkey, or anything else on the market. Accounts come in two types:- Wallet accounts — linked to your own wallet infrastructure. Wallets covers the linking options.
- Provider balance accounts — balances you hold with your providers.
Before you start
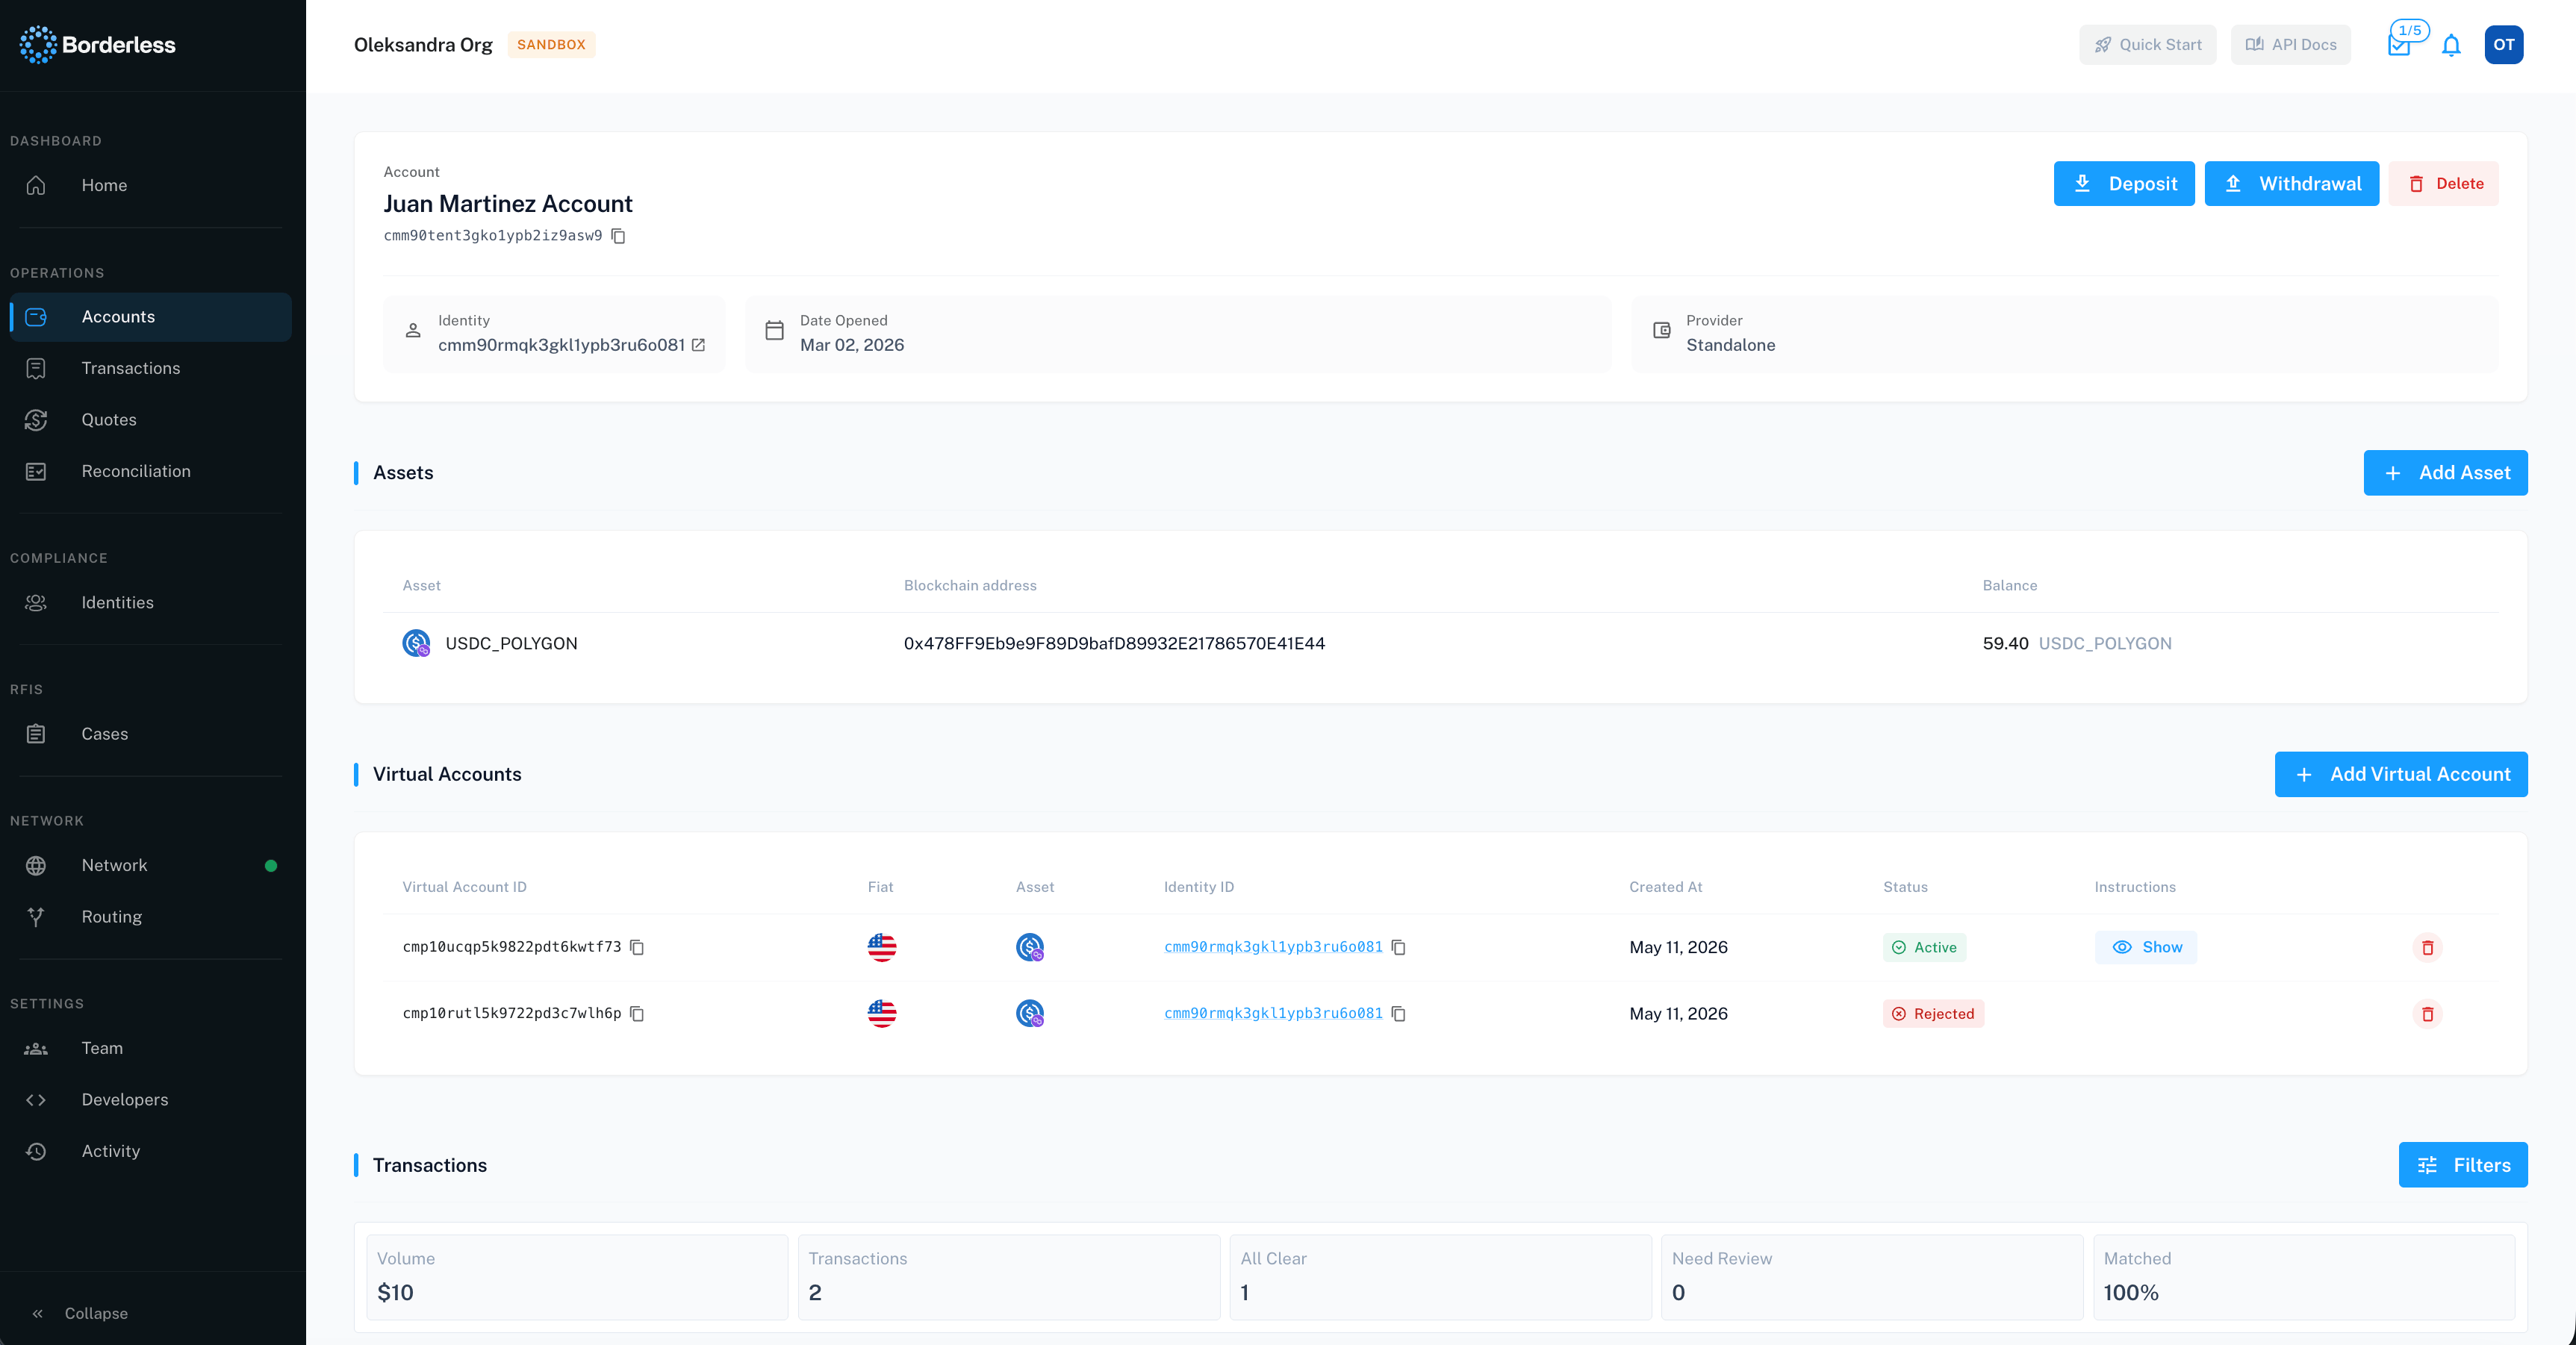
You need the Create Transaction permission to see the Deposit, Withdrawal, or Exchange buttons on an account (or the Home page shortcuts). If you don’t see them, ask your administrator — you may also need a connected web3 provider, which gates transaction buttons on every account type, fiat or crypto. For deposits, the account needs a linked blockchain address for the asset you want to receive. If it doesn’t have one, add it first: on the account page, click Add Asset (or Add Asset / Fiat) in the Assets section.Finding the right button
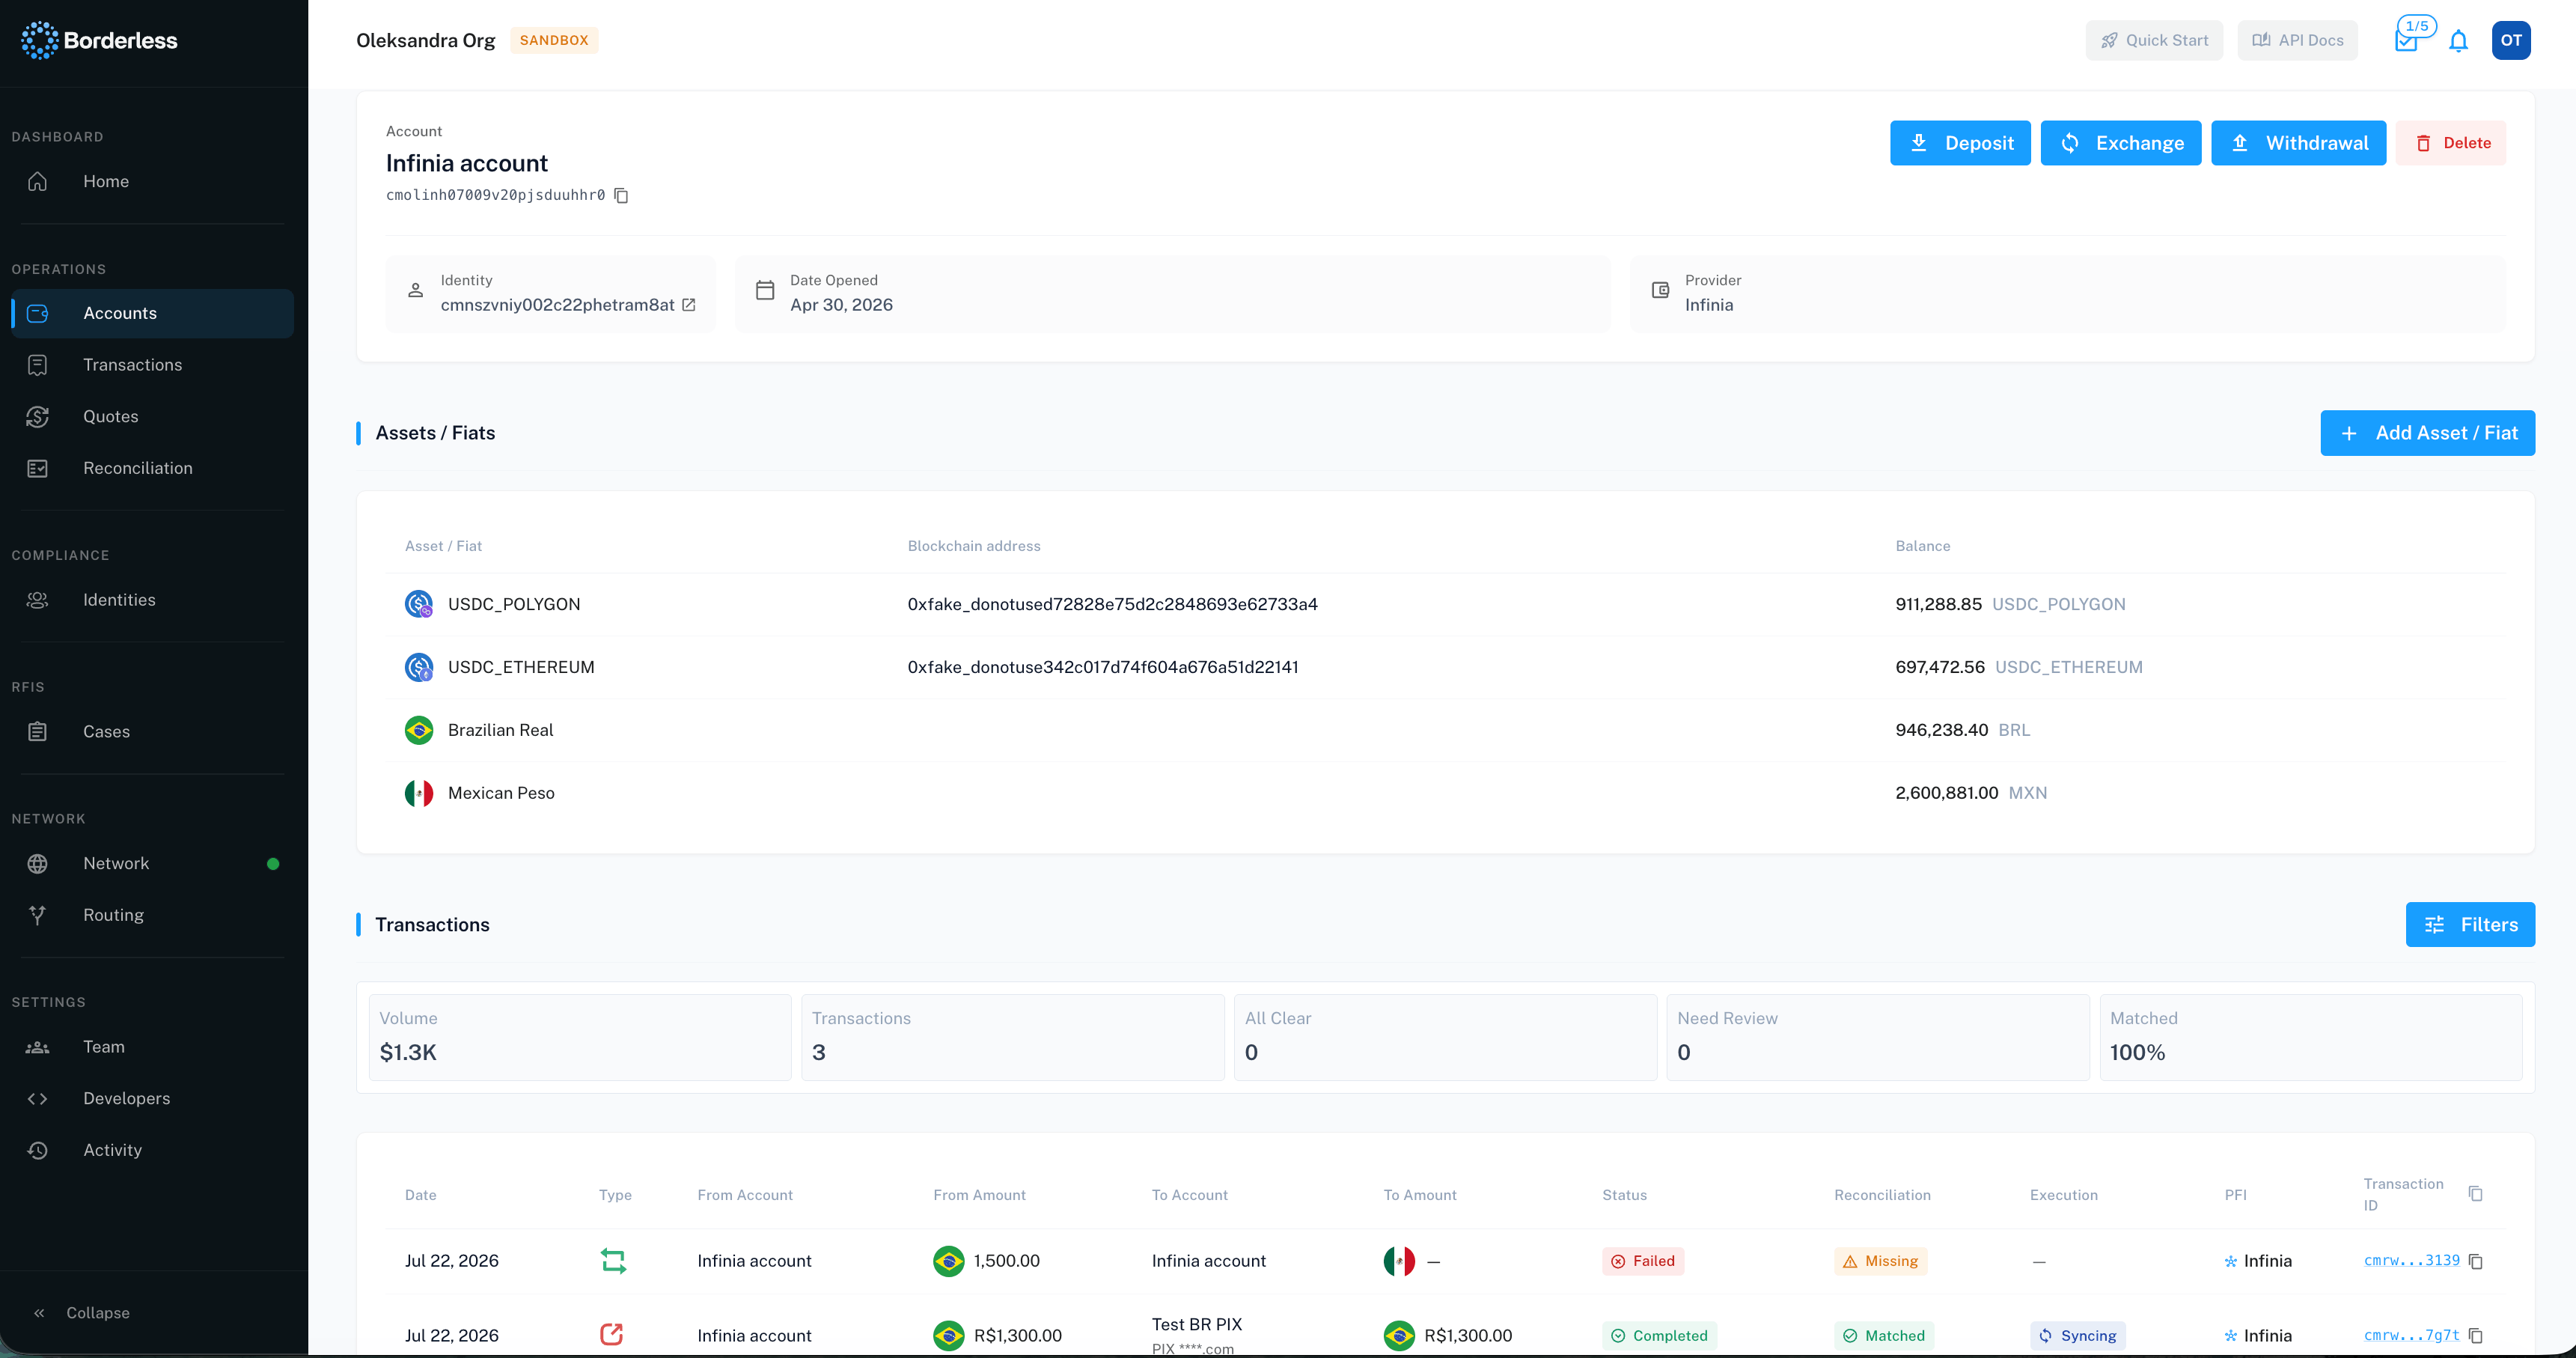
Open Accounts from the nav and click into the account you want to transact on. The buttons next to the account name depend on the account type:- An account holding a provider balance (fiat) shows Exchange.
- A Web3/crypto account shows Deposit.
- Withdrawal appears on both.
- Infinia accounts show no Deposit, Withdrawal, or Exchange button at all.
Depositing funds
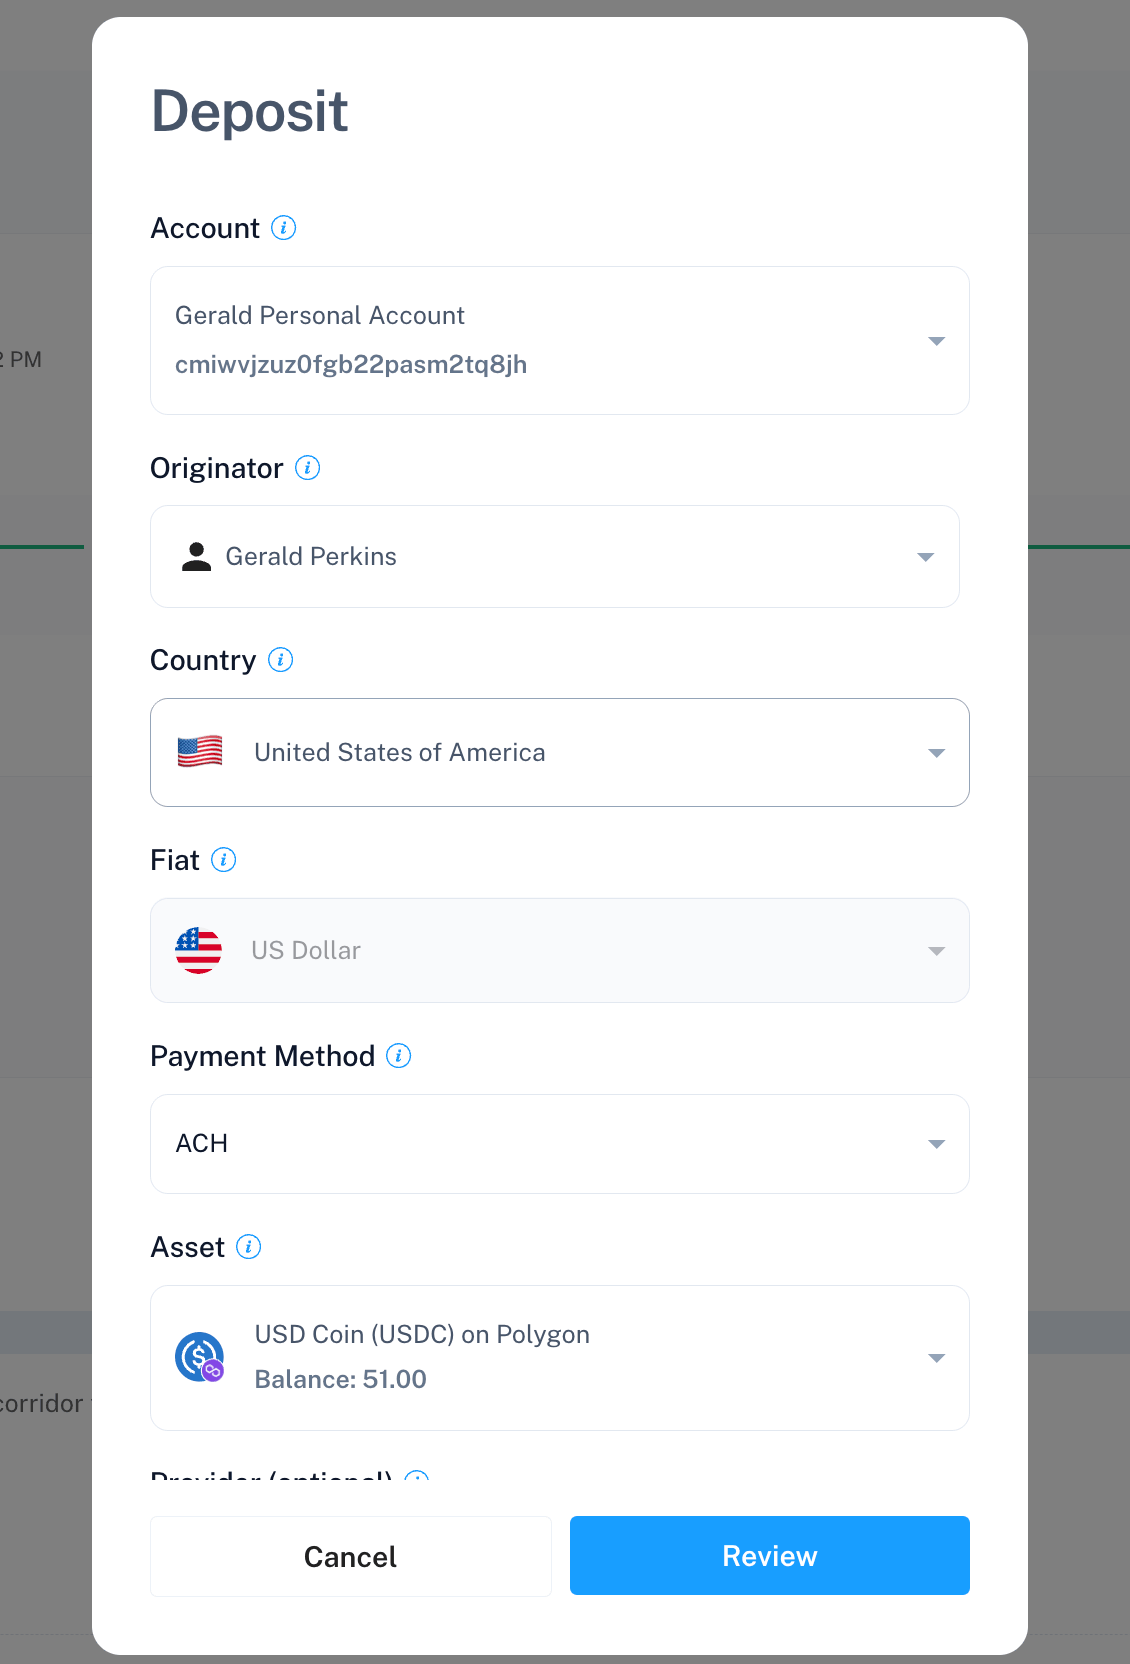
A deposit brings fiat in and converts it to a stablecoin or other asset in a Web3 account.- On the account page, click Deposit.
- Fill in the form:
- Account — pre-filled if you have only one.
- Originator — the identity initiating the transaction. It must have passed compliance checks in the country you select.
- Country and Fiat — the source of funds.
- Payment Method — how you’re sending the fiat.
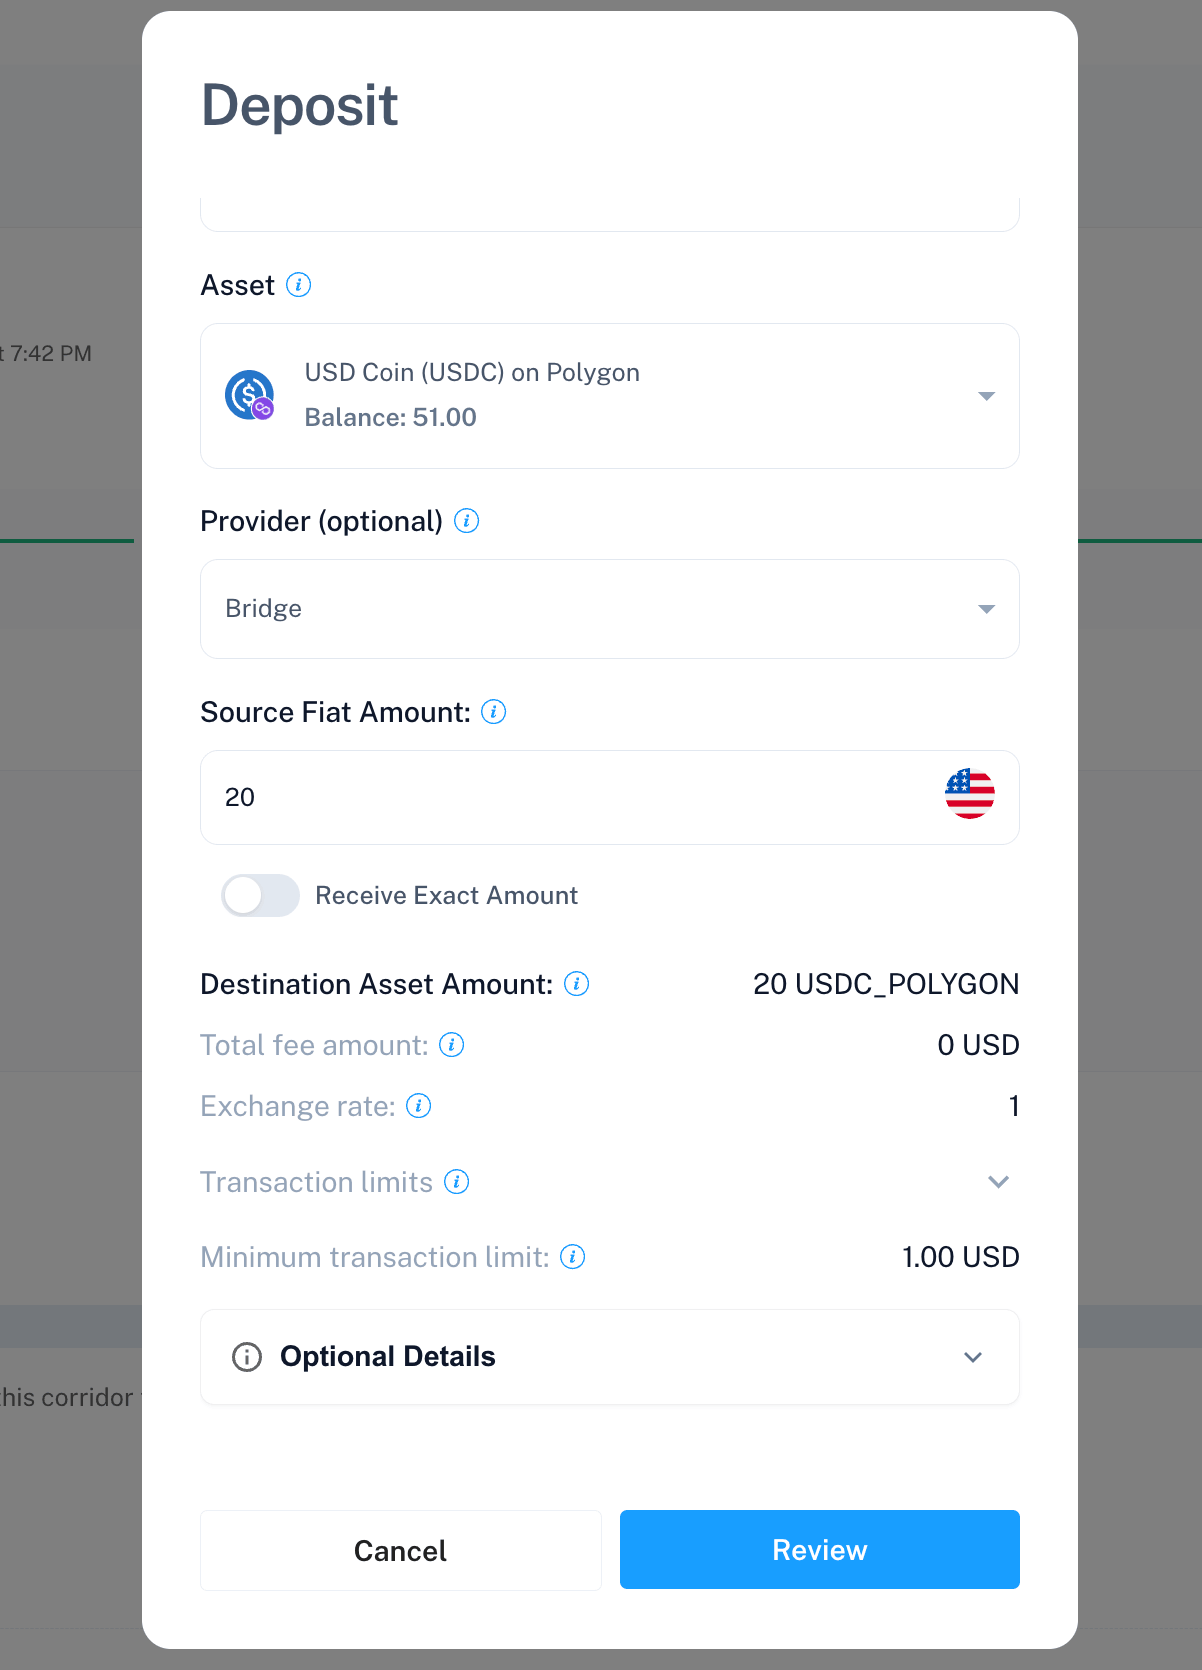
- Asset — the stablecoin or asset you’ll receive. If this shows “No available blockchain addresses,” go back and add one via Add Asset on the account page.
- Provider (optional) — pick a provider explicitly to route this transaction through it, or leave Use default routing to follow the defaults you’ve configured in the routing table. Appears as soon as your organization has at least one active provider.
- Amount — turn on Receive Exact Amount if you’d rather enter what you want to receive than what you’re sending.
- Optional: expand Optional Details to attach a supporting document.
- Click Review. This stays disabled until Borderless has a live quote for your inputs — if it won’t activate, check the form for a routing warning.
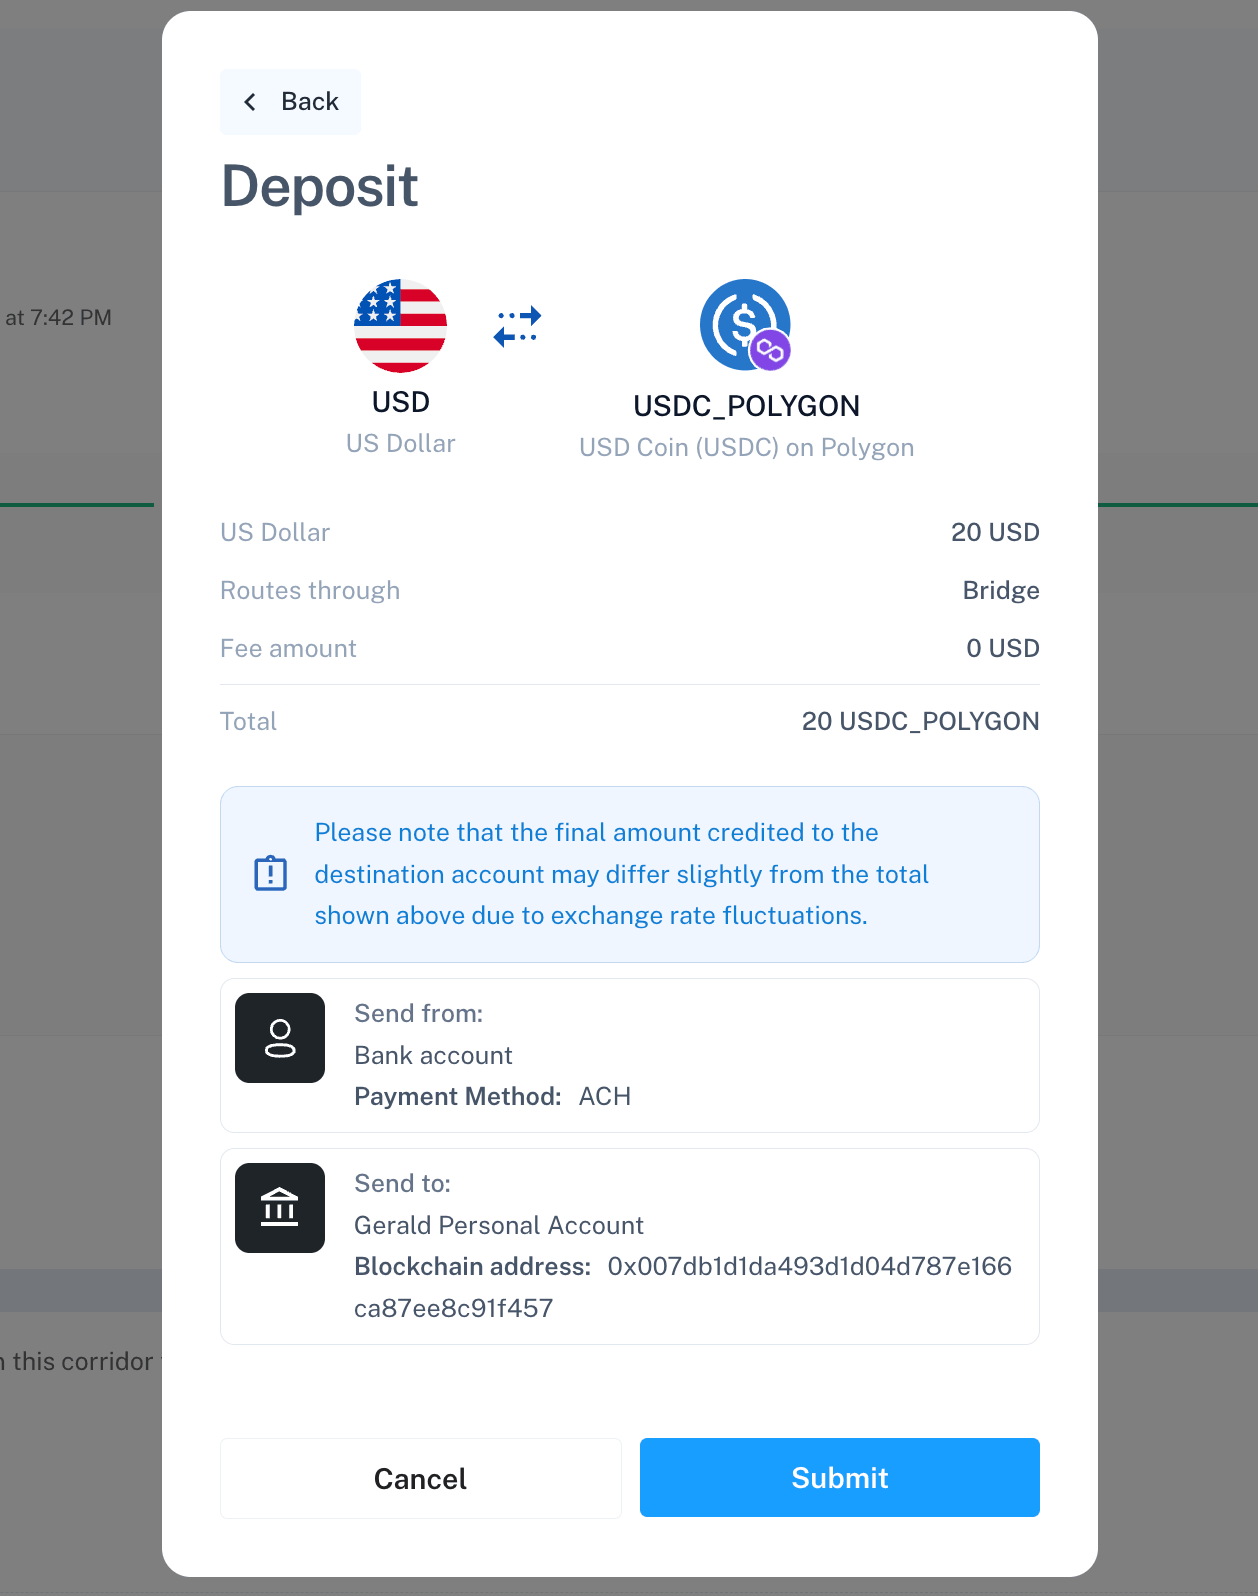
- Check the review screen: the source amount, what it Routes through, the fee, and the total. A notice here warns that the amount credited may differ slightly, since exchange rates move between quote and settlement.
- Click Submit.
- You’ll land on a Thank You confirmation. Click Check status to open the transaction’s detail page.
Withdrawing funds
A withdrawal moves funds out — onchain to a wallet, or offramp to a bank account, depending on the payment instruction you pick.- On the account page, click Withdrawal.
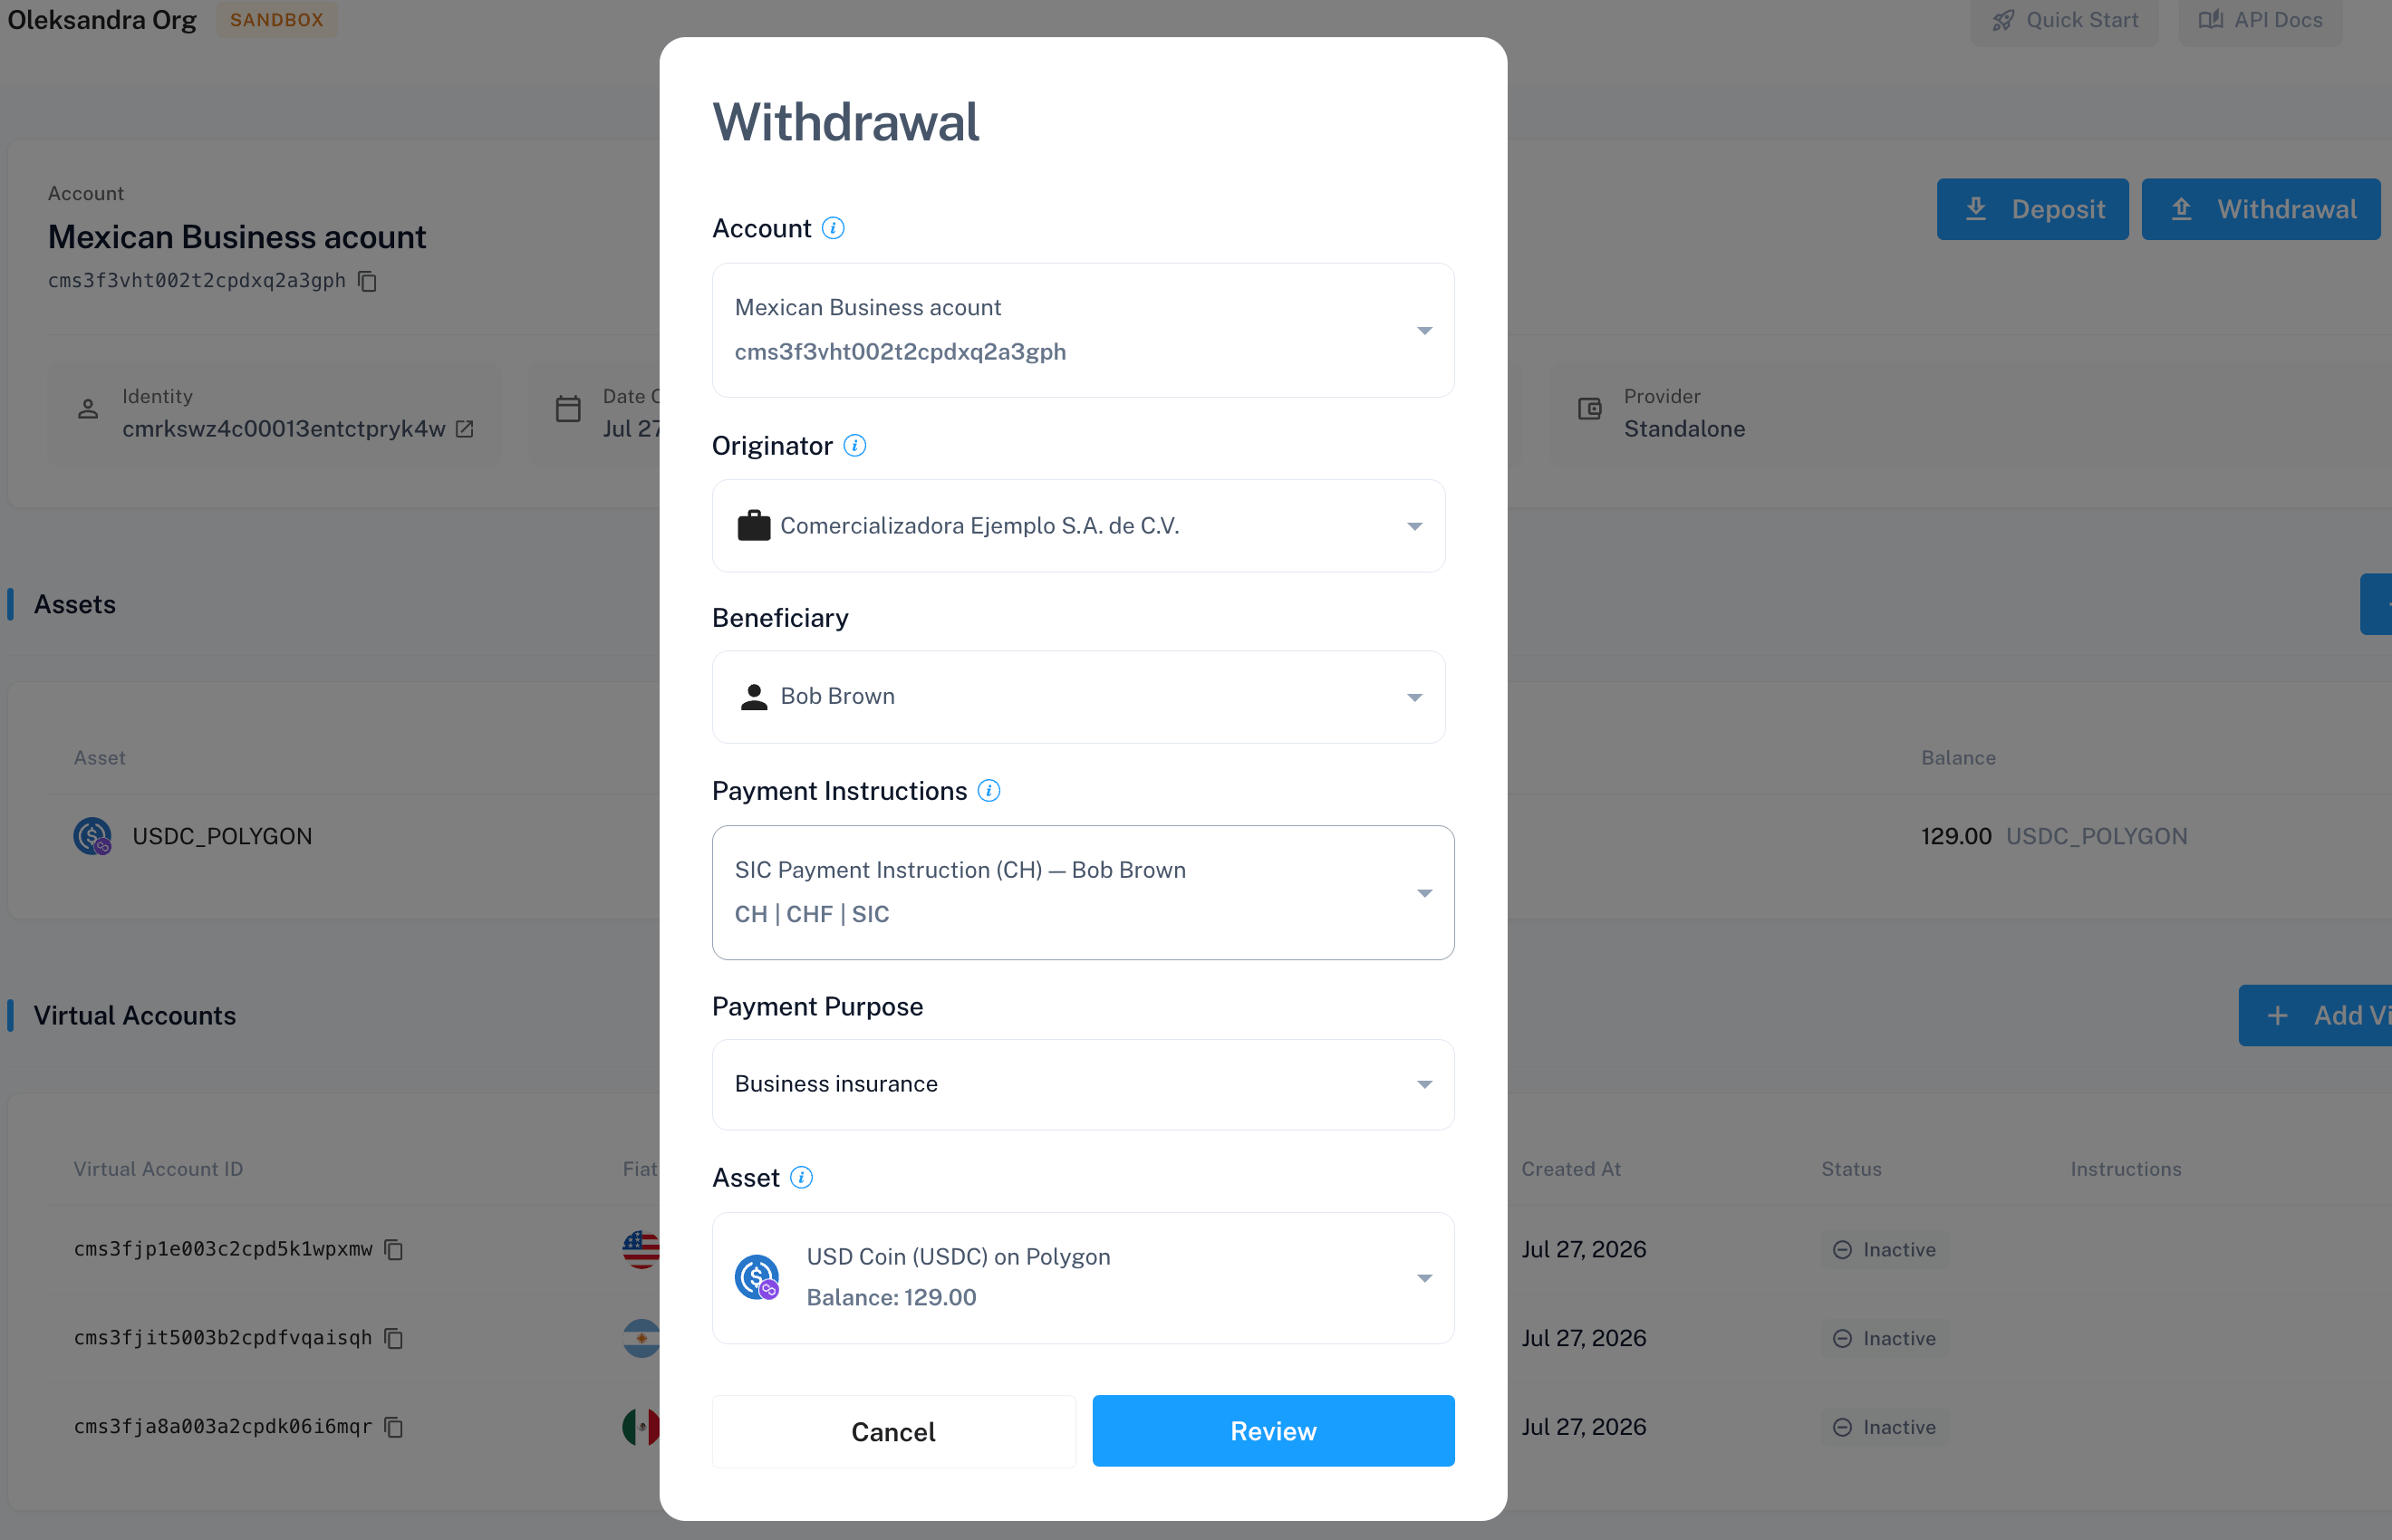
- Fill in the form:
- Account, Originator — same as Deposit.
- Beneficiary — who receives the funds. It auto-fills to match Originator whenever you change Originator — including if you’d already edited Beneficiary by hand, so re-check it after changing Originator.
- Payment Instructions — where the funds go. Picking one back-fills country, fiat, and payment method. “No available payment instructions” means you need to add one first.
- Payment Purpose — required (for example, salary payment, rent payment, or property purchase).
- Asset — shown only for Web3 accounts; hidden on balance accounts, which pay out directly in fiat.
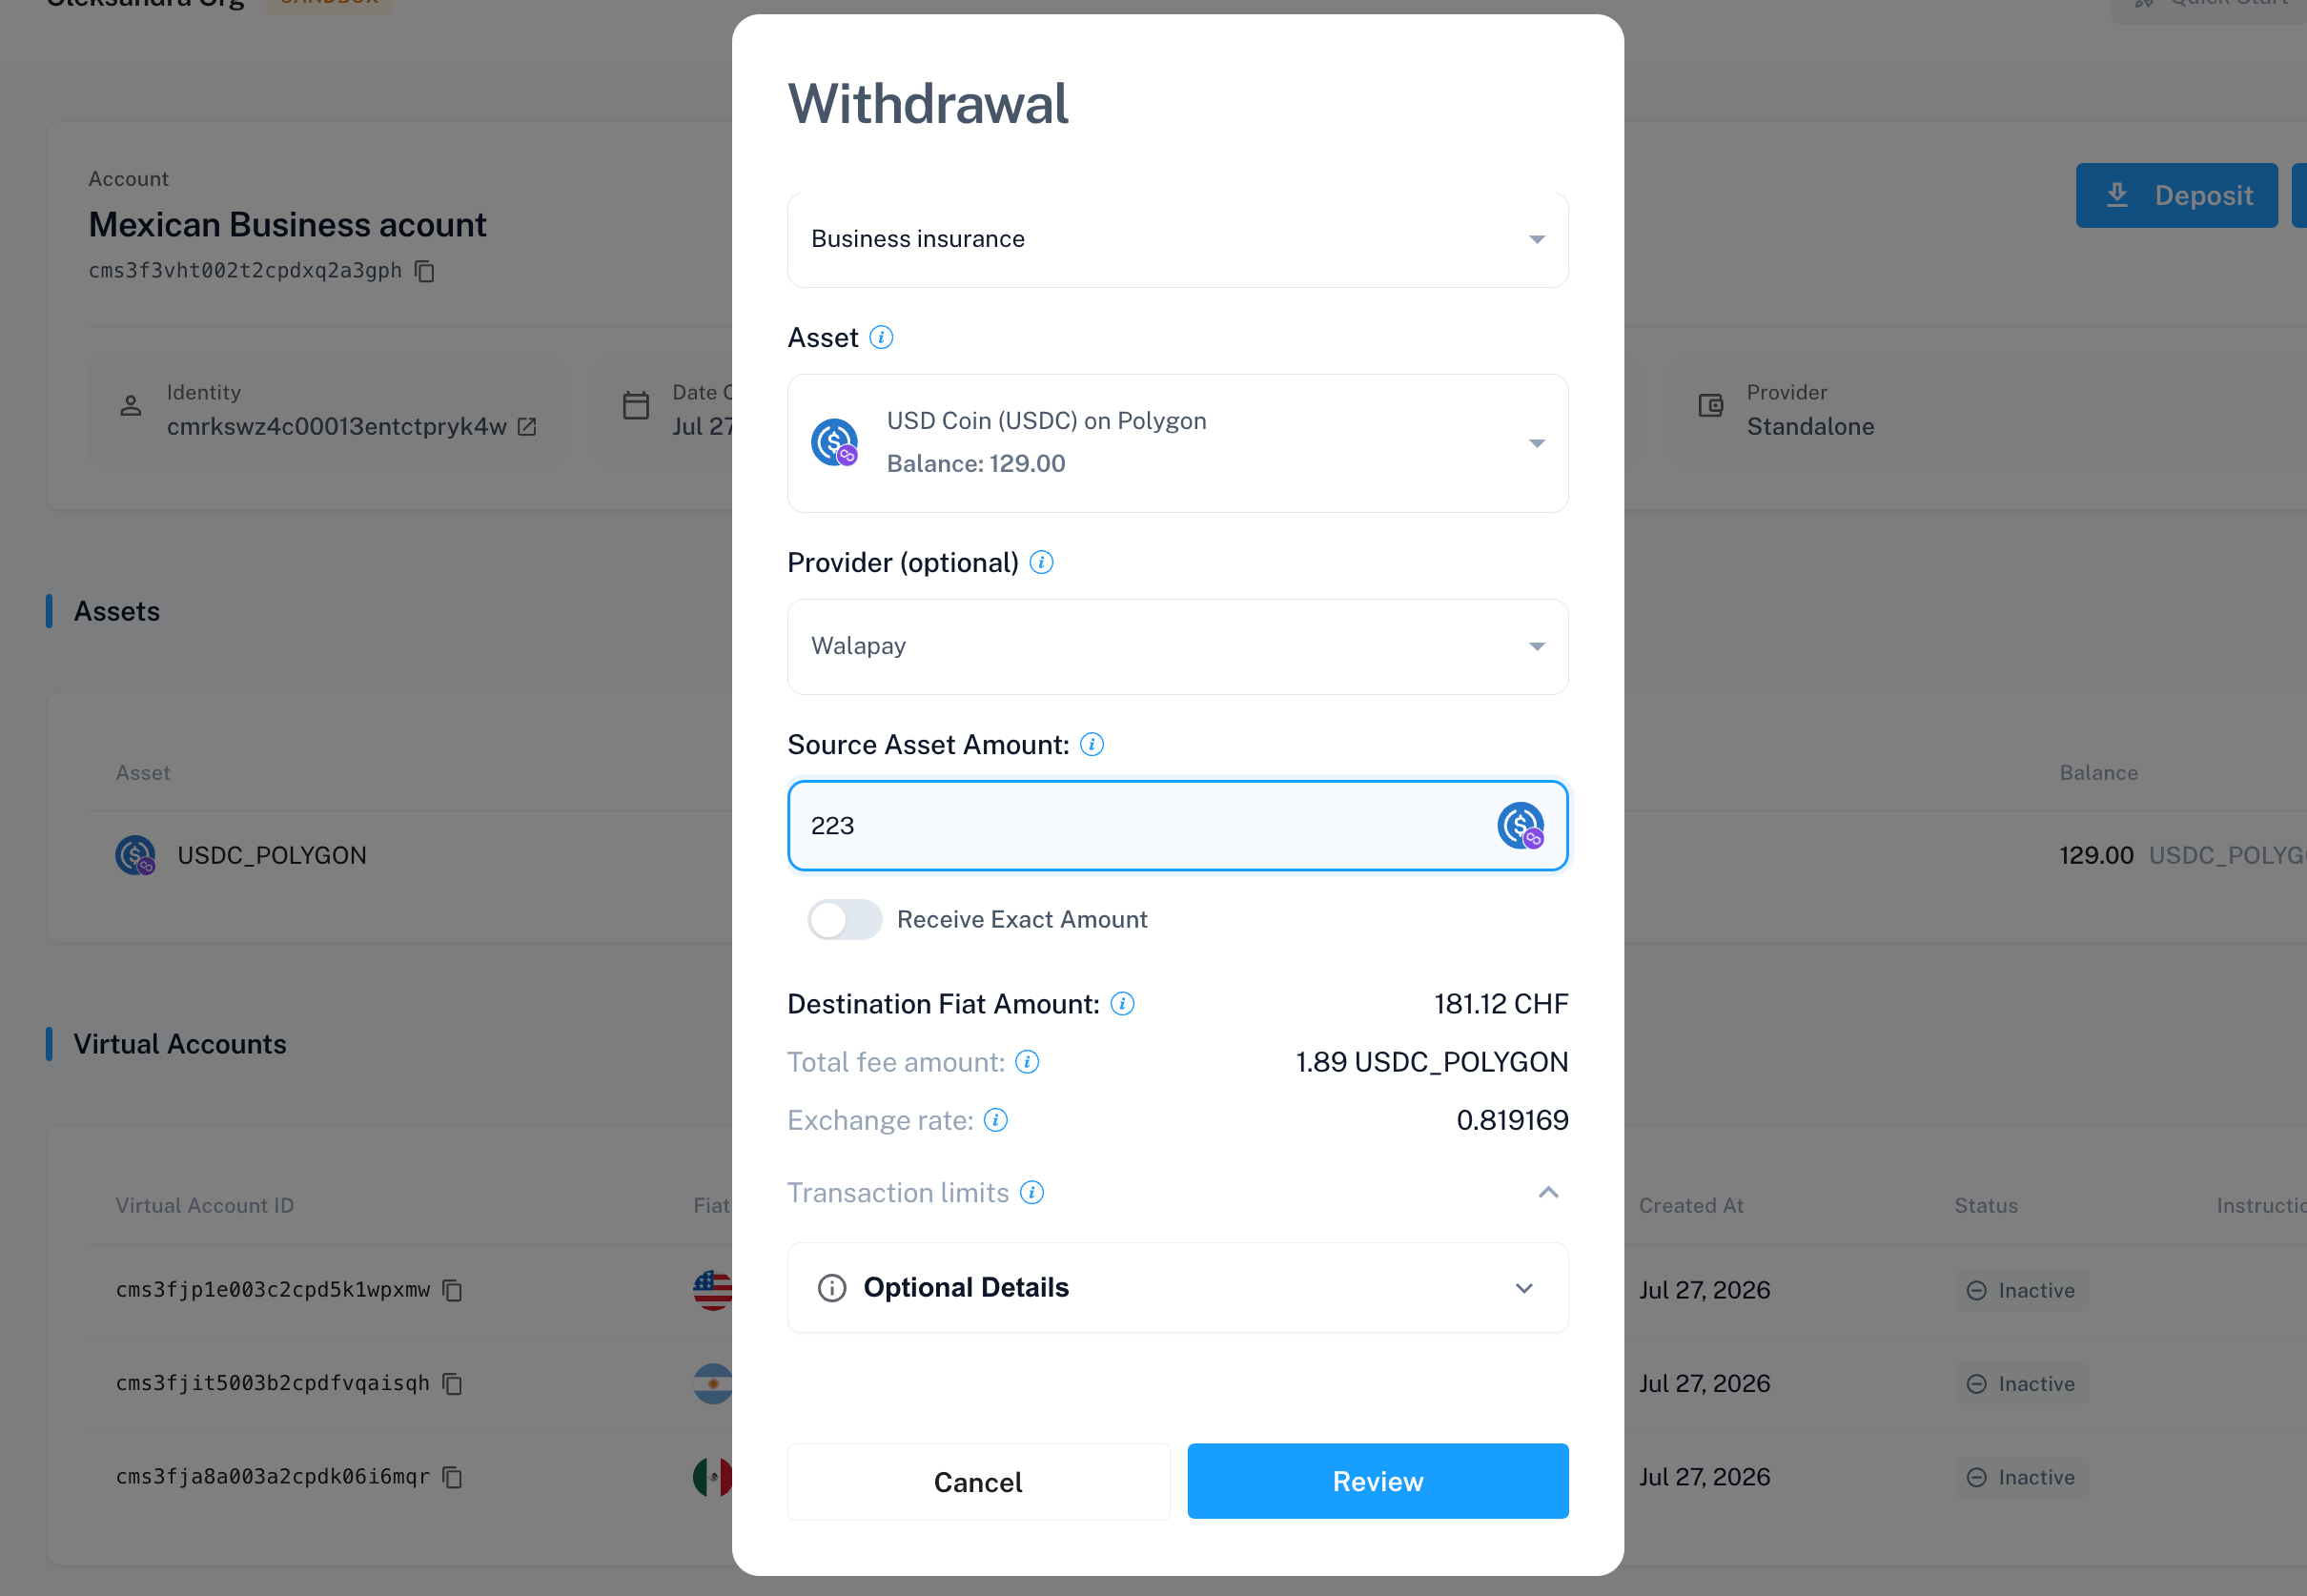
- Provider (optional) — same as Deposit.
- Amount — same Receive Exact Amount toggle as Deposit.
- Optional: expand Optional Details for a Reference message (length depends on the rail — 1–256 characters for wire, 1–10 for ACH, 6–140 for SEPA, 1–190 for SWIFT) and to attach a document.
- Click Review — disabled until a quote loads.
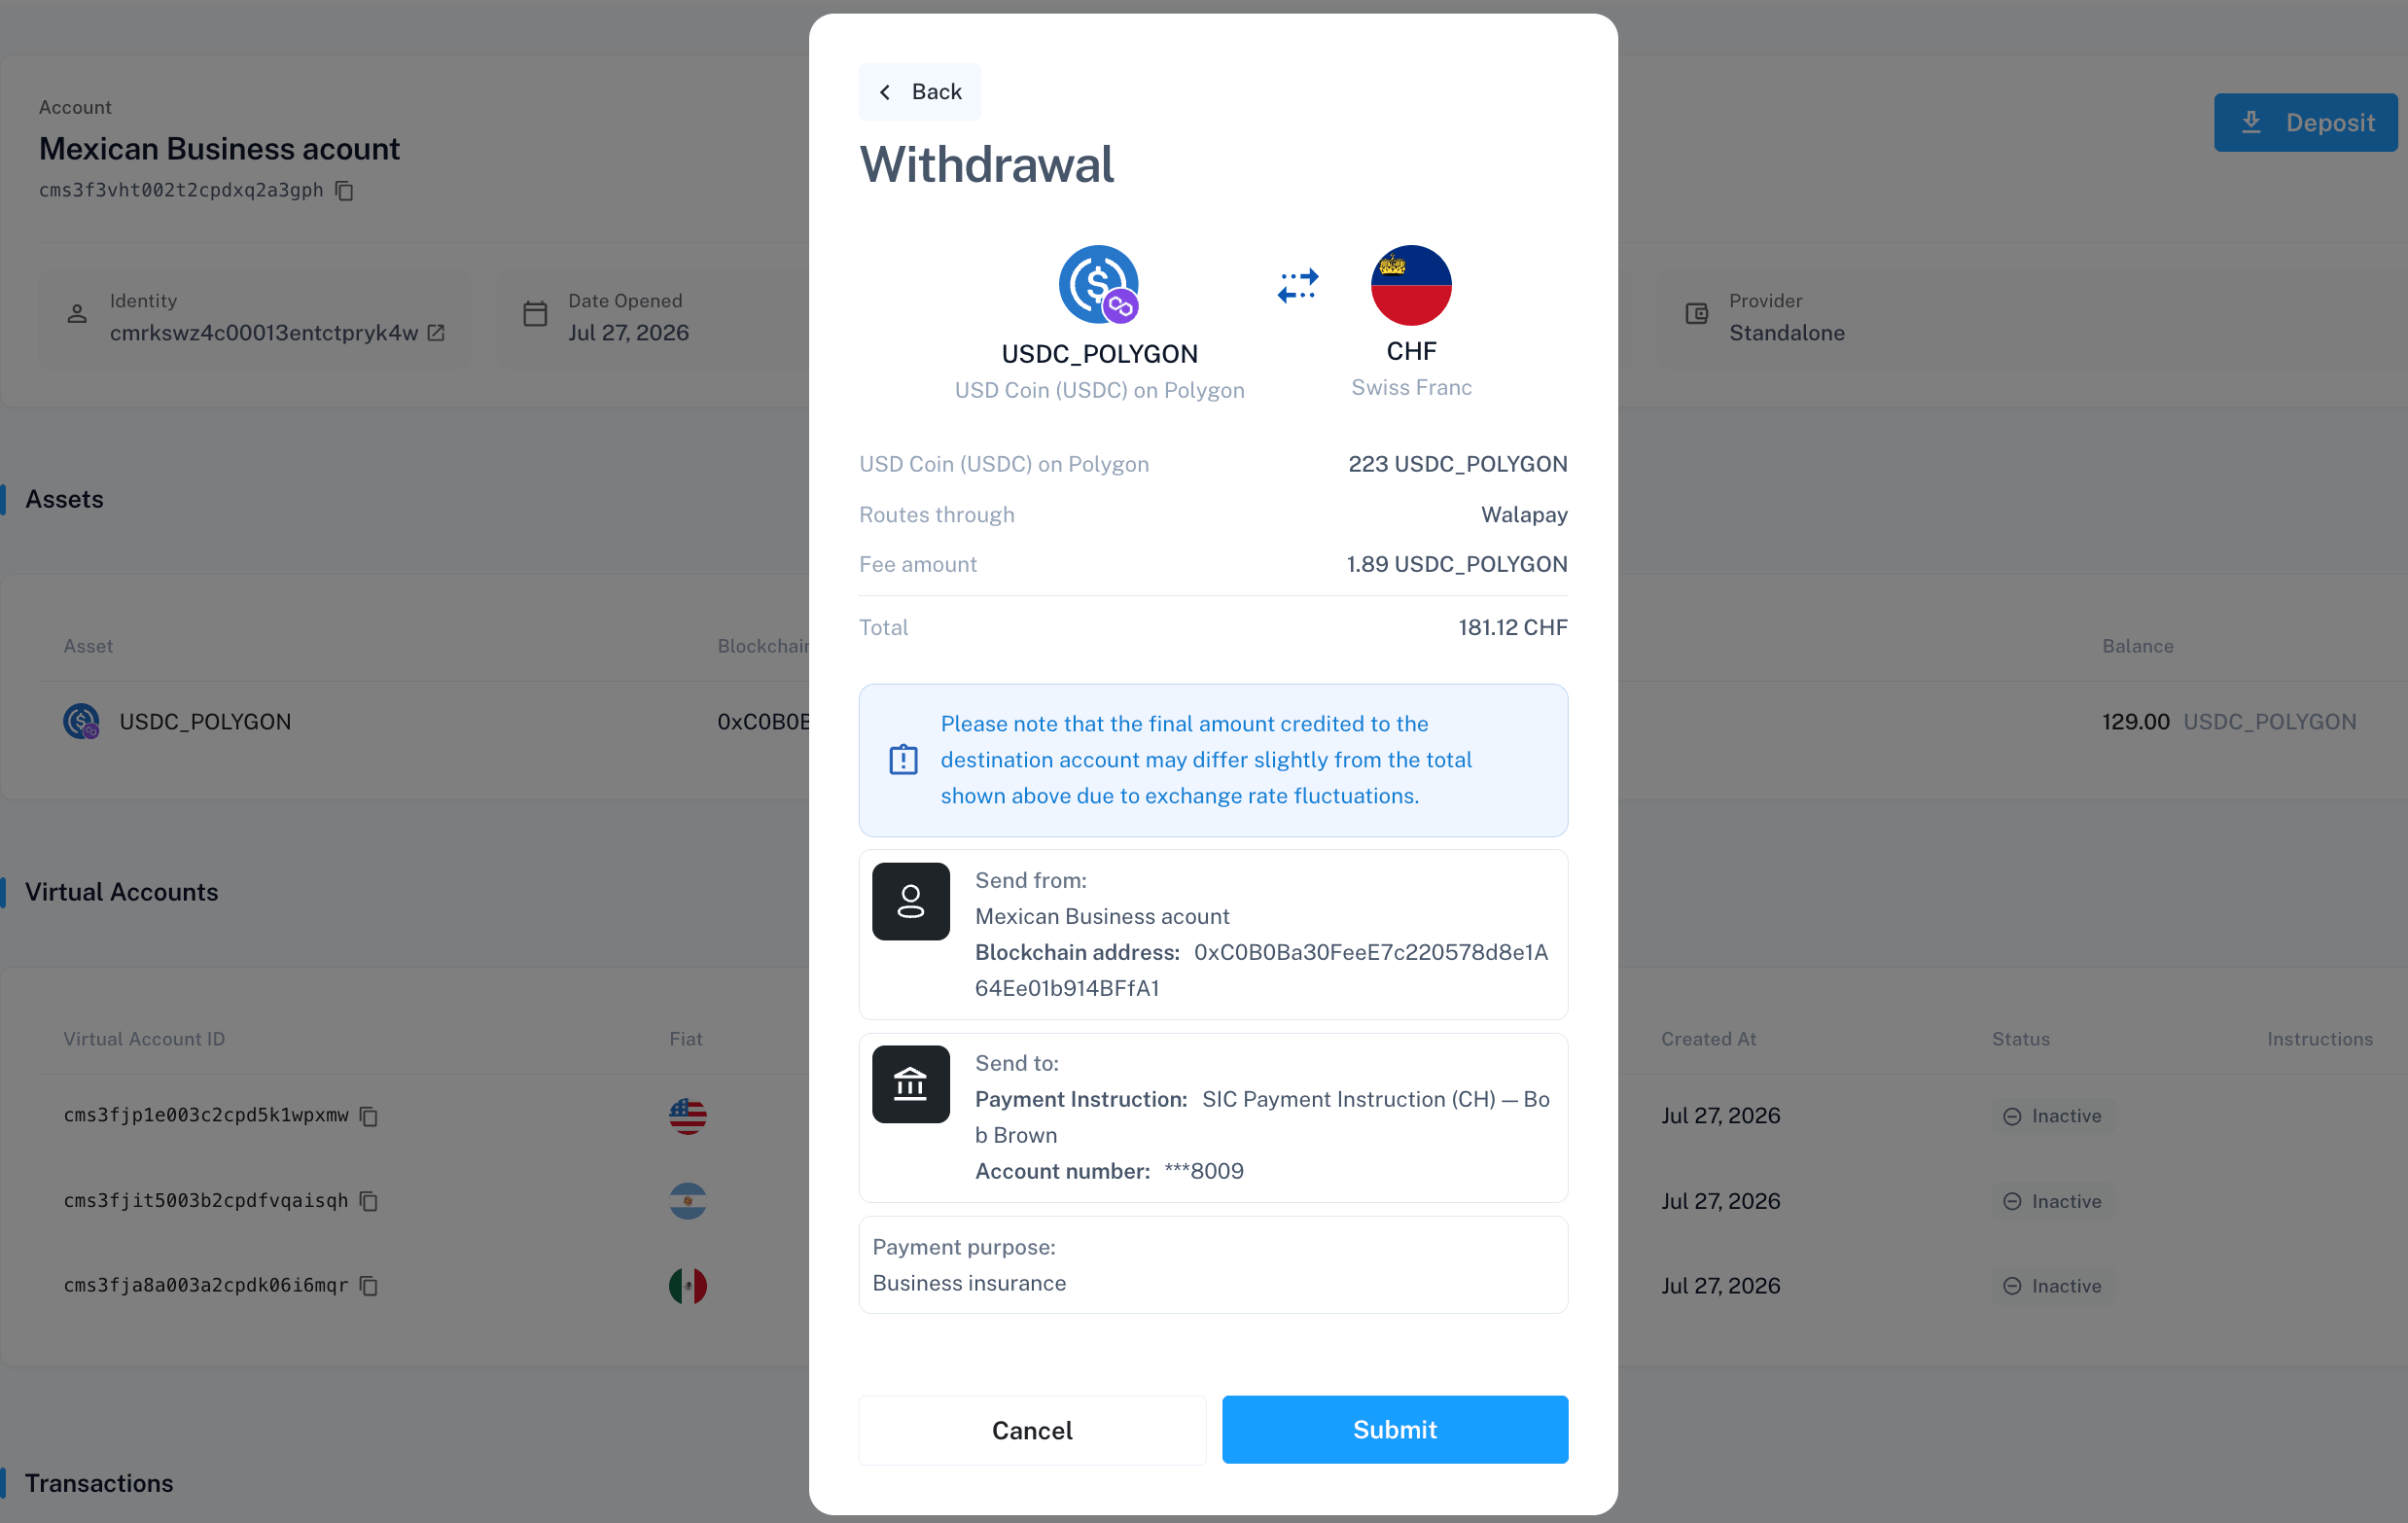
- Check the review screen: amount, provider, fee, total, payment purpose, and your reference if you added one. The same FX-fluctuation notice as Deposit applies.
- Click Submit, then Check status on the confirmation screen.
Exchanging funds
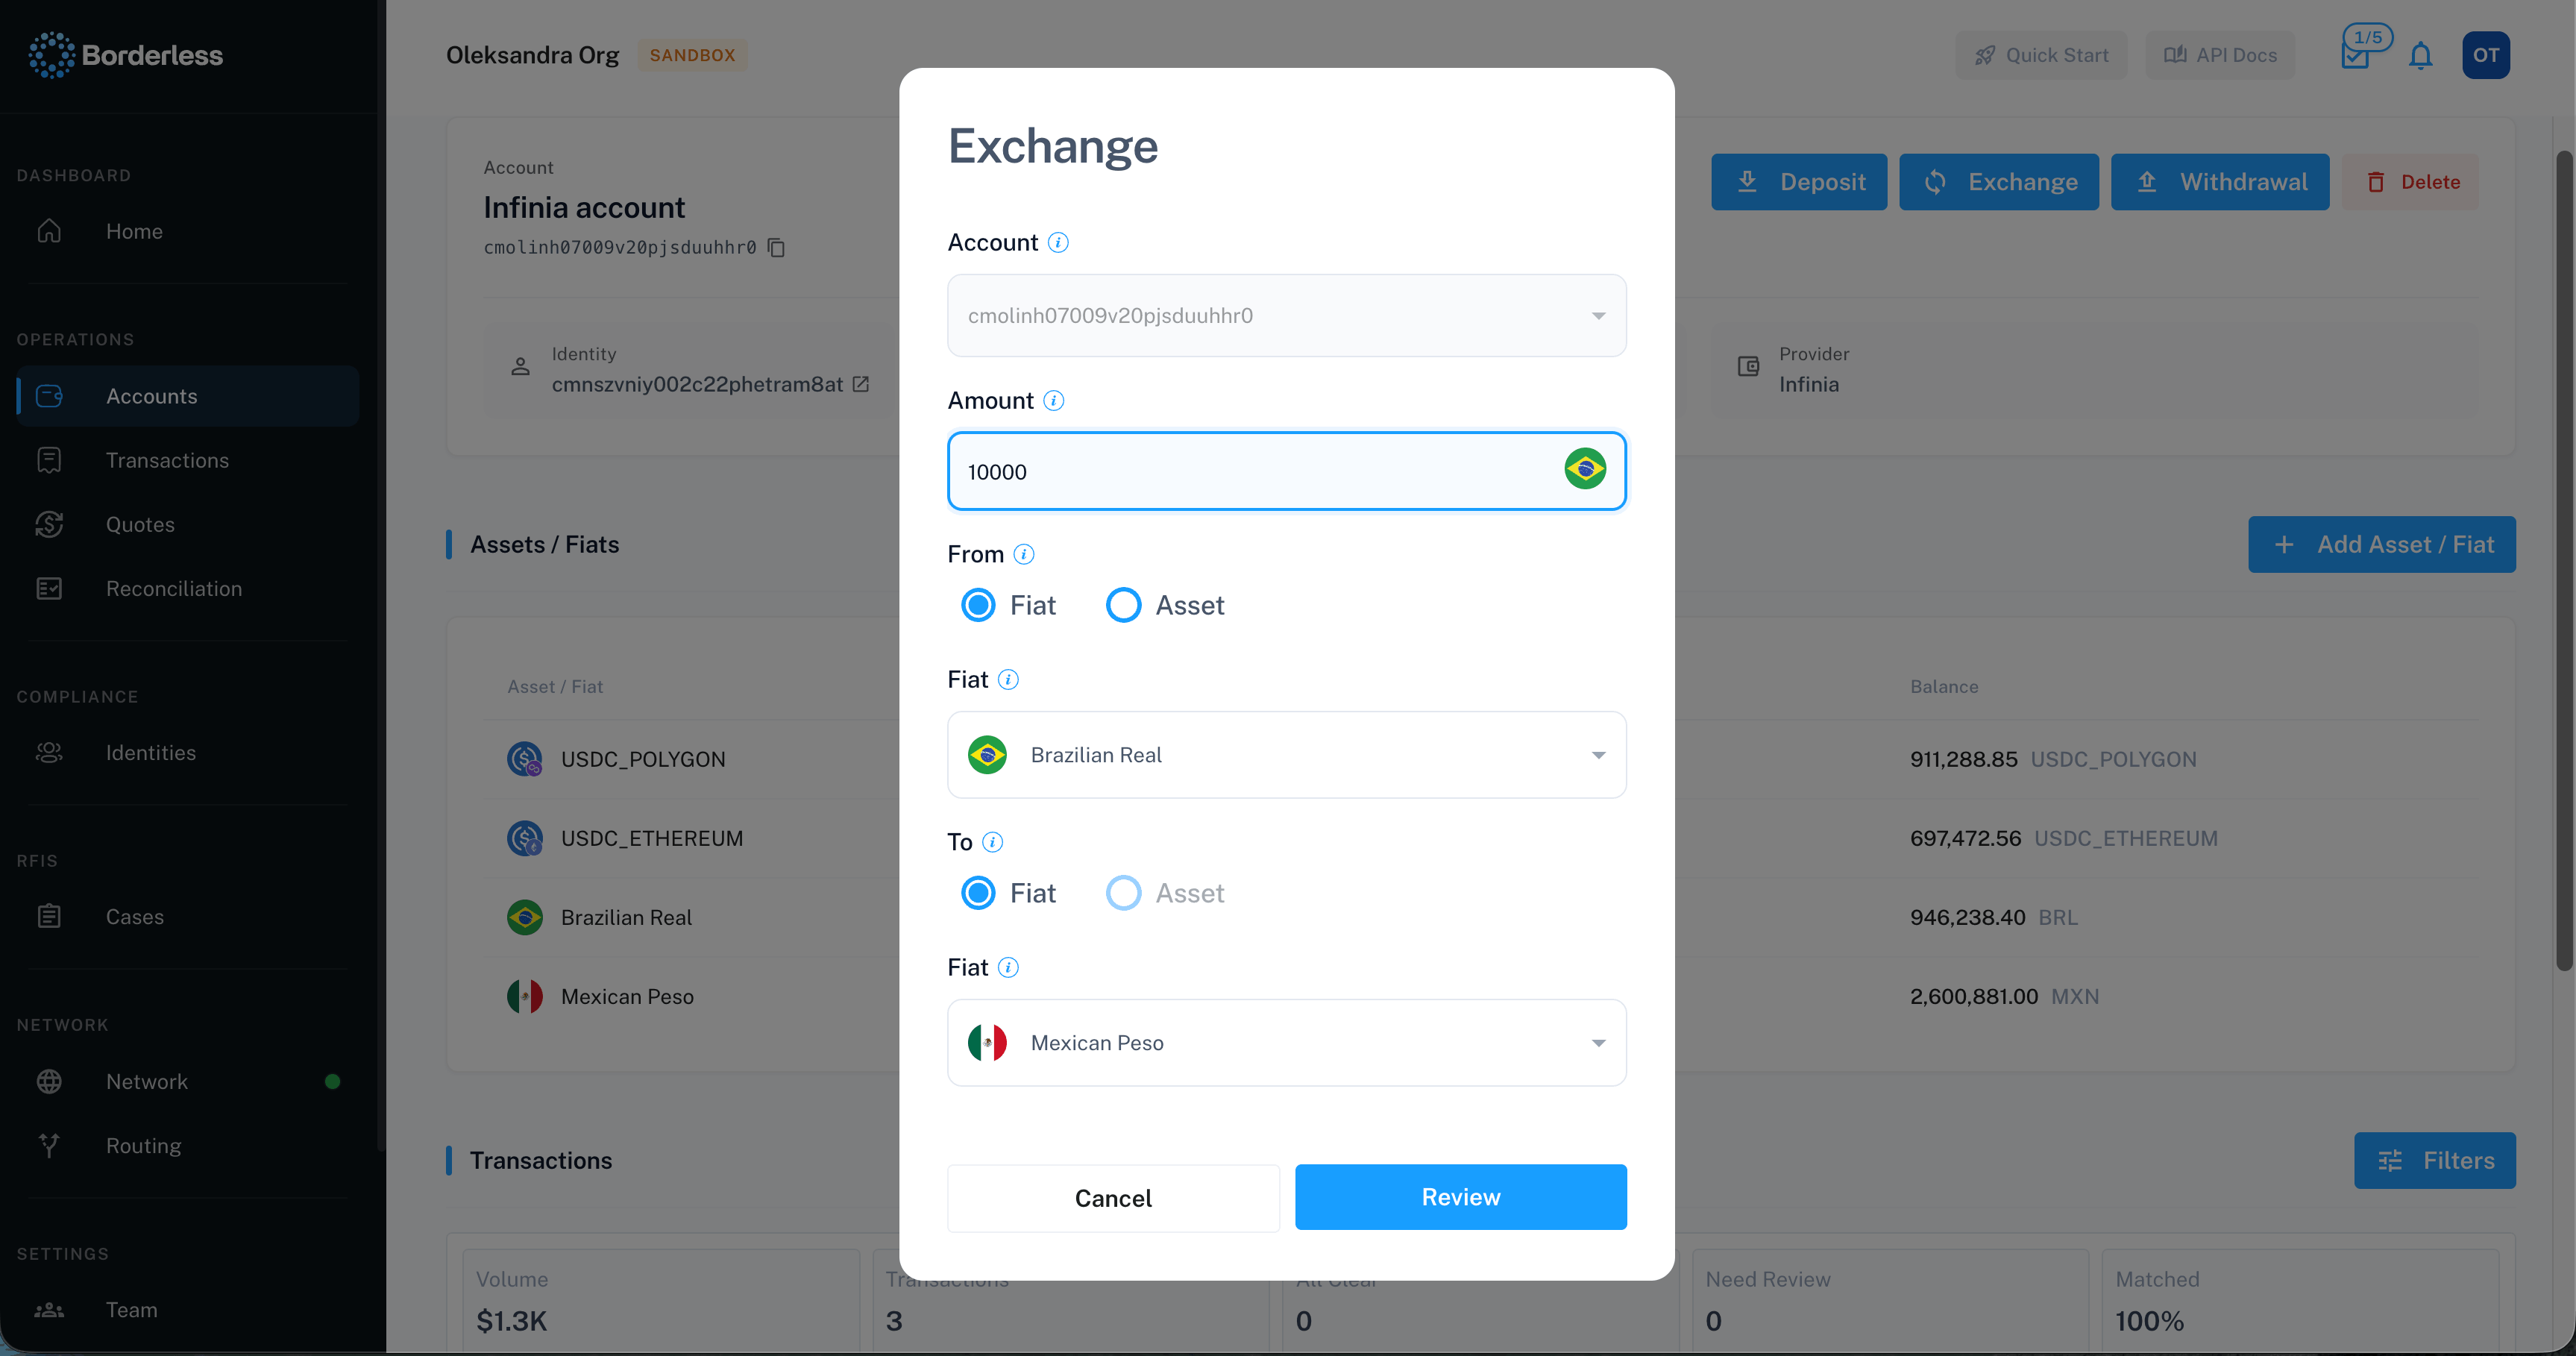
Exchange converts one asset to another inside a balance you hold with a provider — without a deposit or a withdrawal. No money comes in and none goes out, so you can manage conversions separately from money movement.- On the account page, click Exchange.
- Fill in Amount and choose the From and To sides. Each side is either a fiat currency or an asset — what’s available to select depends on your providers and their configuration.
- Click Review.
- Check the total and the account the exchange happens within.
- Click Submit, then Check status.
Checking transaction status
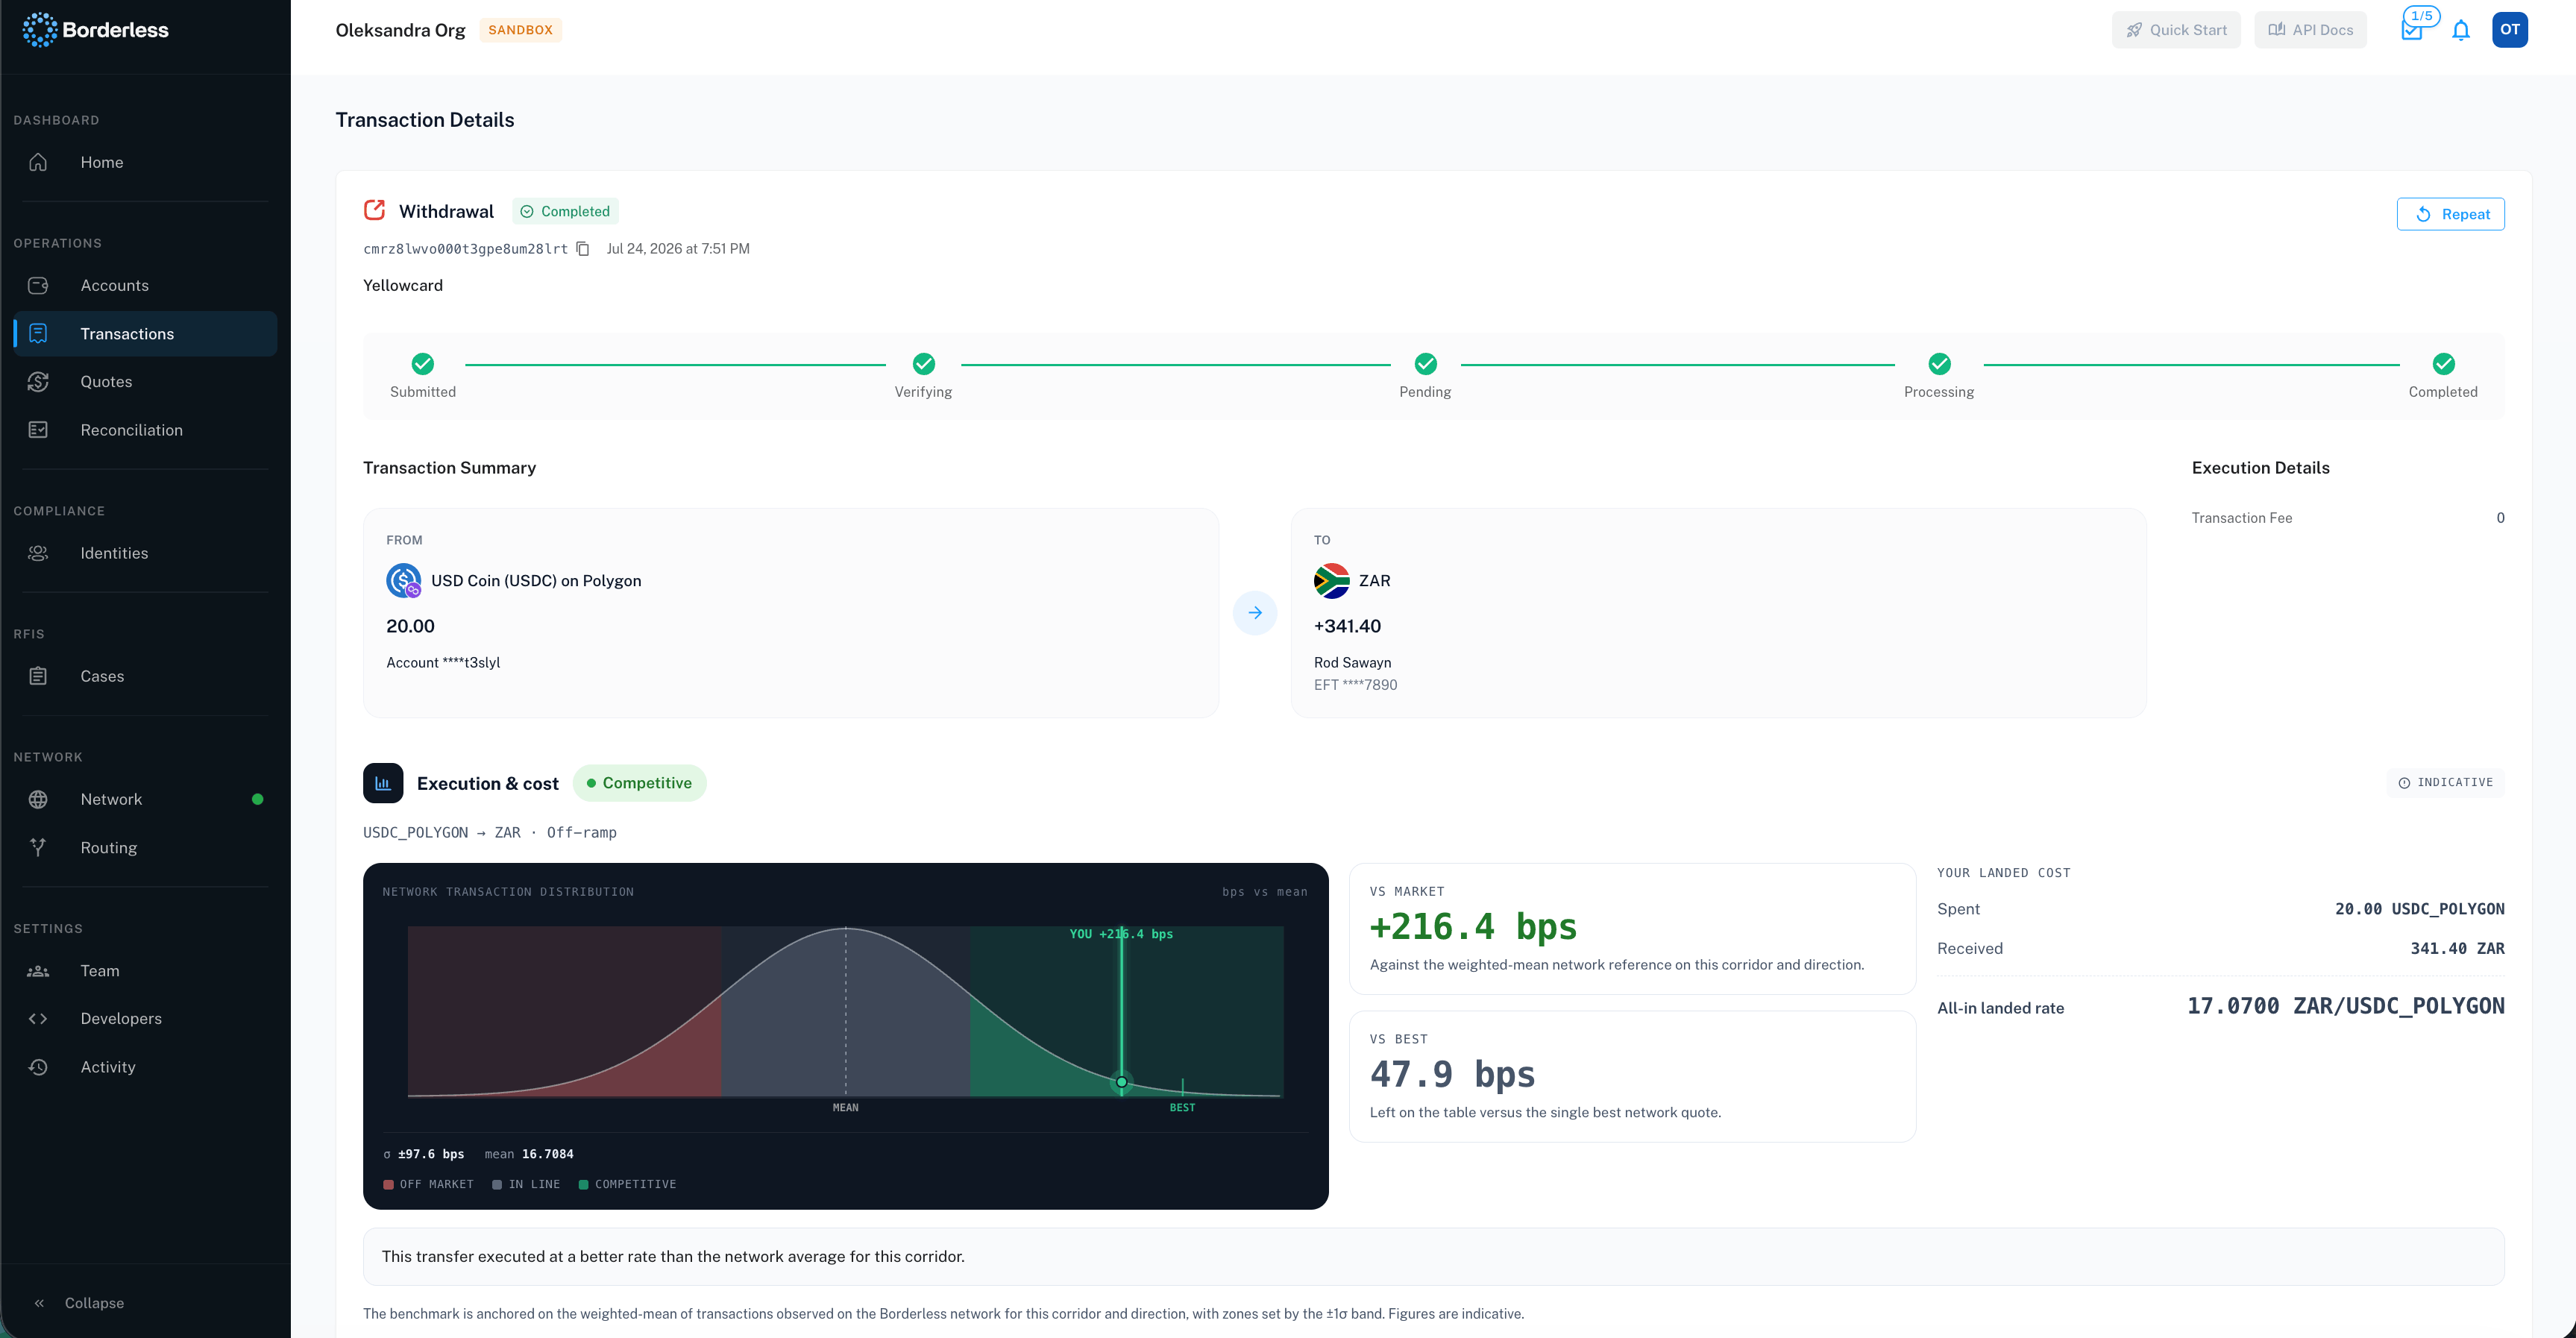
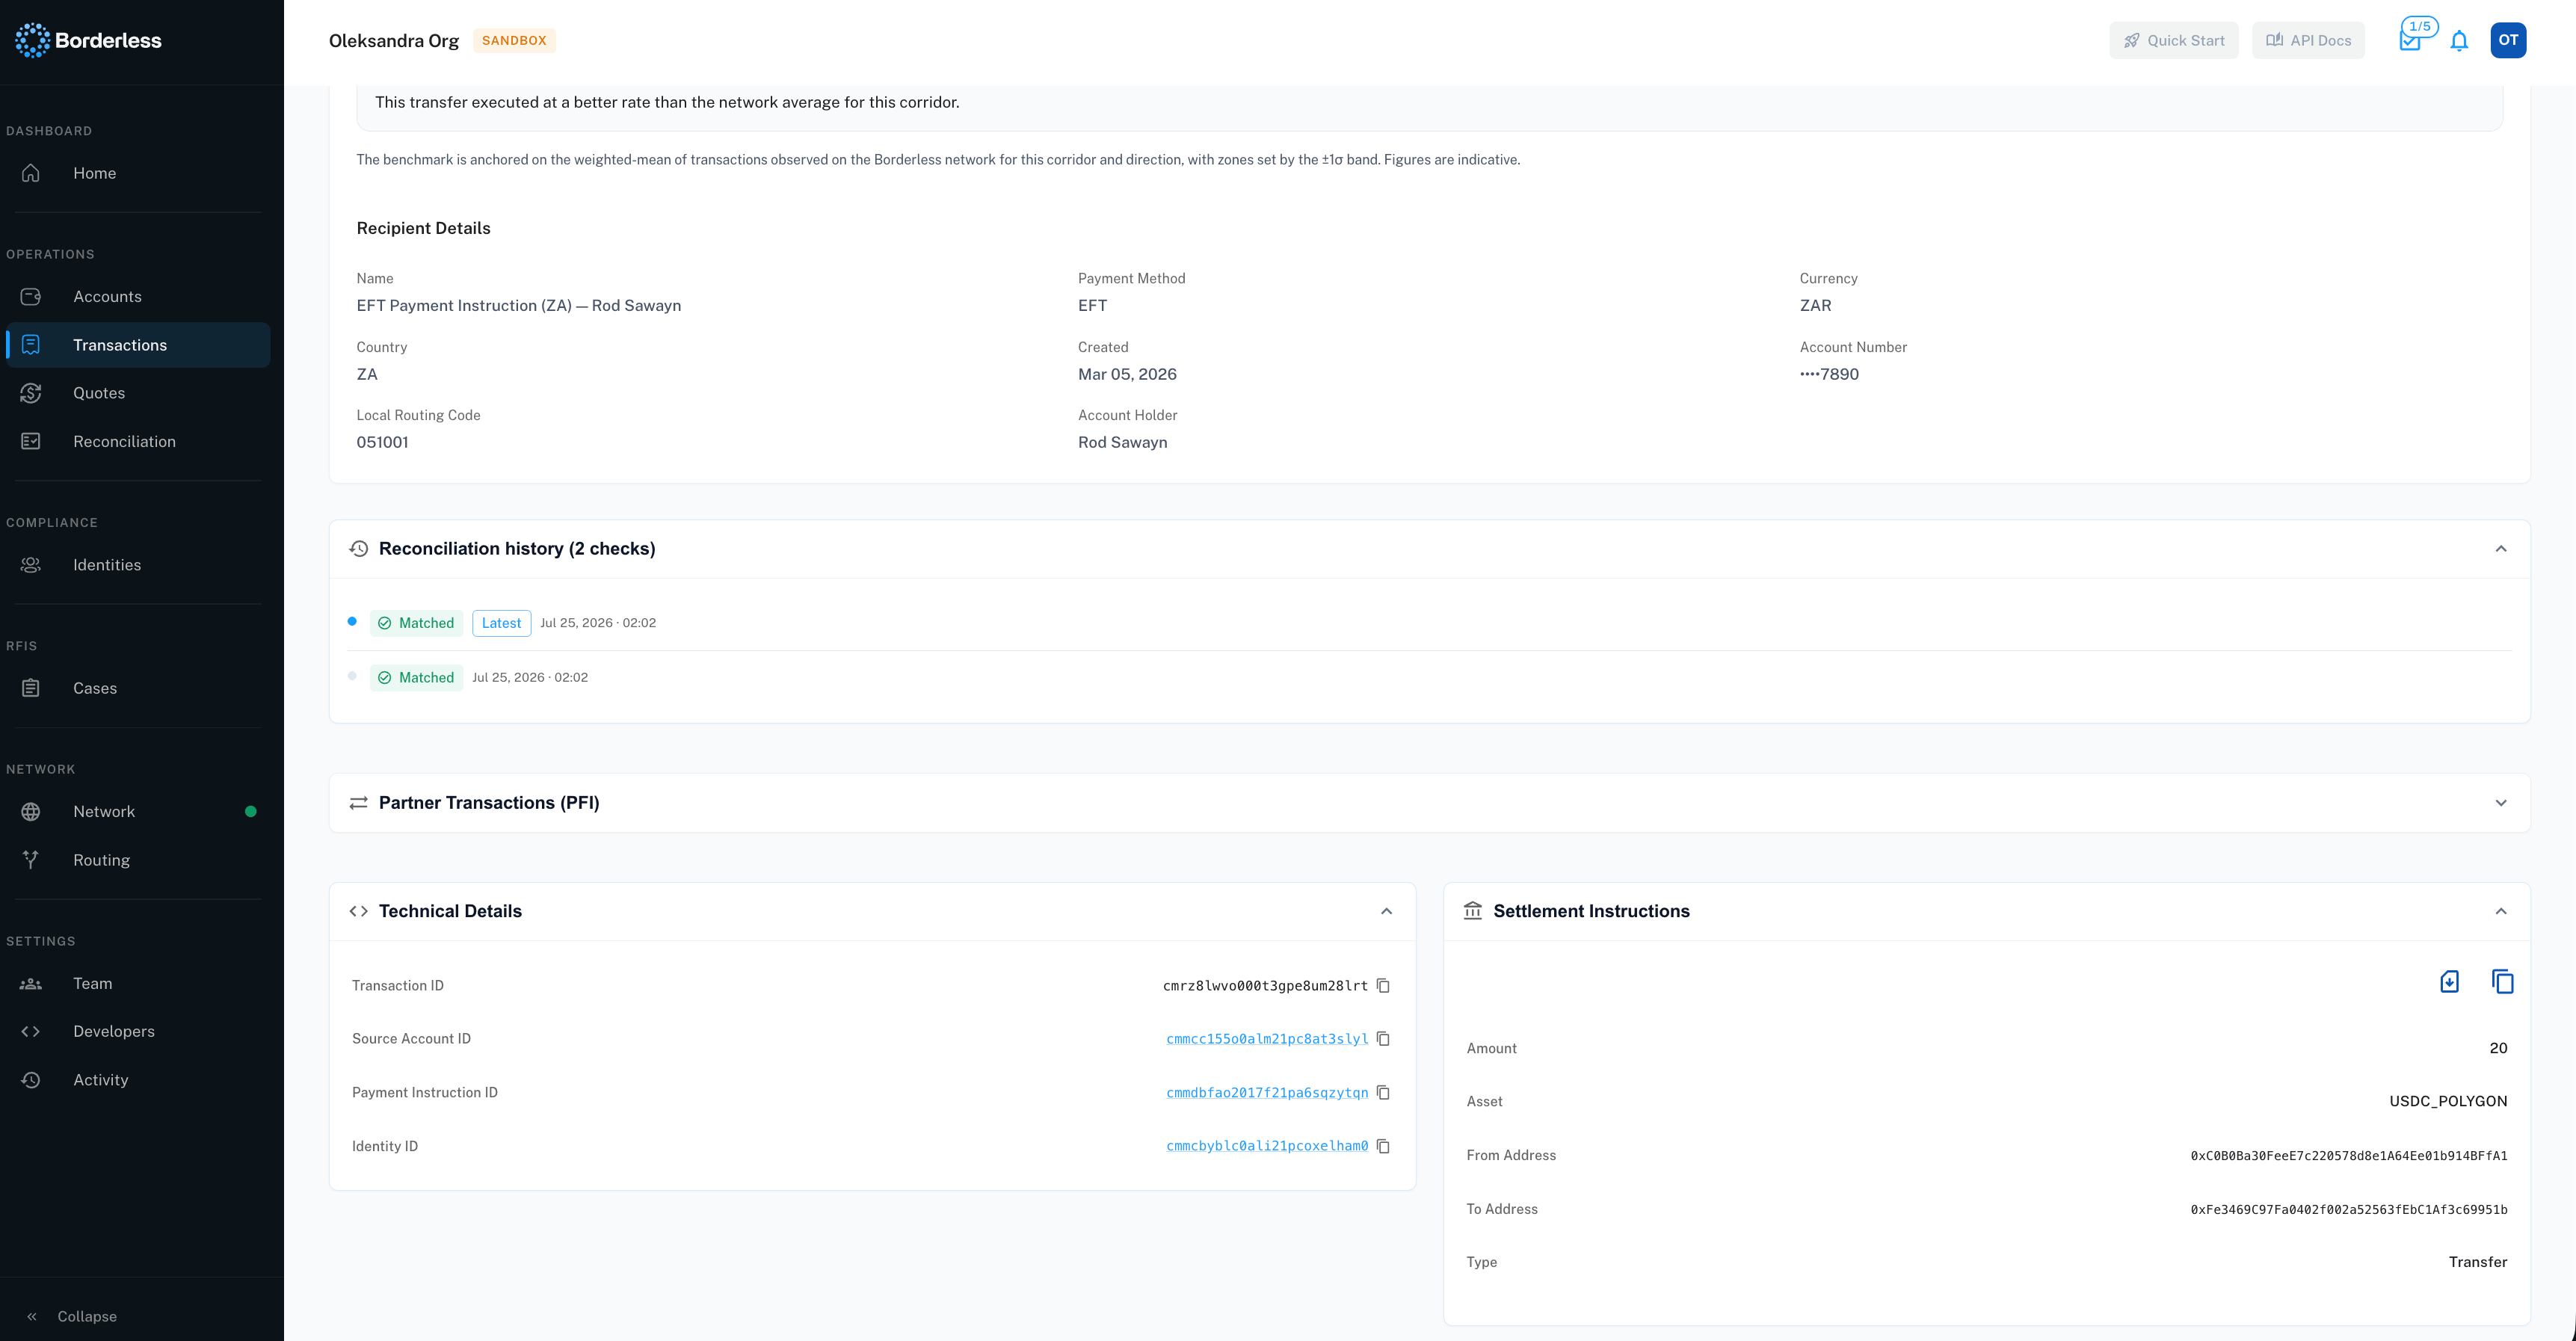
Go to Transactions to see every transaction, or view them embedded on an account’s page. The All / Orchestrated / Imported tabs filter between transactions Borderless routed and ones imported from a connected provider without Borderless routing. The table shows date, type, source and destination accounts and amounts, status, provider, and transaction ID. Click a row to open its detail page, or use the copy icon in the table header to copy every visible transaction ID at once.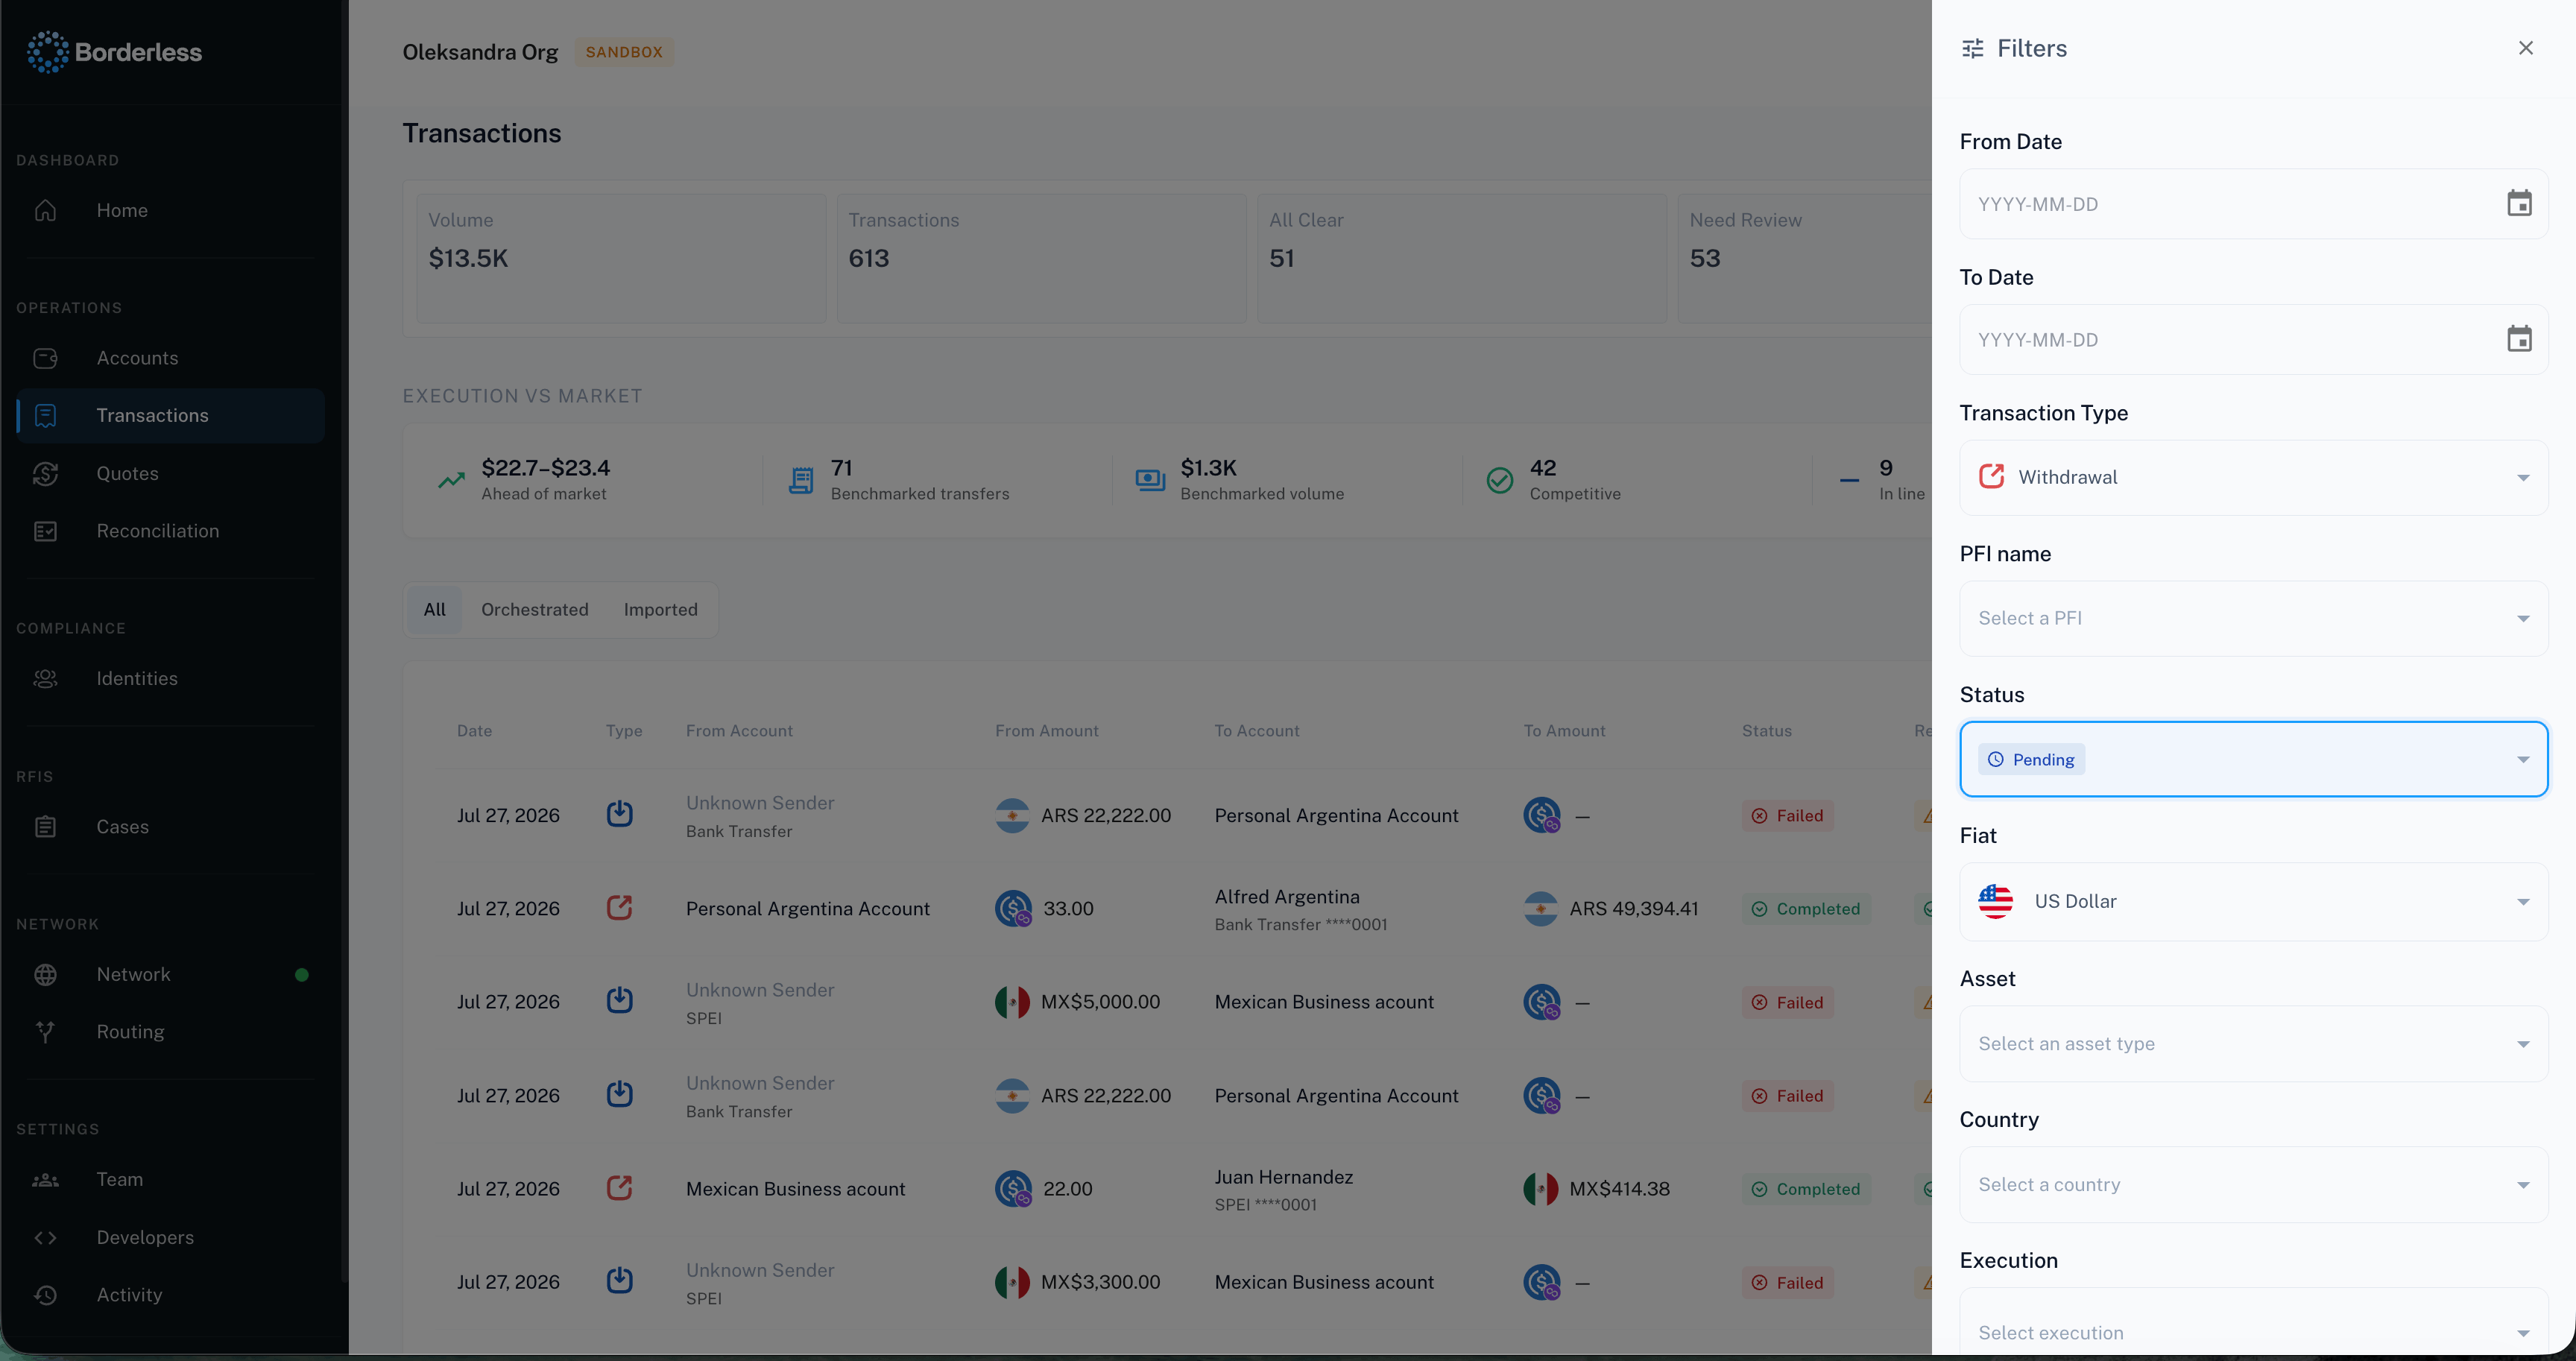
- Pending means the transaction needs action from you — the detail page shows what to do.
- Failed, Cancelled, and Refunded are end states; a failed transaction shows the reason on its detail page.
Cancelling a transaction
You can cancel only while a transaction is Submitted, Verifying, Orchestrating, or Pending. Once it reaches Processing, there’s no cancel option.- Open the transaction’s detail page.
- Click Cancel.
- Read the confirmation dialog: cancellation isn’t guaranteed — it depends on the stage the provider has reached.
- Click Confirm.
Exporting and filtering transactions
From the Transactions list, click Filters to narrow the table by date, type, provider, status, currency, asset, country, or account ID, then Apply. Click Export to download a CSV — you need the Export Transactions permission to see this button. Export opens its own blank filter form (date range, type, provider, status, source/destination account ID); it isn’t pre-populated from the Filters panel, so set your criteria there separately rather than assuming it exports whatever the table currently shows. Export is only available from the standalone Transactions page, not on the embedded Transactions view on an account’s page. This section covers the quick path; for everything about getting data out — filter details, filename conventions, reconciliation run exports, and size limits — see Exporting Reports.