The Network page shows every payment provider available to your organization, whether it’s live, ready to activate, or still coming. This guide covers browsing and filtering providers, reading a provider’s coverage and health, connecting your own credentials, and importing transactions that happened outside Borderless.

Before you start

Only users with the Owner role — or a Custom role explicitly granted the Enable Integrations permission — can configure credentials or import transactions. Everyone else can browse providers, view coverage, and check health status, but won’t see the action buttons described below.

Find the Network page

Click Network in the left navigation. The page opens with the header “Provider Network” and a subtitle telling you how many providers you have across how many countries. Provider Network page with stat tiles and provider cards Three tiles at the top summarize your network:
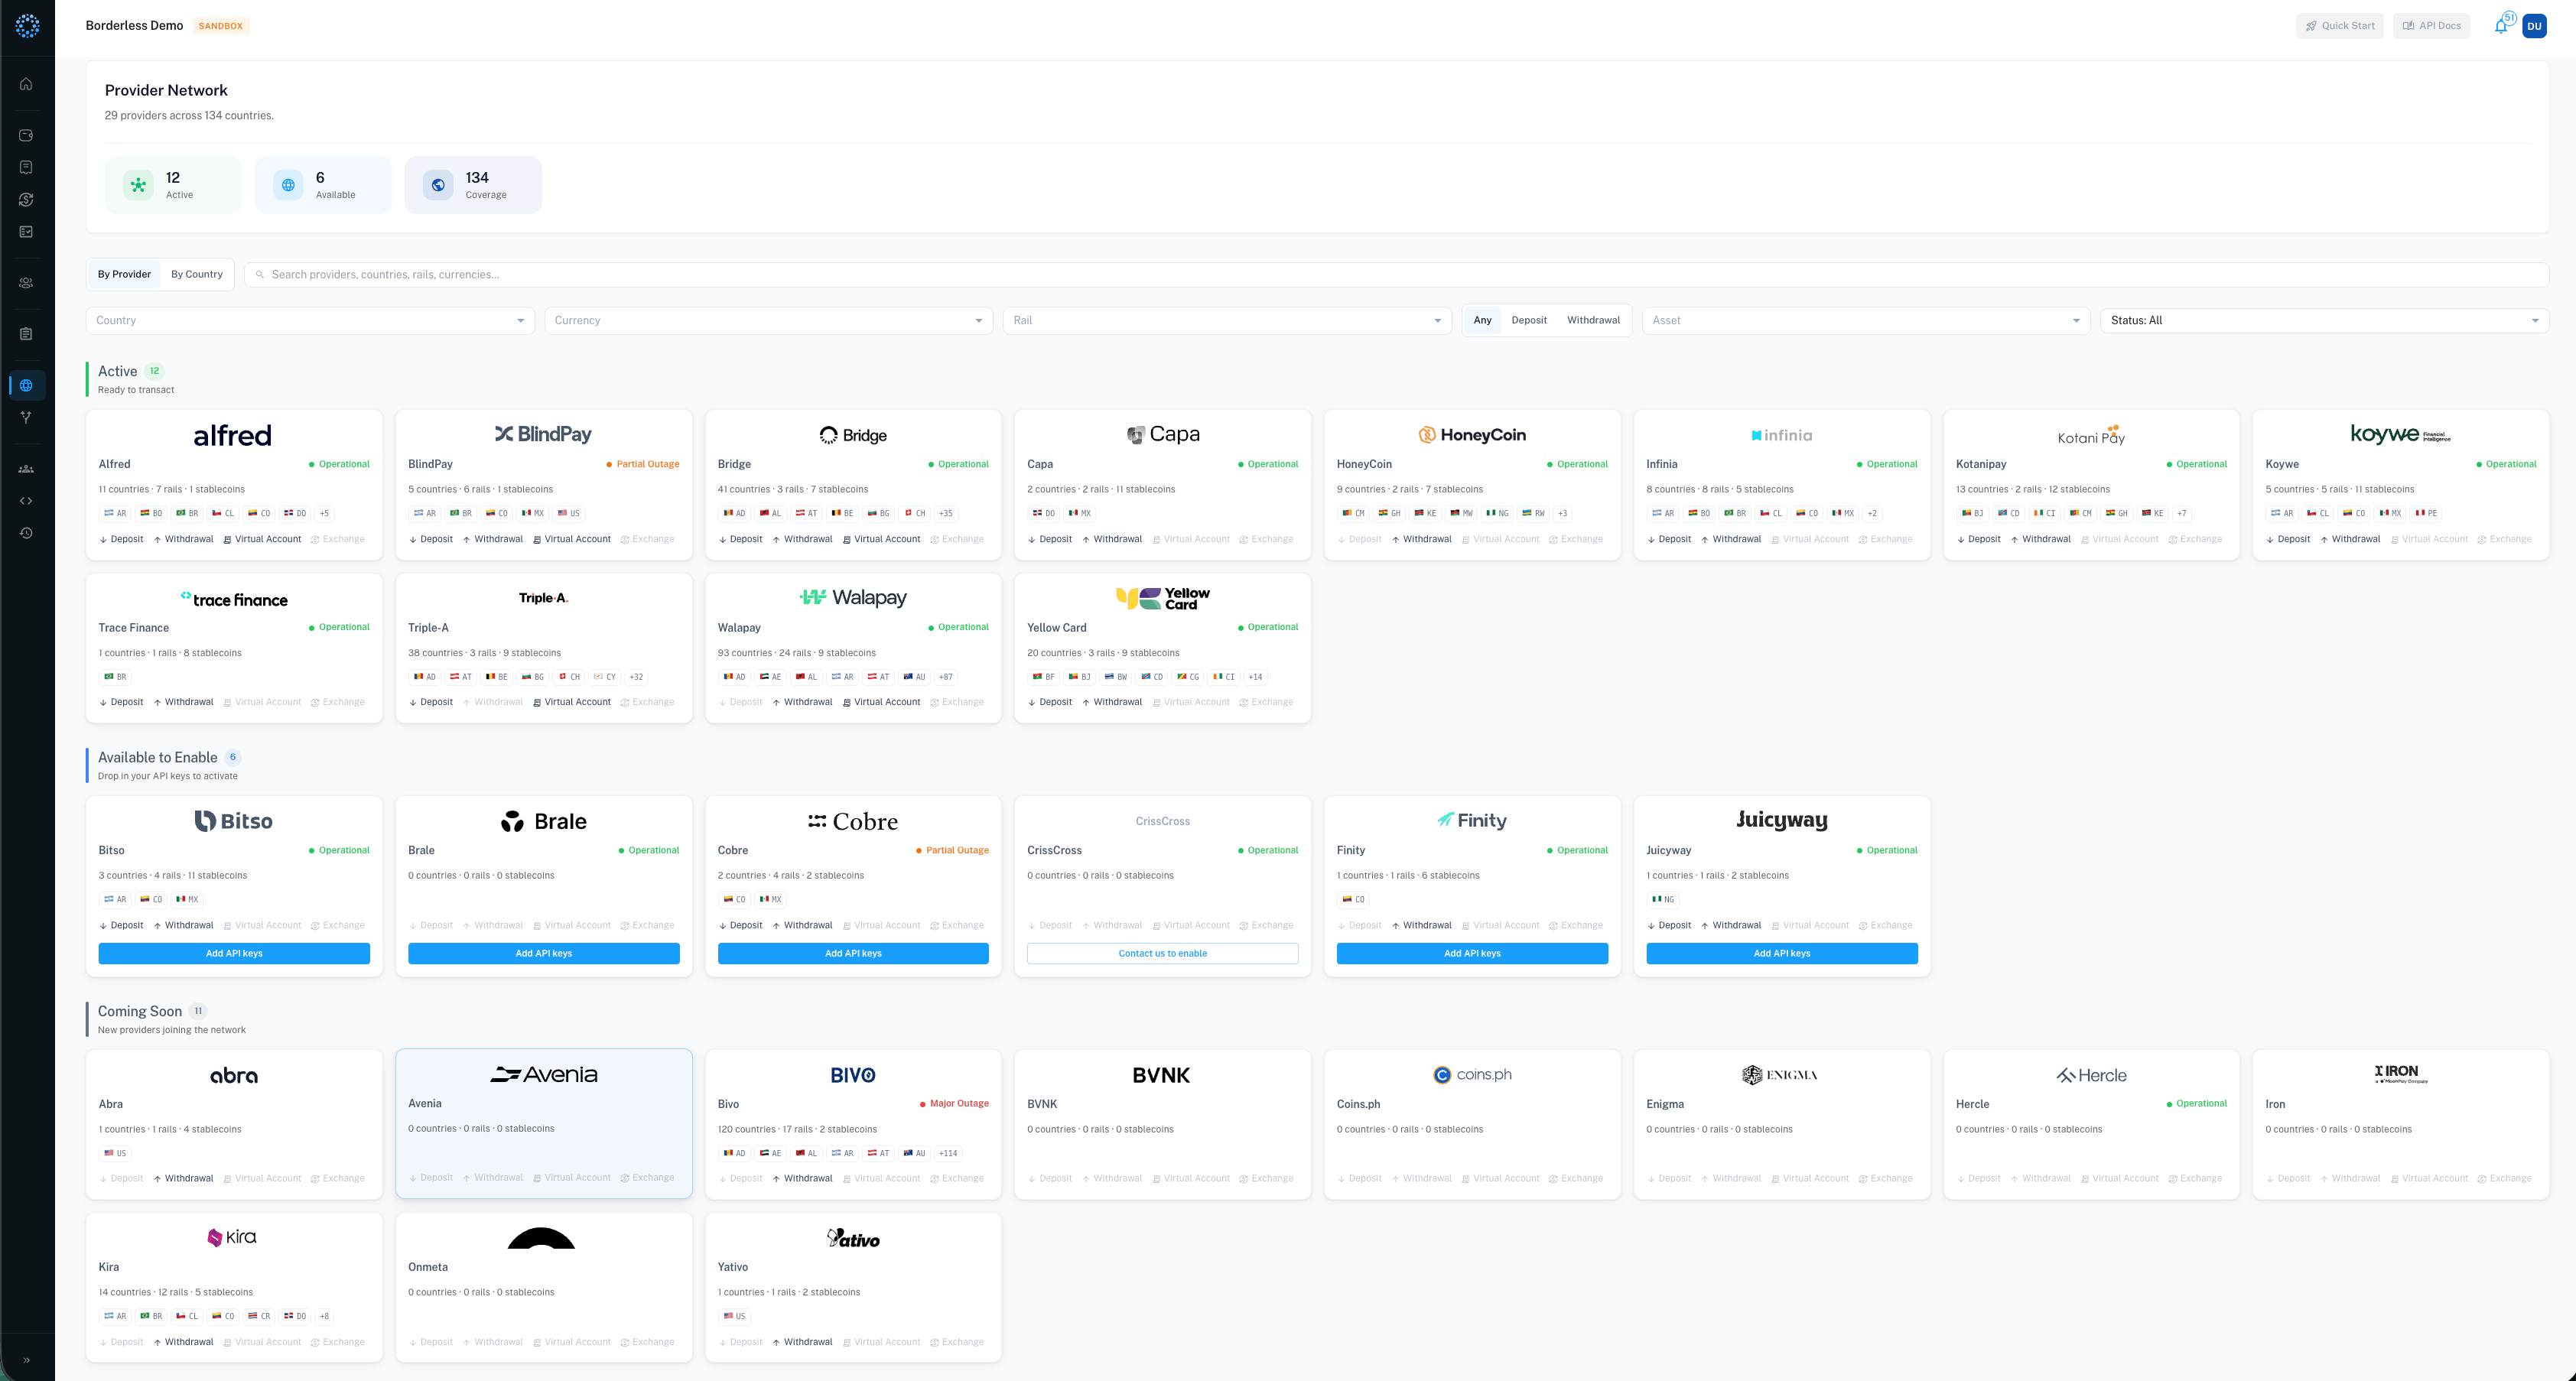
  • Active — providers ready to transact
  • Available — providers you can enable yourself
  • Coverage — number of distinct countries covered
Below the tiles, providers are grouped into three sections, each shown only if it has matching providers:
  • Active — “Ready to transact”
  • Available to Enable — “Drop in your API keys to activate”
  • Coming Soon — “New providers joining the network”

Explore providers by capability, country, and currency

The marketplace is how you explore the network: search and filter to see which providers offer the rails and services you need — who covers a country, who supports a currency or rail, who can do deposits versus withdrawals, who offers virtual accounts. Use the filter bar above the provider list:
  • Search — matches provider names, countries, rails, currencies, and more
  • Country, Currency, and Rail — multi-select filters
  • DirectionAny, Deposit, or Withdrawal
  • Asset — filter by stablecoin
  • StatusAll, Active, Available, or Coming Soon
Toggle By Provider or By Country to change how results are grouped. By Country groups providers under each country they cover; if any provider serving that country is Active, the country card shows as Active even if other providers there are only Available or Coming Soon — open the country to see the real breakdown provider by provider. If a filter is active, click Clear in the filter bar (or Clear all filters in an empty results state) to reset. Each provider card shows the provider’s logo and name, a health indicator (if available), how many countries, rails, and stablecoins it supports, and up to six country flags. Four capability icons — Deposit, Withdrawal, Virtual Account, Exchange — show which operations that provider supports.

Open a provider’s details

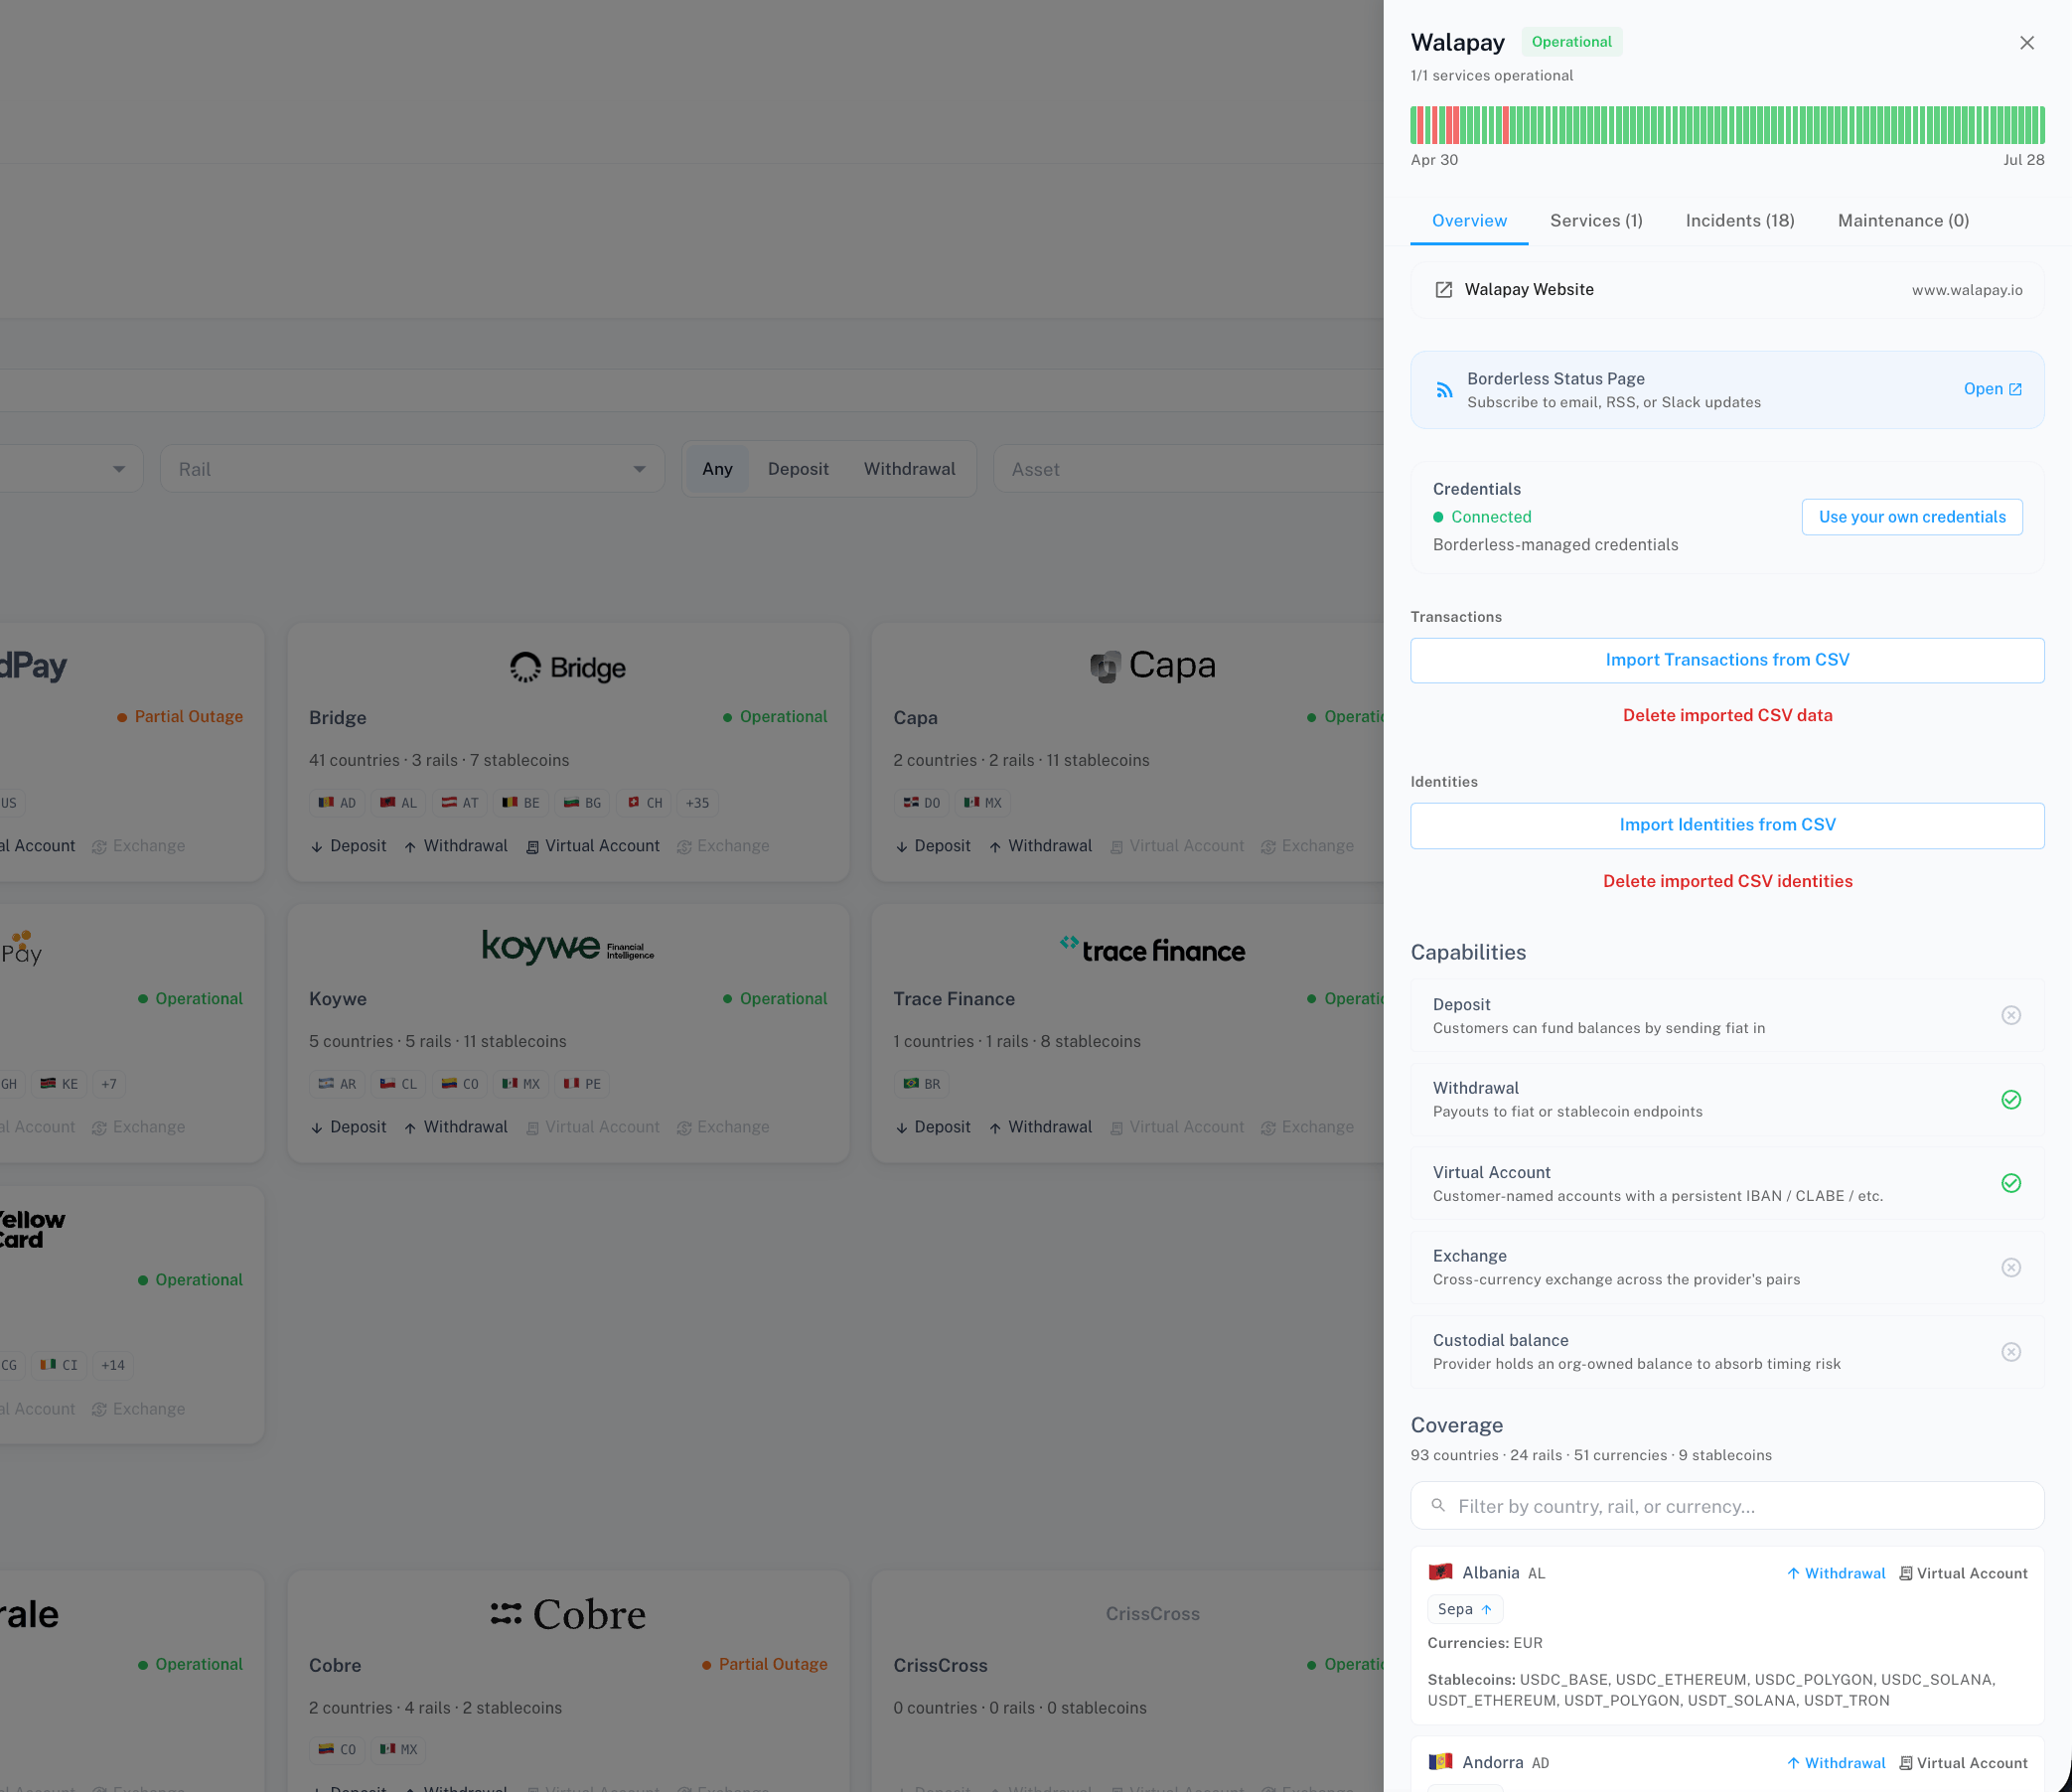
Click any provider card to open its drawer from the right side of the screen. The drawer header shows the provider name, its current health at a glance, and how many of its services are operational; where health data exists, tabs for Services, Incidents, and Maintenance appear alongside Overview. Health, incidents, and maintenance have their own guide — see Monitoring Provider Health. Provider drawer open on the Overview tab The Overview tab always appears first, and can include, in order: a short description of the provider, an active-incidents banner, a scheduled-maintenance banner, a link to the provider’s website, a link to the Borderless status page, your credentials status, and buttons to import transactions. Scroll down on the Overview tab to see Capabilities — which of Deposit, Withdrawal, Virtual Account, Exchange, and Custodial balance the provider supports — and Coverage, a country-by-country breakdown of rails, currencies, and stablecoins. Coverage has its own search box to filter by country, rail, or currency; if the provider has no coverage to show, or your search matches nothing, you’ll see a message saying so instead of a list. Click any country row in Coverage to open that country’s drawer, which lists every provider serving it — this drawer has its own search box too (by rail, currency, or provider) with matching empty states when nothing matches or no corridors are configured.
Connect your own credentials

Providers in the Available to Enable section fall into two groups: some let you connect your own credentials, others are managed by Borderless.
  1. On the provider’s card, click Add API keys if the button is present. If it isn’t, click Contact us to enable instead — this opens an email to Borderless support and there’s no self-serve option for that provider.
  2. In the Configure {Provider} Credentials window, fill in the required fields (marked with *). Fields vary by provider — for example, some ask for just an API Key, others for an API Key and API Secret, and others for a Client ID and Client Secret.
  3. Click Save credentials.
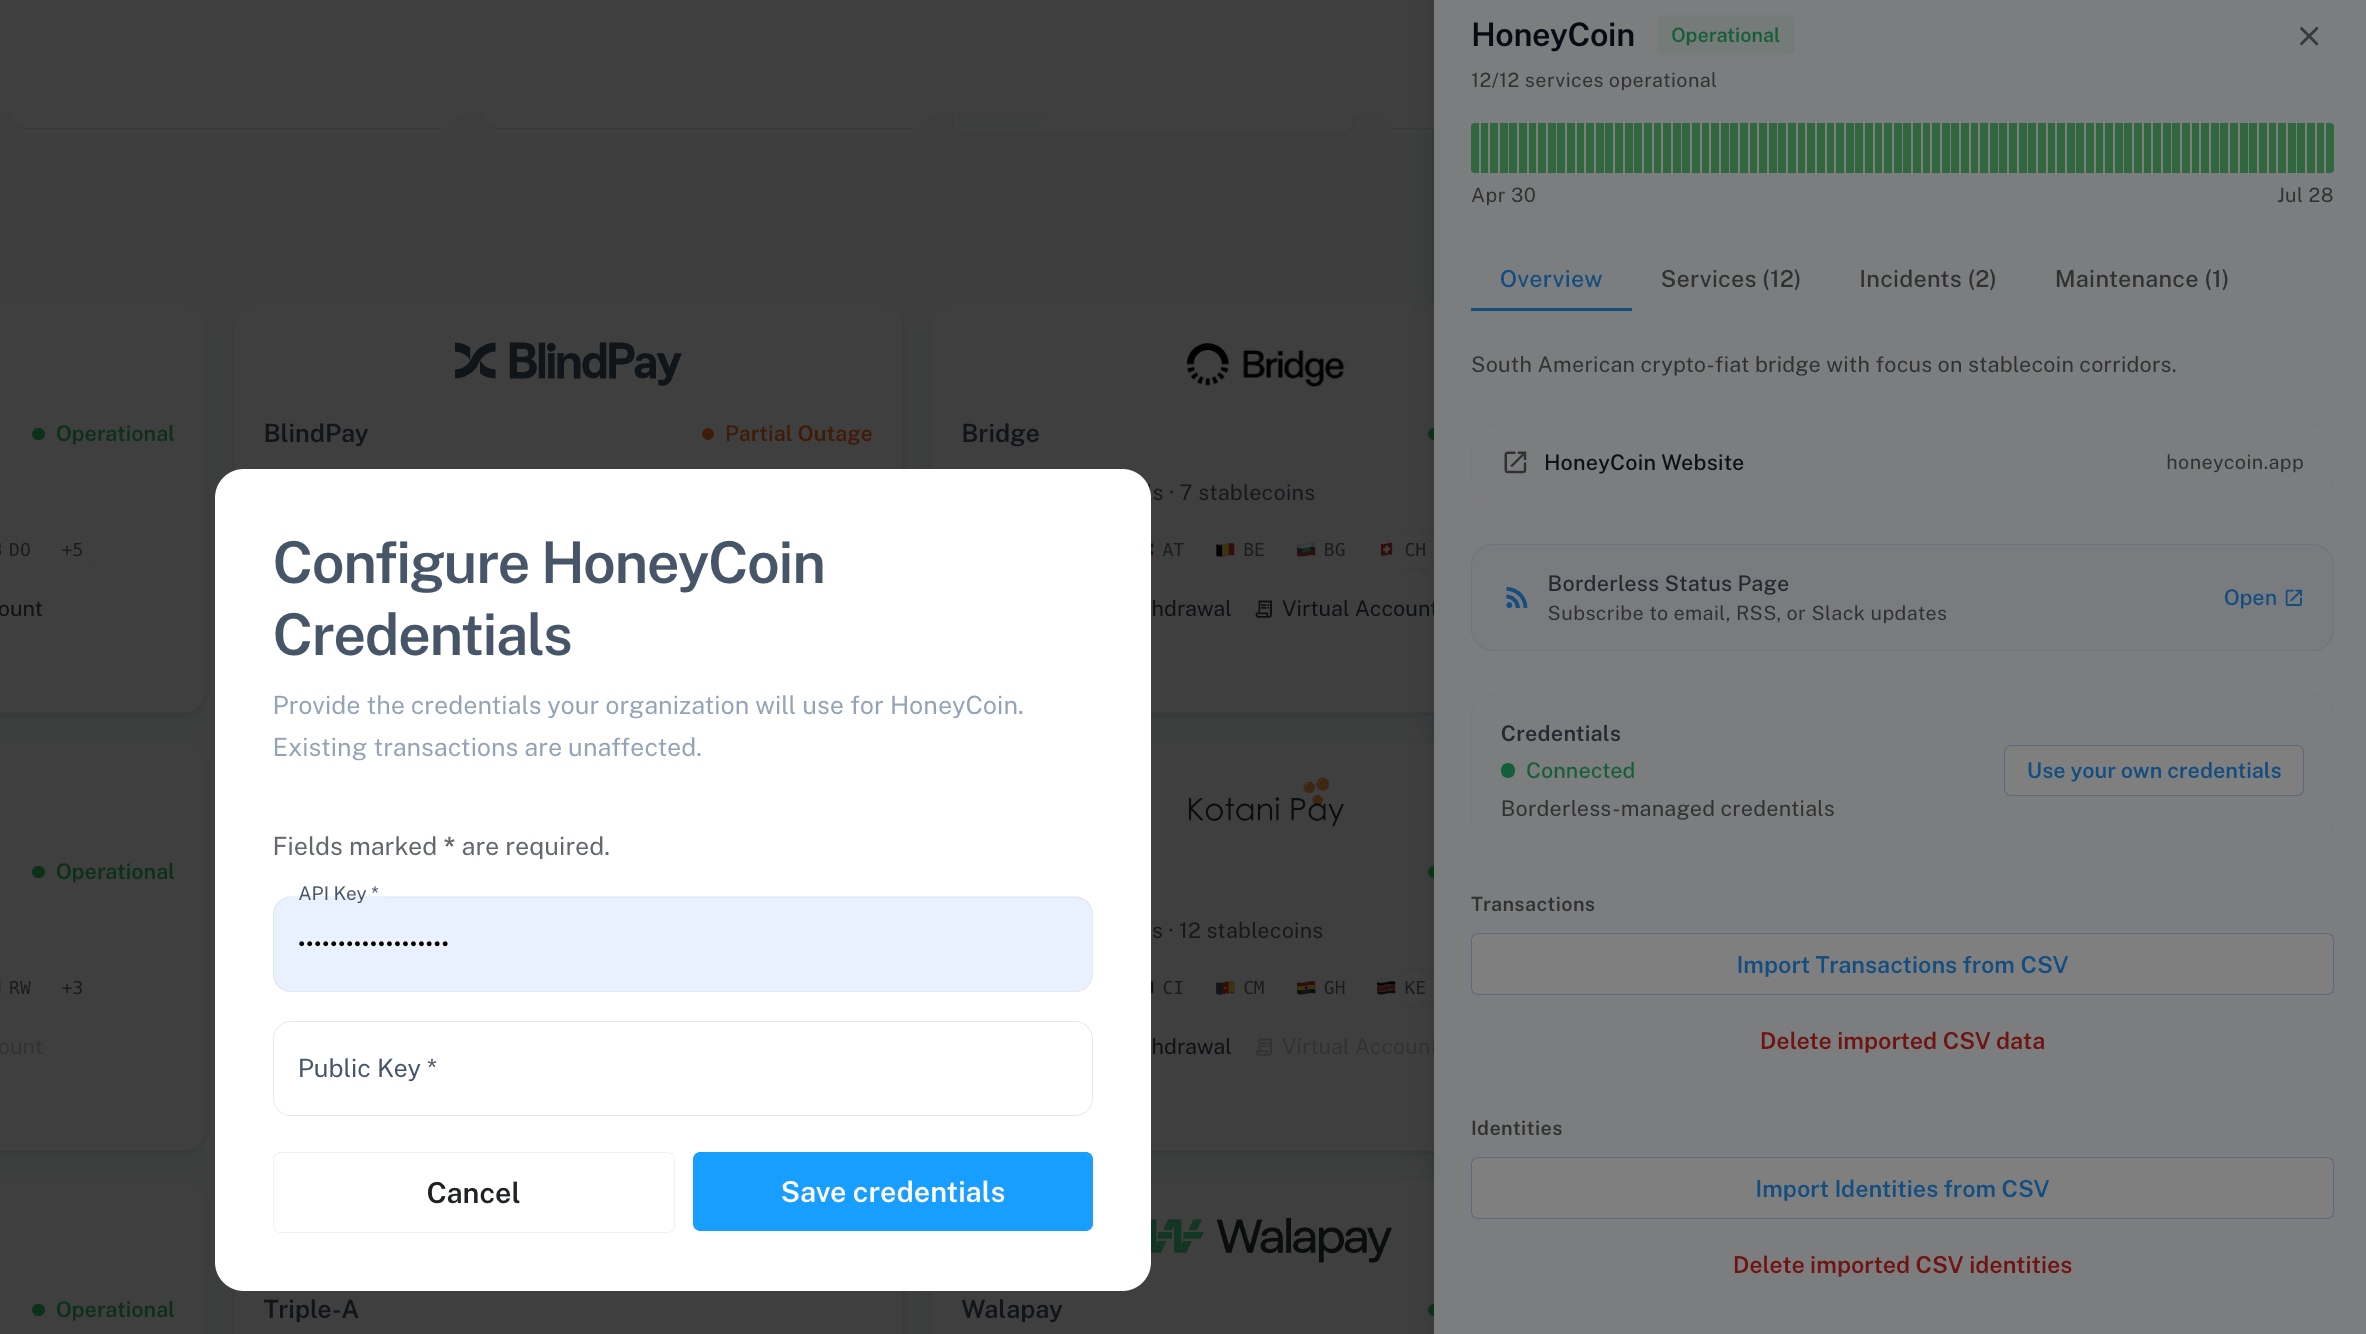
Credentials modal with API Key and API Secret fields Saving replaces any credentials that were already there for that provider. Existing transactions aren’t affected, but there’s no way to preview the change first or undo it afterward — check the values before you save. If a provider has no self-serve setup at all, the window instead tells you to reach out to support, with no fields to fill in.

Update or switch credentials on an already-connected provider

Open the provider’s drawer and look at the credentials card on the Overview tab. The card’s status label is one of three things: Connected (with a sub-label of either “Customer-owned credentials” or “Borderless-managed credentials”), Not configured, or Managed by Borderless. Which button sits next to it follows from that status:
  • If you’re already using your own credentials, click Update credentials to replace them.
  • If Borderless is currently managing the connection for you but self-serve is available, click Use your own credentials to take it over.
  • If the provider isn’t configured yet and self-serve is available, click Configure credentials.
  • If the provider is fully Borderless-managed with no self-serve option, no button appears — the card shows Managed by Borderless with a “Contact us to enable” note underneath.
If a provider is still marked Coming Soon, its drawer shows a placeholder card instead of the credentials section, saying “Coming soon” — “We’re working on bringing this PFI online. You’ll be able to add your credentials once it’s available.”

Import transactions that happened outside Borderless

If you process a transaction directly with a provider instead of through Borderless, bring it into your records from the provider’s Overview tab:
  • Import Transactions via API — only appears if you’re using your own credentials and the provider supports it. Click it to start a sync; you’ll see a toast confirming the sync started, or a note if one’s already running.
  • Import Transactions from CSV — available on any connected provider. Click it to open the import window.
To import from CSV:
  1. Click Download template if you need the column layout: externalId, type, status, asset, network, fiat, assetAmount, fiatAmount, exchangeRate, date.
  2. Click Choose CSV file and pick your file. Borderless checks it automatically and shows either “{N} row(s) ready to import” or a list of row-level errors.
  3. Fix any errors in your file and re-select it, or click Import once the check comes back clean.
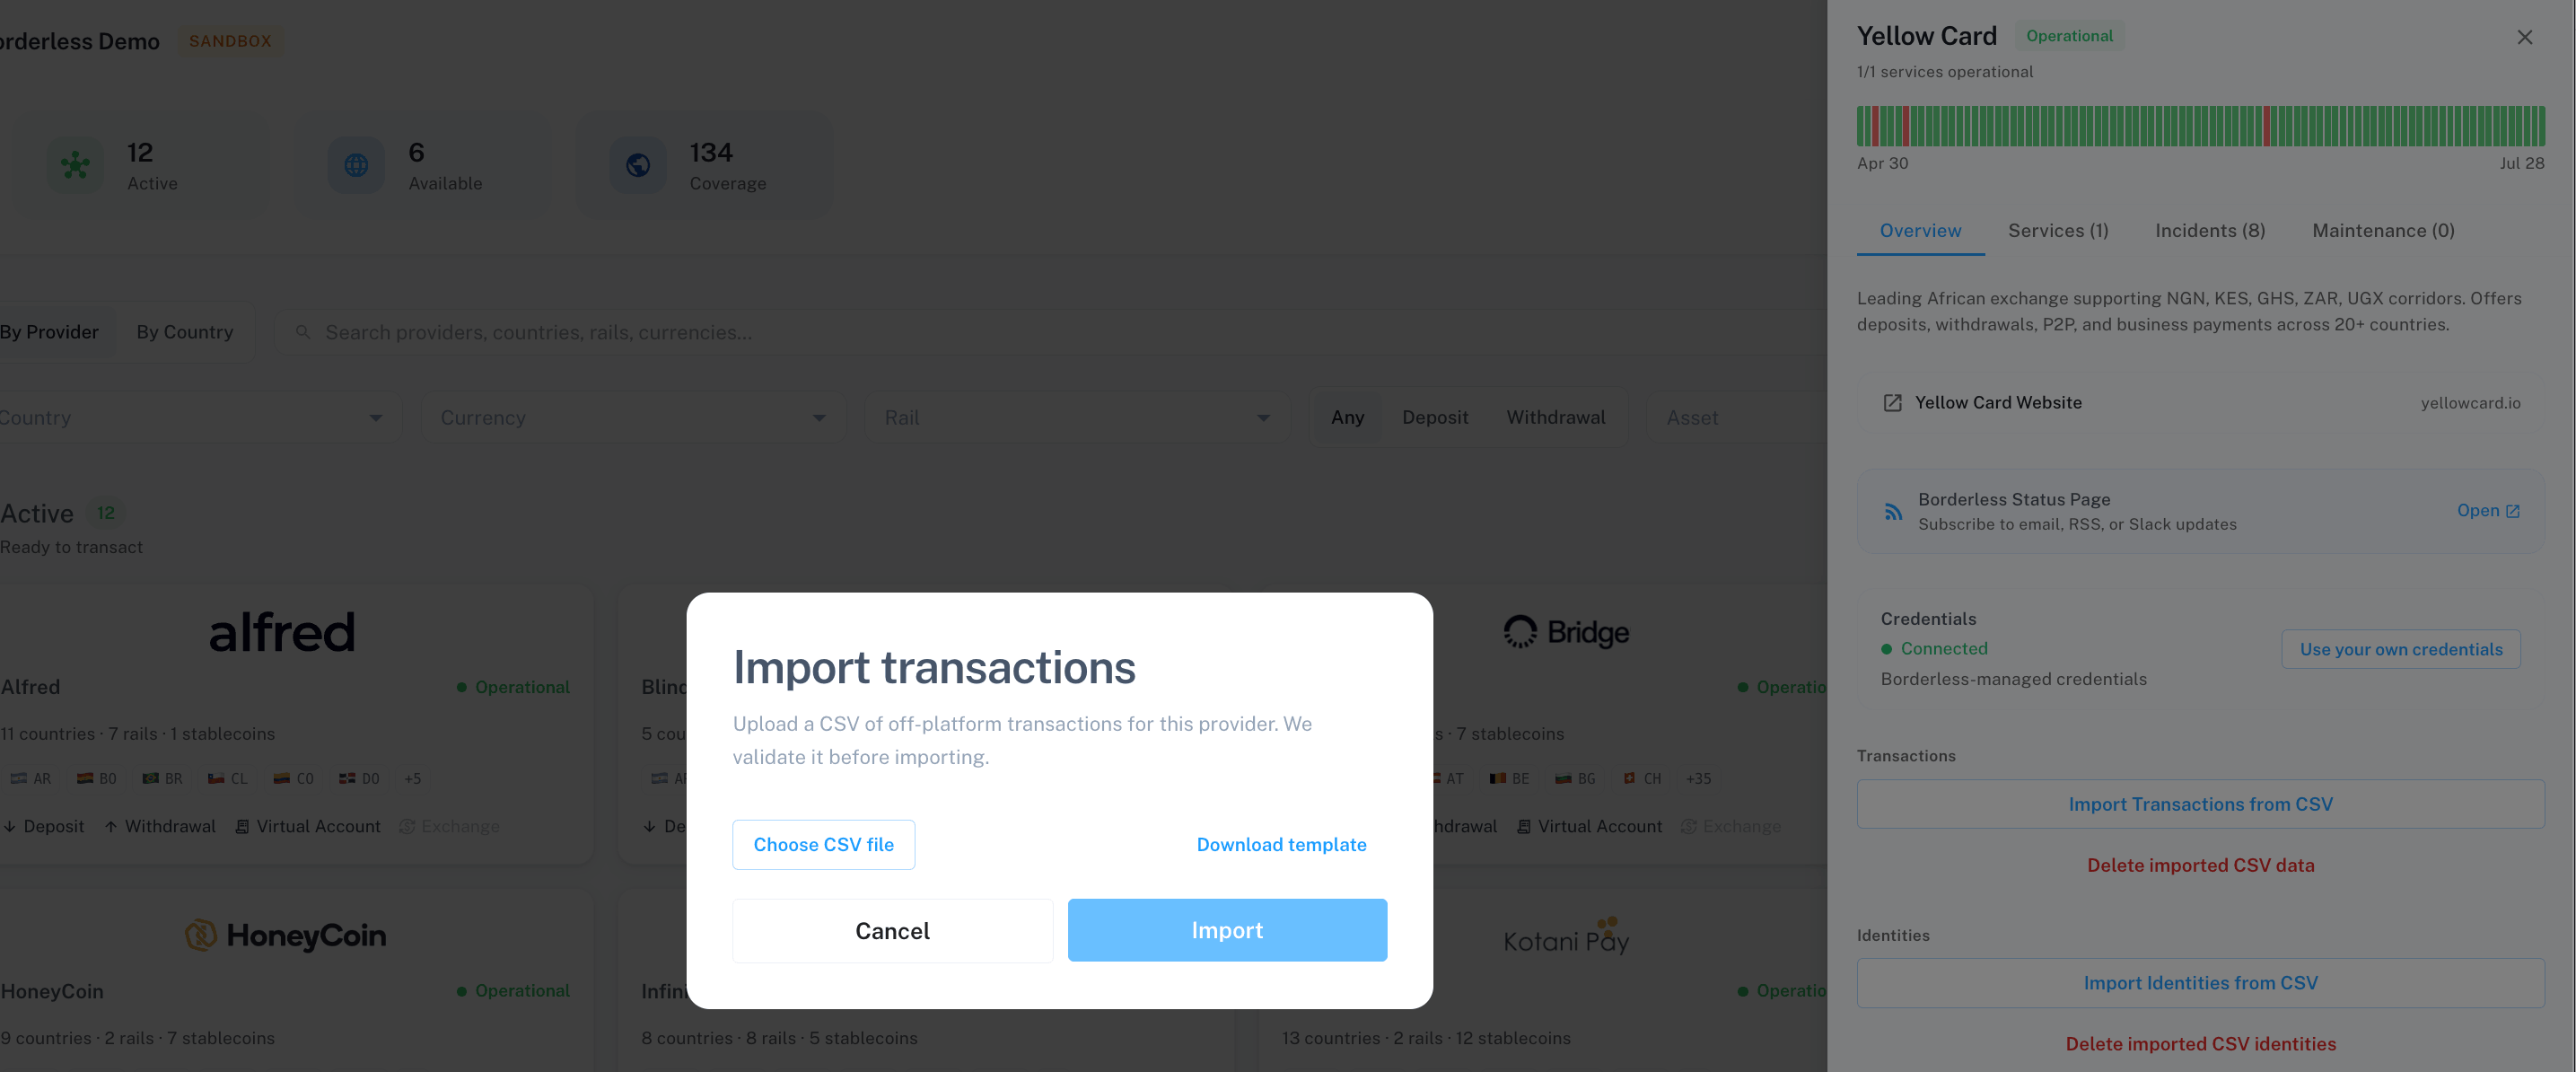
Import transactions modal with Choose CSV file and Download template Import stays greyed out until your file has zero errors and at least one valid row — you can’t force through a file with bad rows, and an empty or header-only file won’t pass either.

Troubleshooting

“Unable to load providers. Please try again.” The Network page failed to load. Refresh the page; if it keeps happening, contact support. “No providers available yet.” Your organization has no providers configured. Contact support to get connected. “No providers match your filters.” / “No countries match your filters.” Your filter combination has no results. Click Clear all filters to start over. “Unable to save credentials. Please try again.” The credentials didn’t save. Double-check the values and retry; if the provider’s API rejected a specific field, the error message will say so. “Unable to load credentials. Please check back shortly.” The credentials status couldn’t load for a provider. This usually resolves on its own — refresh after a moment. Row errors during CSV import Each bad row shows as “Row {n}: {message}” — and a single row can list more than one message if it fails several checks at once, separated by semicolons. Fix the listed rows in your CSV and re-upload; the exact validation rules per column aren’t shown in the platform, so match the error message as closely as possible. “Unable to start the sync. Please try again.” / “A sync is already in progress for this provider.” The first means the API import failed to start — retry. The second means a previous sync hasn’t finished yet — wait for it before starting another.